<?xml version="1.0" encoding="UTF-8"?><feed
	xmlns="http://www.w3.org/2005/Atom"
	xmlns:thr="http://purl.org/syndication/thread/1.0"
	xml:lang="fa-IR"
	>
	<title type="text">سرور</title>
	<subtitle type="text">سرور &#124; خرید سرور &#124; فروش سرور &#124; قیمت سرور &#124; سرور اچ پی &#124; فروش سرور اچ پی</subtitle>

	<updated>2023-04-01T22:39:50Z</updated>

	<link rel="alternate" type="text/html" href="https://server.vcenter.ir/" />
	<id>https://server.vcenter.ir/feed/atom/</id>
	<link rel="self" type="application/atom+xml" href="https://server.vcenter.ir/feed/atom/" />

	<generator uri="https://wordpress.org/" version="6.6.2">WordPress</generator>
	<entry>
		<author>
			<name>admin</name>
					</author>

		<title type="html"><![CDATA[انواع سرور های شبکه]]></title>
		<link rel="alternate" type="text/html" href="https://server.vcenter.ir/network-server-types-explained/" />

		<id>https://server.vcenter.ir/?p=1549</id>
		<updated>2022-01-05T14:19:26Z</updated>
		<published>2022-01-05T14:06:02Z</published>
		<category scheme="https://server.vcenter.ir/" term="وبلاگ" />
		<summary type="html"><![CDATA[<p>انواع سرور های شبکه سرورهای شبکه در اوایل دهه 1990 رایج شدند، زیرا مشاغل به طور فزاینده ای شروع به استفاده از رایانه های شخصی برای ارائه خدماتی کردند که&#8230; </p>
<p>نوشته <a href="https://server.vcenter.ir/network-server-types-explained/">انواع سرور های شبکه</a> اولین بار در <a href="https://server.vcenter.ir">سرور</a>. پدیدار شد.</p>
]]></summary>

					<content type="html" xml:base="https://server.vcenter.ir/network-server-types-explained/"><![CDATA[<h2>انواع سرور های شبکه</h2>
<figure id="attachment_1559" aria-describedby="caption-attachment-1559" style="width: 602px" class="wp-caption aligncenter"><img fetchpriority="high" decoding="async" class="wp-image-1559 size-full" src="https://server.vcenter.ir/wp-content/uploads/2022/01/server-management.jpg" alt="انواع سرور های شبکه" width="602" height="401" srcset="https://server.vcenter.ir/wp-content/uploads/2022/01/server-management.jpg 602w, https://server.vcenter.ir/wp-content/uploads/2022/01/server-management-300x200.jpg 300w" sizes="(max-width: 602px) 100vw, 602px" /><figcaption id="caption-attachment-1559" class="wp-caption-text">انواع سرور های شبکه</figcaption></figure>
<p>سرورهای شبکه در اوایل دهه 1990 رایج شدند، زیرا مشاغل به طور فزاینده ای شروع به استفاده از رایانه های شخصی برای ارائه خدماتی کردند که قبلاً روی رایانه های بزرگ یا مینی رایانه ها میزبانی می شدند.</p>
<p>سرور شبکه، امروزه یک کامپیوتر قدرتمند است که منابع مشترک مختلفی را برای ایستگاه های کاری و سایر سرورهای یک شبکه فراهم می کند. منابع مشترک می تواند شامل فضای دیسک، دسترسی سخت افزاری و خدمات ایمیل باشد. هر کامپیوتری می‌تواند یک «سرور شبکه» باشد، اما آنچه سرور را از ایستگاه کاری جدا می‌کند سخت‌افزار نیست، بلکه عملکردی است که کامپیوتر انجام می‌دهد.</p>
<p>به طور کلی، ایستگاه کاری هر رایانه ای است که توسط یک فرد برای انجام وظایف شغلی خود استفاده می شود، در حالی که سرور شبکه هر رایانه ای است که دسترسی کاربران را به نرم افزار یا منابع سخت افزاری مشترک فراهم می کند.</p>
<p>سرورها معمولاً با اجزای قدرتمندتر از ایستگاه های کاری جداگانه ساخته می شوند. به عنوان مثال، یک سرور معمولاً رم بیشتری نسبت به یک ایستگاه کاری نصب کرده است یا از سیستم عامل قوی تری استفاده می کند که برای اجرای 24/7 طراحی شده است. در حالی که این ممکن است <strong><a href="https://shop.vcenter.ir/product-category/servers/">قیمت سرور</a></strong> را نسبت به یک ایستگاه کاری افزایش دهد، هزینه کلی می تواند به طور قابل توجهی برای یک سازمان کمتر باشد.</p>
<p>در زیر 13 مورد از رایج ترین انواع سرور های شبکه مورد استفاده امروزی آورده شده است:</p>
<h3>1. سرورهای اپلیکیشن</h3>
<p>گاهی اوقات به عنوان نوعی میان افزار شناخته می شود، سرورهای کاربردی بخش بزرگی از قلمرو محاسباتی بین سرورهای پایگاه داده و کاربر نهایی را اشغال می کنند و اغلب این دو را به هم متصل می کنند.</p>
<h3>2. سرورهای مشتری</h3>
<p>در مدل برنامه‌نویسی کلاینت/سرور، سرور برنامه‌ای است که منتظر برنامه‌های سرویس گیرنده در همان رایانه یا سایر رایانه‌ها است و آن‌ها را برآورده می‌کند. یک برنامه کاربردی در یک کامپیوتر ممکن است به عنوان یک سرویس گیرنده با درخواست خدمات از برنامه های دیگر و همچنین به عنوان سرور درخواست های برنامه های دیگر عمل کند.</p>
<h3>3. سرورهای کلاینت</h3>
<p>از بسیاری جهات، نرم افزار همکاری که زمانی «گروه افزار» نامیده می شد، قدرت اصلی وب را نشان می دهد. نرم‌افزار همکاری که به کاربران امکان می‌دهد بدون توجه به مکان، از طریق اینترنت یا اینترانت شرکتی با یکدیگر همکاری کنند و در فضای مجازی با یکدیگر همکاری کنند.</p>
<h3>4. سرورهای FTP</h3>
<p>یکی از قدیمی ترین سرویس های اینترنتی، پروتکل انتقال فایل، امکان جابجایی یک یا چند فایل را به صورت ایمن بین رایانه ها فراهم می کند و در عین حال امنیت و سازماندهی فایل و همچنین کنترل انتقال را فراهم می کند.</p>
<h3>5. لیست سرورها</h3>
<p>سرورهای لیست راهی برای مدیریت بهتر لیست های پستی ارائه می دهند، خواه این لیست ها گفتگوهای تعاملی باز برای عموم باشند یا لیست های یک طرفه ای که اعلامیه ها، خبرنامه ها یا تبلیغات را ارائه می دهند.</p>
<h3>6. سرورهای پست الکترونیکی یا میل</h3>
<p>سرورهای پست تقریباً به اندازه وب سرورها همه جا حاضر و حیاتی هستند.</p>
<h3>7. سرورهای متن باز</h3>
<p>از سیستم عامل سرور منبع باز اصلی شما گرفته تا نرم افزار سروری که به شما کمک می کند کار خود را انجام دهید، نرم افزار منبع باز بخش مهمی از بسیاری از زیرساخت های فناوری اطلاعات است.</p>
<h3>8. سرورهای پروکسی</h3>
<p>سرورهای پروکسی بین یک برنامه مشتری (معمولاً یک مرورگر وب) و یک سرور خارجی (معمولاً یک سرور دیگر در وب) قرار می گیرند تا درخواست ها را فیلتر کنند، عملکرد را بهبود بخشند و اتصالات را به اشتراک بگذارند.</p>
<h3>9. سرورهای ارتباطی</h3>
<p>سرورهای ارتباطی بی‌درنگ، که قبلاً به عنوان سرورهای چت یا سرورهای IRC شناخته می‌شدند، و هنوز هم گاهی اوقات به عنوان سرورهای پیام‌رسان فوری (IM) شناخته می‌شدند، تعداد زیادی از کاربران را قادر می‌سازند تا اطلاعات را به صورت آنی تبادل کنند.</p>
<h3>10. سرورهای پلتفرم</h3>
<p>اصطلاحی که اغلب مترادف با سیستم عامل استفاده می شود، پلت فرم سخت افزار یا نرم افزار زیربنایی یک سیستم است و بنابراین موتوری است که سرور را به حرکت در می آورد.</p>
<h3>11. سرورهای Telnet</h3>
<p>سرور Telnet به کاربران این امکان را می دهد که به رایانه میزبان وارد شوند و وظایفی را انجام دهند که گویی در حال کار بر روی خود رایانه راه دور هستند.</p>
<h3>12. سرورهای مجازی</h3>
<p>در سال 2009، تعداد سرورهای مجازی مستقر شده از تعداد سرورهای فیزیکی بیشتر شد. امروزه مجازی سازی <a href="https://server.vcenter.ir/">سرور</a> در مرکز داده تقریباً در همه جا حاضر شده است. از هایپروایزر گرفته تا ابرهای ترکیبی، ServerWatch به آخرین روندهای فناوری مجازی سازی نگاه می کند.</p>
<h3>13. وب سرورها</h3>
<p>در هسته خود، یک وب سرور، محتوای ثابت را با بارگیری یک فایل از یک دیسک و ارائه آن در سراسر شبکه به مرورگر وب کاربر، به مرورگر وب ارائه می دهد. کل این تبادل با واسطه مرورگر و سرور با استفاده از HTTP با یکدیگر صحبت می کنند.</p>
<h4>سرور تبادل</h4>
<p>مایکروسافت اکسچنج که برای ارائه امنیت و قابلیت اطمینان در سطح سازمانی مورد نیاز کسب و کارها ساخته شده است، ایمیل، تقویم و مخاطبین را در رایانه شخصی، تلفن و مرورگر وب شما ارائه می دهد.</p>
<h4>سرور Lync</h4>
<p>Lync Server یک نرم‌افزار سرور ارتباطات بی‌درنگ سازمانی است که زیرساختی را برای پیام‌رسانی فوری سازمانی، حضور، VoIP، کنفرانس‌های موقت و ساختار یافته (صوت، ویدئو و کنفرانس وب) و اتصال PSTN از طریق یک دروازه شخص ثالث یا SIP Trunk فراهم می‌کند.</p>
<h4>سرور شیرپوینت</h4>
<p>یک محصول سرور که بر فناوری SharePoint Foundation تکیه دارد تا چارچوبی سازگار و آشنا برای لیست ها و کتابخانه ها، مدیریت سایت و سفارشی سازی سایت ارائه دهد. سرور شیرپوینت شامل تمام ویژگی های SharePoint Foundation به اضافه ویژگی ها و قابلیت های اضافی مانند مدیریت محتوای سازمانی، هوش تجاری، جستجوی سازمانی، سایت های شخصی و Newsfeed است.</p>
<h4>SQL Server</h4>
<p>SQL Server یک سیستم مدیریت پایگاه داده رابطه ای (RDBMS) از مایکروسافت است که برای محیط سازمانی طراحی شده است. به عنوان یک پایگاه داده، یک محصول نرم افزاری است که وظیفه اصلی آن ذخیره و بازیابی داده ها به درخواست سایر برنامه های نرم افزاری است: برنامه هایی که در همان رایانه هستند یا آنهایی که روی رایانه دیگری در یک شبکه (از جمله ابر) اجرا می شوند.</p>
<h4>ویندوز سرور</h4>
<p>Windows Server 2012 به عنوان نسخه سرور ویندوز 8، دسته سرور را دوباره تعریف می کند و صدها ویژگی و پیشرفت جدید را ارائه می دهد که شامل مجازی سازی، شبکه، ذخیره سازی، تجربه کاربر، رایانش ابری، اتوماسیون و غیره می شود.</p>
<p>پس سرور چیست؟ به یک معنا، واقعاً چیزی به نام سرور وجود ندارد. همیشه نوعی منبع وجود دارد که در حال ارائه است، که یا صریح یا ضمنی است. سرور فقط رایانه ای است که انتخاب شده و احتمالاً برای انجام یک کار خاص در خدمت دیگران بهینه شده است. و این وظیفه است که همه تفاوت را ایجاد می کند.</p>
<p>&nbsp;</p>
<p>&nbsp;</p>
<p>&nbsp;</p>
<p>&nbsp;</p>
<p>نوشته <a href="https://server.vcenter.ir/network-server-types-explained/">انواع سرور های شبکه</a> اولین بار در <a href="https://server.vcenter.ir">سرور</a>. پدیدار شد.</p>
]]></content>
		
					<link rel="replies" type="text/html" href="https://server.vcenter.ir/network-server-types-explained/#comments" thr:count="0" />
			<link rel="replies" type="application/atom+xml" href="https://server.vcenter.ir/network-server-types-explained/feed/atom/" thr:count="0" />
			<thr:total>0</thr:total>
			</entry>
		<entry>
		<author>
			<name>admin</name>
					</author>

		<title type="html"><![CDATA[روشهای جلوگیری از هدر رفتن منابع سرور]]></title>
		<link rel="alternate" type="text/html" href="https://server.vcenter.ir/ways-to-prevent-server-resources-from-being-wasted/" />

		<id>https://server.vcenter.ir/?p=1537</id>
		<updated>2021-12-29T15:02:25Z</updated>
		<published>2021-12-29T14:46:02Z</published>
		<category scheme="https://server.vcenter.ir/" term="وبلاگ" />
		<summary type="html"><![CDATA[<p>روشهای جلوگیری از هدر رفتن منابع سرور در این پست از راهکارهای جامع دیتاسنتر می خواهیم به بررسی روشهای جلوگیری از هدر رفتن منابع سرور بپردازیم. هر زمان که سروری&#8230; </p>
<p>نوشته <a href="https://server.vcenter.ir/ways-to-prevent-server-resources-from-being-wasted/">روشهای جلوگیری از هدر رفتن منابع سرور</a> اولین بار در <a href="https://server.vcenter.ir">سرور</a>. پدیدار شد.</p>
]]></summary>

					<content type="html" xml:base="https://server.vcenter.ir/ways-to-prevent-server-resources-from-being-wasted/"><![CDATA[<h2>روشهای جلوگیری از هدر رفتن منابع سرور</h2>
<p>در این پست از راهکارهای جامع دیتاسنتر می خواهیم به بررسی روشهای جلوگیری از هدر رفتن منابع سرور بپردازیم. هر زمان که سروری دارید که از ظرفیت آن استفاده نمی شود، یا شاید اصلا استفاده نمی شود. شما ضایعات سرور دارید مراکز داده اغلب سرورهایی دارند که کمتر مورد استفاده قرار می گیرند یا شاید مورد نیاز نیستند. با این حال، این سرورهای کم استفاده هنوز به برق و خنک کننده نیاز دارند. هنگامی که در <a href="https://datacenter.vcenter.ir">مرکز داده</a> در نظر گرفته شود، می تواند مقدار زیادی برق هدر رفته یا غیرضروری مصرف شود.</p>
<p>برای کمک به شما در استفاده از تمام سرورهای خود به طور کامل، ما فهرستی از راه هایی را که می توانید بیشترین استفاده را از آنها ببرید، گردآوری کرده ایم.</p>
<p><img decoding="async" class="wp-image-1539 size-full aligncenter" src="https://server.vcenter.ir/wp-content/uploads/2021/12/avoid-server-waste.jpg" alt="" width="813" height="429" srcset="https://server.vcenter.ir/wp-content/uploads/2021/12/avoid-server-waste.jpg 813w, https://server.vcenter.ir/wp-content/uploads/2021/12/avoid-server-waste-300x158.jpg 300w, https://server.vcenter.ir/wp-content/uploads/2021/12/avoid-server-waste-768x405.jpg 768w" sizes="(max-width: 813px) 100vw, 813px" /></p>
<h3>1. به سمت Cloud بروید</h3>
<p>اگر فرآیندها، داده‌ها یا برنامه‌هایی دارید که می‌توانند بدون تأثیر بر عملیات تجاری یا امنیت داده‌ها به ابر منتقل شوند، این کار را انجام دهید! با استفاده از قدرت و کارایی رایانش ابری برای سازمان خود، ردپای کربن خود را کاهش می‌دهید و سرورها را آزاد می‌کنید تا برای موارد دیگر مورد استفاده قرار گیرند.</p>
<h3>2. مجازی سازی</h3>
<p>در طول مسیر حرکت به سمت ابر، استفاده از مجازی سازی روی سرورهای شما می تواند قدرت محاسباتی یک ماشین را با اجرای چندین نمونه به طور همزمان به حداکثر برساند. <a href="https://virtualization.vcenter.ir">مجازی سازی</a> به سرعت مقیاس پذیر است و می تواند هزینه های سخت افزاری را کاهش دهد.</p>
<h3>3. ادغام سرورها</h3>
<p>یکپارچه سازی سرور با قرار دادن برنامه ها یا فرآیندهای بیشتر در ماشین های کمتری کار می کند. این را می توان با ترکیب برنامه ها روی یک سرور واحد یا خوشه بندی سرورها برای استفاده از یک سرور پشتیبان واحد برای خوشه ای از سرورها انجام داد. همانند مجازی سازی، این کار استفاده از سرور را برای کاهش هدر رفتن سرور به حداکثر می رساند. با این روش همچنین نیاز به <a href="https://shop.vcenter.ir/product-category/servers/"><strong>خرید سرور</strong></a> جدید نیز کاهش می یابد.</p>
<h3>4. داده ها را با کارایی بیشتری ذخیره کنید</h3>
<p>اگر از سرورها برای ذخیره یا تهیه نسخه پشتیبان استفاده می کنید، راه هایی وجود دارد که می توانید فضای مورد نیاز برای داده هایی را که ذخیره می کنید کاهش دهید. برای استفاده از فضای کمتر، فشرده سازی، کپی کردن و ردیف کردن داده ها بر اساس تقاضا را در نظر بگیرید. هنگامی که به فضای کمتری برای ذخیره سازی نیاز دارید، می توانید تعداد سرورهای مورد نیاز برای ذخیره داده ها را کاهش دهید یا از آن سرورها به طور موثرتری استفاده کنید.</p>
<h3>5. فقط آنچه را که نیاز دارید بخرید</h3>
<p>چه سرور یا فضایی را در یک مرکز داده میزبانی شده کرایه می‌کنید یا خود را دارید، فقط سعی کنید آنچه را که واقعاً نیاز دارید خریداری کنید. با انجام این کار، احتمال داشتن سرورهایی که استفاده نمی شوند یا به طور موثر استفاده نمی شوند را کاهش می دهید. علاوه بر این، تنها با خرید تجهیزات مورد نیاز در هزینه خود صرفه جویی خواهید کرد.</p>
<h3>6. از کار انداختن سرورهای استفاده نشده</h3>
<p>به احتمال زیاد، چند <a href="https://server.vcenter.ir/">سرور</a> قدیمی در هر مرکز داده وجود دارد که دیگر مورد استفاده قرار نمی گیرند، اما همچنان در حال کار هستند و از برق استفاده می کنند. این سرورها فراموش شده‌اند، زیرا کارکنان فناوری اطلاعات مشغول استقرار محصولات جدید بوده‌اند یا شاید آنها هنوز هم در آنجا هستند «فقط در مورد» اغلب، ابزارهای نظارت بر شبکه از پینگ هایی استفاده می کنند که در دسترس بودن سرور را بررسی می کند و این سرورهای استفاده نشده می توانند مورد توجه قرار نگیرند. اگر سرورهایی پیدا کردید که استفاده نمی شوند و دیگر مورد نیاز نیستند، آنها را از کار انداخته و به جای معدوم کردن، آنها را بفروشید.<br />
کاهش هزینه های انرژی و صرفه جویی در پول</p>
<p>برق برای تامین انرژی سرورها، سیستم های گرمایش و سرمایش و روشنایی در مراکز داده مورد نیاز است و هزینه برق هزینه دارد. مدیریت سرورهای خود برای افزایش کارایی آنها و <strong>کاهش اتلاف سرور</strong> به شما کمک می کند تا نیازهای انرژی خود را کاهش دهید.</p>
<p>نوشته <a href="https://server.vcenter.ir/ways-to-prevent-server-resources-from-being-wasted/">روشهای جلوگیری از هدر رفتن منابع سرور</a> اولین بار در <a href="https://server.vcenter.ir">سرور</a>. پدیدار شد.</p>
]]></content>
		
					<link rel="replies" type="text/html" href="https://server.vcenter.ir/ways-to-prevent-server-resources-from-being-wasted/#comments" thr:count="0" />
			<link rel="replies" type="application/atom+xml" href="https://server.vcenter.ir/ways-to-prevent-server-resources-from-being-wasted/feed/atom/" thr:count="0" />
			<thr:total>0</thr:total>
			</entry>
		<entry>
		<author>
			<name>admin</name>
					</author>

		<title type="html"><![CDATA[پرفروش هایHP]]></title>
		<link rel="alternate" type="text/html" href="https://server.vcenter.ir/hp-bestsellers/" />

		<id>https://server.vcenter.ir/?p=1506</id>
		<updated>2021-12-25T17:14:27Z</updated>
		<published>2020-12-07T22:32:47Z</published>
		<category scheme="https://server.vcenter.ir/" term="سرور" />
		<summary type="html"><![CDATA[<p>پرفروش هایHP امروزه به دلیل استفاده های متعدد از تجهیزات آی تی، استفاده از سرورها از اهمیت ویژه ای برخوردار است به طوری که تقریبا انجام فعالیت های روزانه بدون&#8230; </p>
<p>نوشته <a href="https://server.vcenter.ir/hp-bestsellers/">پرفروش هایHP</a> اولین بار در <a href="https://server.vcenter.ir">سرور</a>. پدیدار شد.</p>
]]></summary>

					<content type="html" xml:base="https://server.vcenter.ir/hp-bestsellers/"><![CDATA[<h2>پرفروش هایHP</h2>
<figure id="attachment_1508" aria-describedby="caption-attachment-1508" style="width: 520px" class="wp-caption aligncenter"><img decoding="async" class="wp-image-1508 size-full" src="https://server.vcenter.ir/wp-content/uploads/2020/12/5501718.jpg" alt="پرفروش هایHP" width="520" height="234" srcset="https://server.vcenter.ir/wp-content/uploads/2020/12/5501718.jpg 520w, https://server.vcenter.ir/wp-content/uploads/2020/12/5501718-300x135.jpg 300w" sizes="(max-width: 520px) 100vw, 520px" /><figcaption id="caption-attachment-1508" class="wp-caption-text">پرفروش هایHP</figcaption></figure>
<p class="summary introtext">امروزه به دلیل استفاده های متعدد از تجهیزات آی تی، استفاده از سرورها از اهمیت ویژه ای برخوردار است به طوری که تقریبا انجام فعالیت های روزانه بدون حضور سرورها در همه جای دنیا به امری غیر ممکن تبدیل شده است.</p>
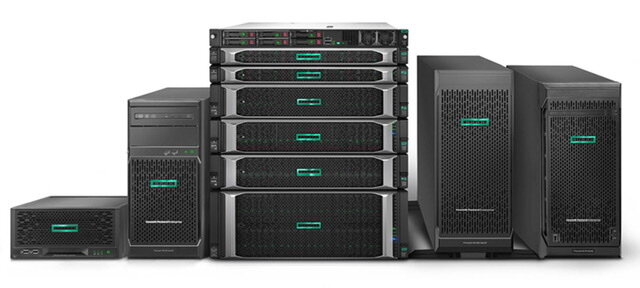
<p dir="rtl">سرورهای کامپیوتری توسط شرکتهای مختلف در مدل های گوناگونی تولید و روانه بازار می شوند.</p>
<p dir="rtl">در میان شرکت های تولید کننده، اچ پی به عنوان شاخص ترین و بزرگترین برند در زمینه تولید و عرضه سرور های کامپیوتری شناخته می شود.</p>
<p><img loading="lazy" decoding="async" class="aligncenter wp-image-1528 size-full" src="https://server.vcenter.ir/wp-content/uploads/2020/12/55017189.jpg" alt="پرفروش هایHP" width="640" height="288" srcset="https://server.vcenter.ir/wp-content/uploads/2020/12/55017189.jpg 640w, https://server.vcenter.ir/wp-content/uploads/2020/12/55017189-300x135.jpg 300w" sizes="(max-width: 640px) 100vw, 640px" /></p>
<p dir="rtl">ویژگی هایی همچون استفاده از بروز ترین تکنولوژی ها با مقیاس توسعه پذیری بالا <strong><a href="https://shop.vcenter.ir/product-category/servers/">سرور HP</a></strong> را از سایر رقبا متمایز می کند. قیمت سرور HP در مقایسه با سایر شرکتها کاملا رقابتی بوده که باعث شده در کنار عملکرد بالای این سرورها بتواند بازار قابل توجهی در دنیا را نسبت به رقبا به خود اختصاص دهد.</p>
<p><img loading="lazy" decoding="async" class="aligncenter wp-image-1526 size-full" src="https://server.vcenter.ir/wp-content/uploads/2020/12/5501719.jpg" alt="پرفروش هایHP" width="640" height="220" srcset="https://server.vcenter.ir/wp-content/uploads/2020/12/5501719.jpg 640w, https://server.vcenter.ir/wp-content/uploads/2020/12/5501719-300x103.jpg 300w" sizes="(max-width: 640px) 100vw, 640px" /></p>
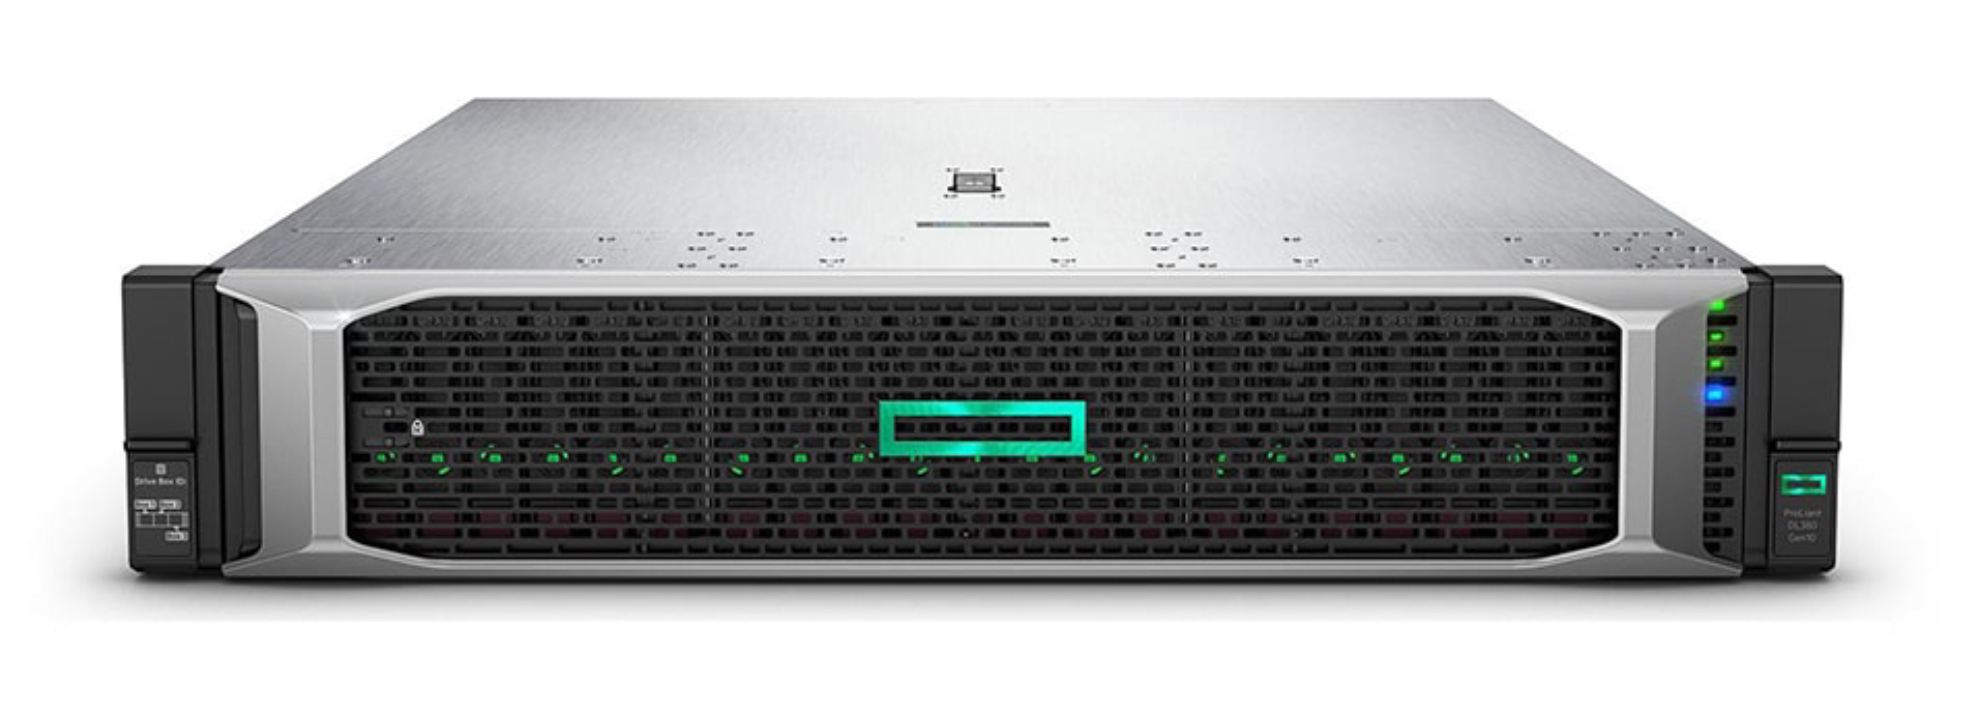
<p dir="rtl">در مدل های گوناگون با کارایی های مختلف توسط این کمپانی طراحی و ساخته شده است. یکی از سرورهای این شرکت سرورHPE ProLiant DL380 G10  می باشد که آخرین نسل از پرفروش ترین سرور دنیا یعنی سری HPE DL380 است. سری DL380 و DL360 تنها سری است که اچ پی در تمامی ده نسل آن را عرضه کرده است. از مدل های مشابه با این سرور می توان از سرور HPE ProLiant DL360 G10 نام برد که تفاوت اصلی آن با سرور DL380 G10 در این است که این سرور تک یونیت (1U) می باشد و از ظرفیت کمتر هارد نسبت به مدل DL380 G10 برخوردار است.</p>
<p><img loading="lazy" decoding="async" class="aligncenter wp-image-1527 size-full" src="https://server.vcenter.ir/wp-content/uploads/2020/12/5501720.jpeg" alt="پرفروش هایHP" width="1973" height="705" srcset="https://server.vcenter.ir/wp-content/uploads/2020/12/5501720.jpeg 1973w, https://server.vcenter.ir/wp-content/uploads/2020/12/5501720-300x107.jpeg 300w, https://server.vcenter.ir/wp-content/uploads/2020/12/5501720-1024x366.jpeg 1024w, https://server.vcenter.ir/wp-content/uploads/2020/12/5501720-768x274.jpeg 768w, https://server.vcenter.ir/wp-content/uploads/2020/12/5501720-1536x549.jpeg 1536w, https://server.vcenter.ir/wp-content/uploads/2020/12/5501720-1144x409.jpeg 1144w" sizes="(max-width: 1973px) 100vw, 1973px" /></p>
<p dir="rtl">سرور HPE ProLiant DL380 G10 به دلیل رابط کاربری راحت، قیمت مناسب تر، عملکرد بسیار قوی و طول عمر بالای قطعات، عنوان پرفروش ترین سرور را هم در میان تمامی سرور های اچ پی و هم در مقایسه با سایر رقبا از برندهای دیگر را به خود اختصاص داده است. برای <a href="https://shop.vcenter.ir/product-category/servers/">خرید سرور اچ پی</a> می توانید به فروشگاه ما مراجعه نمایید.</p>
<p dir="rtl">قابلیت پشتیبانی از حداکثر 56 هسته فیزیکی در کنار 112 هسته مجازی به همراه حدود 3 ترابایت حافظه رم با باس 2933 MT/s این امکان را فراهم می سازد تا این سرور طیف وسیعی از ماشین های مجازی با تعداد کاربران بالا و یا هر نوع فعالیت تحت شبکه  را به راحتی پشتیبانی و اجرا کند.</p>
<p dir="rtl">پشتیبانی از سی پی یو های نسل اول و دوم Scalable شرکت Intel در کنار پشتیبانی از کارت های گرافیک نسل های جدید AMD و NVIDIA این سرور را از هر حیث برای انجام پردازش های سنگین گرافیکی آماده به کار کرده است.</p>
<p dir="rtl">این سرور که یک <a href="https://server.vcenter.ir">سرور دو یونیت</a> می باشد از فناوری iLO5 نیز بهره می برد. که مدیر با استفاده از این قابلیت می‌تواند کنترل کامل سرور را بوسیله تنها یک Node از مجموعه به دست گیرد.</p>
<p dir="rtl">از دیگر قابلیت های سرور DL380 G10 می‌توان به موارد زیر اشاره کرد:</p>
<ol>
<li dir="rtl">پشتیبانی از رم های LRDIMM وRDIMM که با داشتن بیست و چهار اسلات رم کاربران را از هر لحاظ نسبت به رم بی نیاز می کند.</li>
<li dir="rtl">سرور DL380 G10 قابلیت نصب دو عدد سی پی یو را دارا می باشد.</li>
<li dir="rtl">قابلیت نصب 27 عدد هارد 2.5 inch SFF را دارا می باشد.</li>
</ol>
<p>نوشته <a href="https://server.vcenter.ir/hp-bestsellers/">پرفروش هایHP</a> اولین بار در <a href="https://server.vcenter.ir">سرور</a>. پدیدار شد.</p>
]]></content>
		
					<link rel="replies" type="text/html" href="https://server.vcenter.ir/hp-bestsellers/#comments" thr:count="0" />
			<link rel="replies" type="application/atom+xml" href="https://server.vcenter.ir/hp-bestsellers/feed/atom/" thr:count="0" />
			<thr:total>0</thr:total>
			</entry>
		<entry>
		<author>
			<name>admin</name>
					</author>

		<title type="html"><![CDATA[نصب و راه اندازی HP BladeSystem]]></title>
		<link rel="alternate" type="text/html" href="https://server.vcenter.ir/hp-bladesystem-installation/" />

		<id>https://server.vcenter.ir/?p=1496</id>
		<updated>2021-12-25T18:53:08Z</updated>
		<published>2020-11-09T16:21:04Z</published>
		<category scheme="https://server.vcenter.ir/" term="سرور" />
		<summary type="html"><![CDATA[<p>نصب و راه اندازی HP BladeSystem در این پست از راهکارهای جامع دیتاسنتر ، ما شاهد یک سیستم و محیطی متشکل از سرورهای مختلف هستیم که در گذسته زیاد رایج&#8230; </p>
<p>نوشته <a href="https://server.vcenter.ir/hp-bladesystem-installation/">نصب و راه اندازی HP BladeSystem</a> اولین بار در <a href="https://server.vcenter.ir">سرور</a>. پدیدار شد.</p>
]]></summary>

					<content type="html" xml:base="https://server.vcenter.ir/hp-bladesystem-installation/"><![CDATA[<h2 class="post-title">نصب و راه اندازی HP BladeSystem</h2>
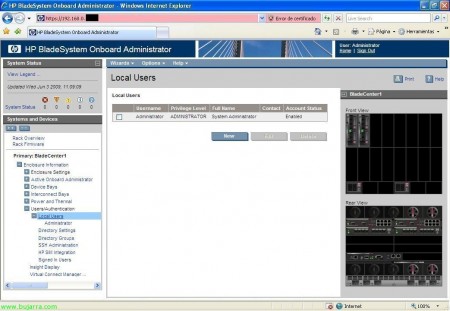
<p>در این پست از <a href="https://vcenter.ir">راهکارهای جامع دیتاسنتر</a> ، ما شاهد یک سیستم و محیطی متشکل از سرورهای مختلف هستیم که در گذسته زیاد رایج نبوده است. ما در این پست قصد نداریم به بررسی اینکه این محیط چه مزایایی دارد یا اینکه چه قابلیتهای افزونه ای به نسبت مدل های قدیمی ارائه می دهد بپردازیم ولی بطور اجمالی با برخی از این مزایا در حین خواندن این پست آشنا خواهید شد. در تصاویر زیر می توانید  یک محیط مبتنی بر سرورهای تیغه ای HP که HP BladeSystem نامیده می شود را مشاهده کنید. همانطور که می بینید دارای مدلهای مختلف می باشد و دارای یک کنسول مدیریتی برای کل شاسی BladeSystem می باشد که آن HP Onboard Administrator نام دارد و برای پیکربندی و مدیریت کلیه سرورها و تجهیزات موجود در محیط BladeSystem بکار می رود.</p>
<div class="post-content">
<p><a class="cboxElement" href="http://www.bujarra.com/wp-content/uploads/2009/07/hpbladecenter00.jpg"><img loading="lazy" decoding="async" class="alignnone size-medium wp-image-2868 colorbox-2796" title="hpbladesystem00" src="http://www.bujarra.com/wp-content/uploads/2009/07/hpbladecenter00-450x398.jpg" alt="" width="450" height="398" /></a></p>
</div>
<p>&nbsp;</p>
<p>بنابراین به عنوان مقدمه ، این یک سیستم سرور تیغه ای است ، یعنی کشویی که بسته به تیغه های مدل 8 قرار می دهیم ، 16 in به خودی خود افزونگی و جمع و جور است ، زیرا 16 سرور مشابه را اشغال نمی کند قالب 16 ردیف رک. ما به اندازه کافی منبع تغذیه داریم که برای تغذیه شاسی ، نه به صورت جداگانه ، اگر نه به طور کامل ، و فن برای خنک سازی محیط نیاز داریم. بسته به درجه حرارت کم و بیش کارکرد با سرعت ، می تواند توسط سنسورها تنظیم شود و به محیطی که در آن سوار می شویم بستگی دارد ، در صورت عدم نیاز تیغه ها خاموش می شوند (به عنوان مثال یک VMware) ، با همه اینها می توانیم مقدار زیادی $ $ $ به برق ، تهویه مطبوع ، فضای فیزیکی / رک ، من می توانم ببینم که هر تیغه (سرور) در یک جای قرار دارد ، هر سیستم عامل سرور ، کاملاً مستقل از تیغه های دیگر (یا نه) ، ما یک صفحه نمایش کوچک داریم برای مشاهده وضعیت همه شاسی ها و تنظیم برخی پارامترها. در پشت ما سوئیچ ها وجود دارد ، زیرا چنین سرورهایی از سیم کشی جلوگیری می کنند و اترنت سیمی اتصالات داخلی هستند و فیبر ، همه سوئیچ ها برای جلوگیری از سقوط کپی می شوند و ازدیاد بالایی دارند. علاوه بر داشتن یک یا دو دستگاه مدیریت شاسی ، این جایی است که ما سیستم را مدیریت می کنیم ، از اصطلاحا HP Onboard Administrator. هر HP BladeSystem متفاوت است ، همچنین بین تولید کنندگان مختلف (مثال IBM BladeCenter) ، اما هنوز همان &#8220;فلسفه&#8221; یکسانی است و &#8220;تقریبا&#8221; برابر است.</p>
<p>&nbsp;</p>
<p>&nbsp;</p>
<div class="post-content">
<p>So by way of introduction, this is what would be a blade system, that is a drawer where we put depending on the model 8 blades, 16… all in itself would be redundancy and compact, since it does not occupy the same 16 servers in a rack format 16 blades. We have so many power supplies as we need to feed the chassis, not individually, if not comprehensively, and fans to cool the environment. Could set by the sensors depending on the temperature more or less operating at speed, and power sources and depends on our environment we ride up the blades could be turned off if not needed (for example a VMware), with all that we can save a lot $$$ into electricity,air conditioners, physical space / racks,… I can see every blade (server) is in a bay, each server operating system would, totally independent of other blades (or not), we have a small display to view the status of all the chassis and to set some parameters. In the back we have the switches, since such servers prevent wiring, and wired ethernet are internal connections, and fiber, all switches are duplicated to prevent falls and have high redundancy. Besides having one or two chassis management devices, that is where we administer the system, from the so-called HP Onboard Administrator. Each HP BladeSystem es different, as well as between different manufacturers (an IBM BladeCenter example), but still the same ‘philosophy’ and are ‘almost’ set equal.</p>
<p><a class="cboxElement" href="http://www.bujarra.com/wp-content/uploads/2009/07/hpbladecenter01.jpg"><img loading="lazy" decoding="async" class="alignnone size-medium wp-image-2798 colorbox-2796" title="hpbladesystem01" src="http://www.bujarra.com/wp-content/uploads/2009/07/hpbladecenter01-450x251.jpg" alt="" width="450" height="251" /></a></p>
<p>&nbsp;</p>
<p>سوال این است که اول از همه شاسی (آیرونز) را نصب کنید و سپس تنظیمات را شروع می کنیم ، برای اینکه چگونه میله ها را در آنجا نصب کنید هرکسی که سند رسمی را می خواند اگر نمی دانید زیرا در این سند پیکربندی را انجام می دهیم. پس از اتصال HP Onboard Administrator برای تغییر او یا ما ، می توانیم با نام کاربری و رمزعبور پیش فرض (مدیر / گذرواژه) به IP پیش فرض وصل شویم. با این کار می فهمیم که اولین چیزی که باید تغییر یابد IP است که برای آن علاقه مند هستیم و رمز عبور مدیر. روش دیگر می تواند از طریق Insight Display یا نمایشگری باشد که دارای پنل جلوی شاسی است ، از آنجا می توانیم تغییرات اساسی ایجاد کنیم.</p>
<p>&nbsp;</p>
<p>&nbsp;</p>
<p>The question is first of all install the chassis (Irons) and then we start setting, for how to mount the bars there everyone who read the official doc if you do not know <img decoding="async" class="emoji" role="img" draggable="false" src="https://s.w.org/images/core/emoji/13.0.0/svg/1f609.svg" alt="😉" /> since in this document we perform configuration. After connecting the HP Onboard Administrator to switch him or us, we can connect to the default IP with the default username and password (admin / password). By this we understand that the first thing to change would be the IP for which we are interested and admin password. Another way would be from the Insight Display or display that has the chassis front panel, from there we can make basic changes such.</p>
<p><a class="cboxElement" href="http://www.bujarra.com/wp-content/uploads/2009/07/hpbladecenter02.jpg"><img loading="lazy" decoding="async" class="alignnone size-medium wp-image-2799 colorbox-2796" title="hpbladesystem02" src="http://www.bujarra.com/wp-content/uploads/2009/07/hpbladecenter02-450x352.jpg" alt="" width="450" height="352" /></a></p>
<p>In “Rack overview” A brief summary of our chassis, of the items we have in him, a front and a rear. Come the name of our enclosure, and serial number and part number.</p>
<p><a class="cboxElement" href="http://www.bujarra.com/wp-content/uploads/2009/07/hpbladecenter03.jpg"><img loading="lazy" decoding="async" class="alignnone size-medium wp-image-2800 colorbox-2796" title="hpbladesystem03" src="http://www.bujarra.com/wp-content/uploads/2009/07/hpbladecenter03-449x406.jpg" alt="" width="449" height="406" /></a></p>
<p>In “Enclosure information” shows the condition of the components, if we aluna warning or everything is OK.</p>
<p><a class="cboxElement" href="http://www.bujarra.com/wp-content/uploads/2009/07/hpbladecenter04.jpg"><img loading="lazy" decoding="async" class="alignnone size-medium wp-image-2801 colorbox-2796" title="hpbladesystem04" src="http://www.bujarra.com/wp-content/uploads/2009/07/hpbladecenter04-450x319.jpg" alt="" width="450" height="319" /></a></p>
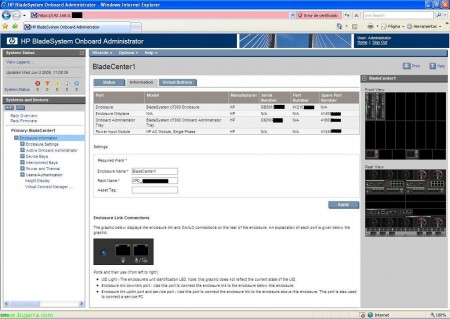
<p>In “Enclosure information, flange “Information” we can change the name of our chassis / BladeSytem / enclosure, or name that owns CPD. Besides the serial ebseñarnos, also indicates a support for chassis connections, UID LED on the identification, the connection port between the chassis rest of our CPD (we make the connection with the BladeSystem continue below) llamado Enclosure link downlink port, Enclosure and also have the uplink port that will link to connect to the upper chassis or to connect a computer if necessary.</p>
<p><a class="cboxElement" href="http://www.bujarra.com/wp-content/uploads/2009/07/hpbladecenter05.jpg"><img loading="lazy" decoding="async" class="alignnone size-medium wp-image-2802 colorbox-2796" title="hpbladesystem05" src="http://www.bujarra.com/wp-content/uploads/2009/07/hpbladecenter05-449x406.jpg" alt="" width="449" height="406" /></a></p>
<p>In “Enclosure information”, flange “Virtual Buttons” can turn on or off LED Light UID, to indicate any administrator what unit must do their homework.</p>
<p><a class="cboxElement" href="http://www.bujarra.com/wp-content/uploads/2009/08/hpbladecenter06.jpg"><img loading="lazy" decoding="async" class="alignnone size-medium wp-image-2873 colorbox-2796" title="hpbladesystem06" src="http://www.bujarra.com/wp-content/uploads/2009/08/hpbladecenter06-450x270.jpg" alt="" width="450" height="270" /></a></p>
<p>In “Enclosure information” &gt; “Enclosure Settings”. is a summary of BladeSystem devices and see if we need one to connect / enable and firmware all, we must always consider that we can have the latest firmware and all common elements have the same firmware!</p>
<p><a class="cboxElement" href="http://www.bujarra.com/wp-content/uploads/2009/07/hpbladecenter07.jpg"><img loading="lazy" decoding="async" class="alignnone size-medium wp-image-2804 colorbox-2796" title="hpbladesystem07" src="http://www.bujarra.com/wp-content/uploads/2009/07/hpbladecenter07-450x332.jpg" alt="" width="450" height="332" /></a></p>
<p>In “Enclosure information” &gt; “Enclosure Settings” &gt; “AlertMail” for that, as the name suggests, to activate email alerts of our chassis.</p>
<p><a class="cboxElement" href="http://www.bujarra.com/wp-content/uploads/2009/07/hpbladecenter08.jpg"><img loading="lazy" decoding="async" class="alignnone size-medium wp-image-2805 colorbox-2796" title="hpbladesystem08" src="http://www.bujarra.com/wp-content/uploads/2009/07/hpbladecenter08-450x332.jpg" alt="" width="450" height="332" /></a></p>
<p>In “Enclosure information” &gt; “Enclosure Settings” &gt; “Device Power Sequence”, flange “Device Bays”, can enable the lighting of the blades in the chassis with a priority order.</p>
<p><a class="cboxElement" href="http://www.bujarra.com/wp-content/uploads/2009/07/hpbladecenter09.jpg"><img loading="lazy" decoding="async" class="alignnone size-medium wp-image-2806 colorbox-2796" title="hpbladesystem09" src="http://www.bujarra.com/wp-content/uploads/2009/07/hpbladecenter09-450x332.jpg" alt="" width="450" height="332" /></a></p>
<p>In “Enclosure information” &gt; “Enclosure Settings” &gt; “Device Power Sequence”, flange “Interconnect Bays”, can enable the bays on the chassis connection (switches) with an order of priority.</p>
<p><a class="cboxElement" href="http://www.bujarra.com/wp-content/uploads/2009/07/hpbladecenter10.jpg"><img loading="lazy" decoding="async" class="alignnone size-medium wp-image-2807 colorbox-2796" title="hpbladesystem10" src="http://www.bujarra.com/wp-content/uploads/2009/07/hpbladecenter10-450x332.jpg" alt="" width="450" height="332" /></a></p>
<p>In “Enclosure information” &gt; “Enclosure Settings” &gt; “Date and Time” to configure the time service of the chassis, be a manual or schedule an NTP time server or.</p>
<p><a class="cboxElement" href="http://www.bujarra.com/wp-content/uploads/2009/07/hpbladecenter11.jpg"><img loading="lazy" decoding="async" class="alignnone size-medium wp-image-2808 colorbox-2796" title="hpbladesystem11" src="http://www.bujarra.com/wp-content/uploads/2009/07/hpbladecenter11-450x396.jpg" alt="" width="450" height="396" /></a></p>
<p>In “Enclosure information” &gt; “Enclosure Settings” &gt; “Enclosure TCP/IP Settings” is where you can configure the name, IP, netmask, gateway and DNS servers to the chassis, the Onboard Administrator.</p>
<p><a class="cboxElement" href="http://www.bujarra.com/wp-content/uploads/2009/07/hpbladecenter12.jpg"><img loading="lazy" decoding="async" class="alignnone size-medium wp-image-2809 colorbox-2796" title="hpbladesystem12" src="http://www.bujarra.com/wp-content/uploads/2009/07/hpbladecenter12-450x332.jpg" alt="" width="450" height="332" /></a></p>
<p>In “Enclosure information” &gt; “Enclosure Settings” &gt; “Network Access” flange “Protocols”, are the connection protocols that will qualify to enter the chassis. We have web access with HTTP or HTTPS, seguro shell with SSH, Telnet y XML reply.</p>
<p><a class="cboxElement" href="http://www.bujarra.com/wp-content/uploads/2009/07/hpbladecenter13.jpg"><img loading="lazy" decoding="async" class="alignnone size-medium wp-image-2810 colorbox-2796" title="hpbladesystem13" src="http://www.bujarra.com/wp-content/uploads/2009/07/hpbladecenter13-450x332.jpg" alt="" width="450" height="332" /></a></p>
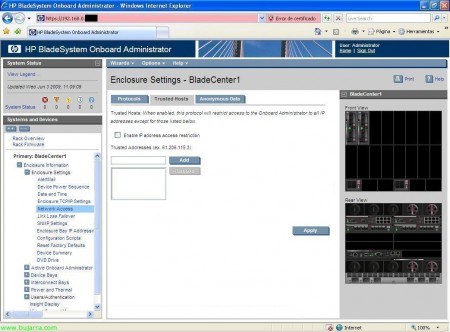
<p>In “Enclosure information” &gt; “Enclosure Settings” &gt; “Network Access” flange “Trusted Hosts” if we enable only give access to the enclosure from these IP’s and not from the entire network.</p>
<p><a class="cboxElement" href="http://www.bujarra.com/wp-content/uploads/2009/07/hpbladecenter14.jpg"><img loading="lazy" decoding="async" class="alignnone size-medium wp-image-2811 colorbox-2796" title="hpbladesystem14" src="http://www.bujarra.com/wp-content/uploads/2009/07/hpbladecenter14-450x332.jpg" alt="" width="450" height="332" /></a></p>
<p>In “Enclosure information” &gt; “Enclosure Settings” &gt; “Network Access” flange “Anonymous Data” simply if we enable chassis give you some information before it loguearnos, you can sign in to be information that interests us as Darla track <img decoding="async" class="emoji" role="img" draggable="false" src="https://s.w.org/images/core/emoji/13.0.0/svg/1f609.svg" alt="😉" /></p>
<p><a class="cboxElement" href="http://www.bujarra.com/wp-content/uploads/2009/07/hpbladecenter15.jpg"><img loading="lazy" decoding="async" class="alignnone size-medium wp-image-2812 colorbox-2796" title="hpbladesystem15" src="http://www.bujarra.com/wp-content/uploads/2009/07/hpbladecenter15-450x332.jpg" alt="" width="450" height="332" /></a></p>
<p>In “Enclosure information” &gt; “Enclosure Settings” &gt; “Link Loss Failover”, if te Devices Onboard Administrator, and want to do that when the primary OA lose connection, al otro pass Onboard Administrator, we enable and indicate what time of seconds that pass without a network connection, primary OA (long as the network has secondary OA!),</p>
<p><a class="cboxElement" href="http://www.bujarra.com/wp-content/uploads/2009/07/hpbladecenter16.jpg"><img loading="lazy" decoding="async" class="alignnone size-medium wp-image-2813 colorbox-2796" title="hpbladesystem16" src="http://www.bujarra.com/wp-content/uploads/2009/07/hpbladecenter16-450x332.jpg" alt="" width="450" height="332" /></a></p>
<p>In “Enclosure information” &gt; “Enclosure Settings” &gt; “SNMP Settings” in case we have configured our network monotorización system, to manage alerts, ads… Denial Nagios, was x put <img decoding="async" class="emoji" role="img" draggable="false" src="https://s.w.org/images/core/emoji/13.0.0/svg/1f609.svg" alt="😉" /></p>
<p><a class="cboxElement" href="http://www.bujarra.com/wp-content/uploads/2009/07/hpbladecenter17.jpg"><img loading="lazy" decoding="async" class="alignnone size-medium wp-image-2814 colorbox-2796" title="hpbladesystem17" src="http://www.bujarra.com/wp-content/uploads/2009/07/hpbladecenter17-450x325.jpg" alt="" width="450" height="325" /></a></p>
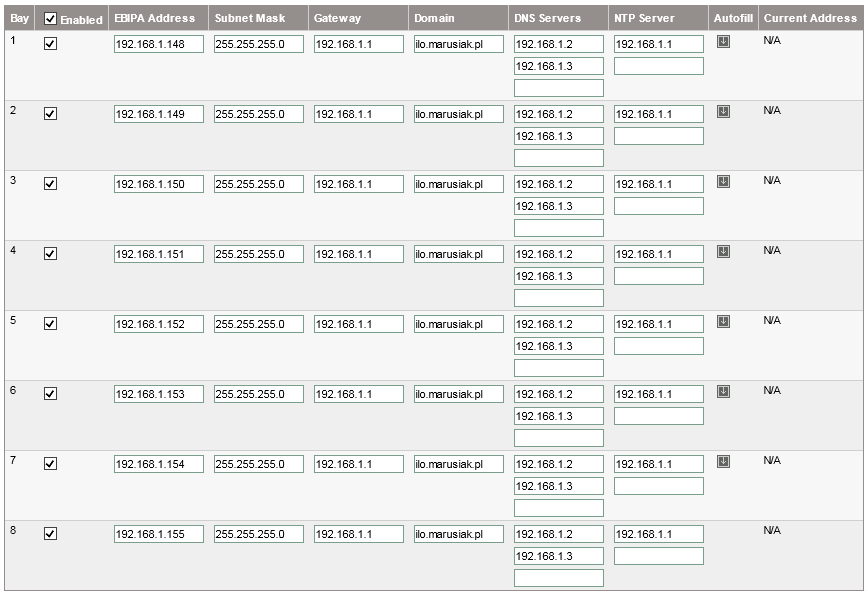
<p>In “Enclosure information” &gt; “Enclosure Settings” &gt; “Enclosure Bay IP Adresses”, tab “Device Bays”, we configured the IP’s of the blades, not your operating system, if the iLO IP’s so we could later connect to each bay.</p>
<p><a class="cboxElement" href="http://www.bujarra.com/wp-content/uploads/2009/07/hpbladecenter18.jpg"><img loading="lazy" decoding="async" class="alignnone size-medium wp-image-2815 colorbox-2796" title="hpbladesystem18" src="http://www.bujarra.com/wp-content/uploads/2009/07/hpbladecenter18-450x279.jpg" alt="" width="450" height="279" /></a></p>
<p>In “Enclosure information” &gt; “Enclosure Settings” &gt; “Enclosure Bay IP Adresses”, tab “Interconnect Bays”, we configured the IP’s of the rear chassis modules, of fiber switches, the ethernet…</p>
<p><a class="cboxElement" href="http://www.bujarra.com/wp-content/uploads/2009/07/hpbladecenter19.jpg"><img loading="lazy" decoding="async" class="alignnone size-medium wp-image-2816 colorbox-2796" title="hpbladesystem19" src="http://www.bujarra.com/wp-content/uploads/2009/07/hpbladecenter19-450x332.jpg" alt="" width="450" height="332" /></a></p>
<p>In “Enclosure information” &gt; “Enclosure Settings” &gt; “Configuration scripts”, can import the configuration scripts to automate configuration chassis and do it faster, we import it from a file or from a URL.</p>
<p><a class="cboxElement" href="http://www.bujarra.com/wp-content/uploads/2009/07/hpbladecenter20.jpg"><img loading="lazy" decoding="async" class="alignnone size-medium wp-image-2817 colorbox-2796" title="hpbladesystem20" src="http://www.bujarra.com/wp-content/uploads/2009/07/hpbladecenter20-450x332.jpg" alt="" width="450" height="332" /></a></p>
<p>In “Enclosure information” &gt; “Enclosure Settings” &gt; “Reset Factory Defaults”, because for that, to reset the chassis to the default settings from the factory,</p>
<p><a class="cboxElement" href="http://www.bujarra.com/wp-content/uploads/2009/07/hpbladecenter21.jpg"><img loading="lazy" decoding="async" class="alignnone size-medium wp-image-2818 colorbox-2796" title="hpbladesystem21" src="http://www.bujarra.com/wp-content/uploads/2009/07/hpbladecenter21-450x427.jpg" alt="" width="450" height="427" /></a></p>
<p>In “Enclosure information” &gt; “Enclosure Settings” &gt; “Device Summary”, is one of the most commonly used screens to document a blade environment, is a summary of all the components that we have in our chassis, with the description, serial, part number, manufacturer, model, spare part number, firmware, hardware version… all, the blades, switches, power, coolers / fans, mezzanines of the blades, info of the chasis…</p>
<p><a class="cboxElement" href="http://www.bujarra.com/wp-content/uploads/2009/07/hpbladecenter22.jpg"><img loading="lazy" decoding="async" class="alignnone size-medium wp-image-2819 colorbox-2796" title="hpbladesystem22" src="http://www.bujarra.com/wp-content/uploads/2009/07/hpbladecenter22-450x332.jpg" alt="" width="450" height="332" /></a></p>
<p>In “Enclosure information” &gt; “Enclosure Settings” &gt; “DVD Drive”, from here we can connect the CD / DVD of the chassis to a specific blade, case we need to get a CD / DVD on a particular blade. Man, is best done from the iLO connection… but tb is here <img decoding="async" class="emoji" role="img" draggable="false" src="https://s.w.org/images/core/emoji/13.0.0/svg/1f61b.svg" alt="😛" /></p>
<p><a class="cboxElement" href="http://www.bujarra.com/wp-content/uploads/2009/07/hpbladecenter23.jpg"><img loading="lazy" decoding="async" class="alignnone size-medium wp-image-2820 colorbox-2796" title="hpbladesystem23" src="http://www.bujarra.com/wp-content/uploads/2009/07/hpbladecenter23-450x332.jpg" alt="" width="450" height="332" /></a></p>
<p>In “Enclosure information” &gt; “Active Onboard Administrator” tab “Status e Information”, we see the state of the chassis says, at temperatures of about, and others on our chassis.</p>
<p><a class="cboxElement" href="http://www.bujarra.com/wp-content/uploads/2009/07/hpbladecenter24.jpg"><img loading="lazy" decoding="async" class="alignnone size-medium wp-image-2821 colorbox-2796" title="hpbladesystem24" src="http://www.bujarra.com/wp-content/uploads/2009/07/hpbladecenter24-450x332.jpg" alt="" width="450" height="332" /></a></p>
<p>In “Enclosure information” &gt; “Active Onboard Administrator” tab “Virtual Buttons”, we have two buttons, one for the chassis completely Resetar, I hope this does not have to do ever, since there is no reason to reboot the entire chassis, or to turn on the LED UID information.</p>
<p><a class="cboxElement" href="http://www.bujarra.com/wp-content/uploads/2009/07/hpbladecenter25.jpg"><img loading="lazy" decoding="async" class="alignnone size-medium wp-image-2822 colorbox-2796" title="hpbladesystem25" src="http://www.bujarra.com/wp-content/uploads/2009/07/hpbladecenter25-450x332.jpg" alt="" width="450" height="332" /></a></p>
<p>In “Enclosure information” &gt; “Active Onboard Administrator” &gt; “TCP/IP Settings”, is informational, on aand Onboard Administrator, network name information, and other IP data,</p>
<p><a class="cboxElement" href="http://www.bujarra.com/wp-content/uploads/2009/07/hpbladecenter26.jpg"><img loading="lazy" decoding="async" class="alignnone size-medium wp-image-2823 colorbox-2796" title="hpbladesystem26" src="http://www.bujarra.com/wp-content/uploads/2009/07/hpbladecenter26-450x381.jpg" alt="" width="450" height="381" /></a></p>
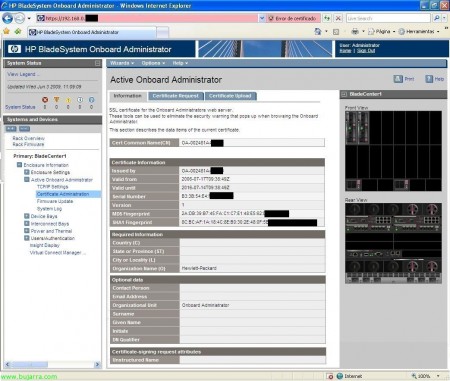
<p>In “Enclosure information” &gt; “Active Onboard Administrator” &gt; “Certificate administration”, tab “Information” we have that, information on the certificate for the SSL web server.</p>
<p><a class="cboxElement" href="http://www.bujarra.com/wp-content/uploads/2009/07/hpbladecenter27.jpg"><img loading="lazy" decoding="async" class="alignnone size-medium wp-image-2824 colorbox-2796" title="hpbladesystem27" src="http://www.bujarra.com/wp-content/uploads/2009/07/hpbladecenter27-400x450.jpg" alt="" width="400" height="450" /></a></p>
<p>In “Enclosure information” &gt; “Active Onboard Administrator” &gt; “Certificate administration”, tab “Certificate Request”, serve to generate a certificate our, using a self-signed certificate or CSR by power give it to a certificate authority for us to generate one ‘good’. And in the flange “Certificate Upload” I would climb.</p>
<p><a class="cboxElement" href="http://www.bujarra.com/wp-content/uploads/2009/07/hpbladecenter28.jpg"><img loading="lazy" decoding="async" class="alignnone size-medium wp-image-2825 colorbox-2796" title="hpbladesystem28" src="http://www.bujarra.com/wp-content/uploads/2009/07/hpbladecenter28-450x332.jpg" alt="" width="450" height="332" /></a></p>
<p>In “Enclosure information” &gt; “Active Onboard Administrator” &gt; “Firmware Update”, could update the firmware of our chassis, if we want the, downgrade could make it, can upload it from a file of our team, from a URL or directly from a USB flash drive connected to the chassis.</p>
<p><a class="cboxElement" href="http://www.bujarra.com/wp-content/uploads/2009/07/hpbladecenter29.jpg"><img loading="lazy" decoding="async" class="alignnone size-medium wp-image-2826 colorbox-2796" title="hpbladesystem29" src="http://www.bujarra.com/wp-content/uploads/2009/07/hpbladecenter29-450x332.jpg" alt="" width="450" height="332" /></a></p>
<p>In “Enclosure information” &gt; “Active Onboard Administrator” &gt; “System Log”, tab “System Log” We have everything that happens in our chassis, a LOG.</p>
<p><a class="cboxElement" href="http://www.bujarra.com/wp-content/uploads/2009/07/hpbladecenter30.jpg"><img loading="lazy" decoding="async" class="alignnone size-medium wp-image-2827 colorbox-2796" title="hpbladesystem30" src="http://www.bujarra.com/wp-content/uploads/2009/07/hpbladecenter30-450x332.jpg" alt="" width="450" height="332" /></a></p>
<p>In “Enclosure information” &gt; “Active Onboard Administrator” &gt; “System Log”, tab “Log Options” LOG can redirect a server’s LOG’s, to a Kiwi Syslog type.</p>
<p><a class="cboxElement" href="http://www.bujarra.com/wp-content/uploads/2009/07/hpbladecenter31.jpg"><img loading="lazy" decoding="async" class="alignnone size-medium wp-image-2828 colorbox-2796" title="hpbladesystem31" src="http://www.bujarra.com/wp-content/uploads/2009/07/hpbladecenter31-450x332.jpg" alt="" width="450" height="332" /></a></p>
<p>In “Enclosure information” &gt; “Device Bays” we have all our blades, with their status, if the UID is on or not, bay number, state on / off, iLO IP address, and state of the DVD drive if it is connected or not.</p>
<p><a class="cboxElement" href="http://www.bujarra.com/wp-content/uploads/2009/07/hpbladecenter32.jpg"><img loading="lazy" decoding="async" class="alignnone size-medium wp-image-2829 colorbox-2796" title="hpbladesystem32" src="http://www.bujarra.com/wp-content/uploads/2009/07/hpbladecenter32-400x450.jpg" alt="" width="400" height="450" /></a></p>
<p>In “Enclosure information” &gt; “Device Bays” &gt; BLADE &gt; flange “Status”, have the information on our blade, if you would have some warning here would tell us what the problem, or if you have a high temperature. Certainly, if we select hardware element, we indicated in the drawing on the right on which device we, helps when we have enough elements or in the theme of the switches.</p>
<p><a class="cboxElement" href="http://www.bujarra.com/wp-content/uploads/2009/07/hpbladecenter33.jpg"><img loading="lazy" decoding="async" class="alignnone size-medium wp-image-2830 colorbox-2796" title="hpbladesystem33" src="http://www.bujarra.com/wp-content/uploads/2009/07/hpbladecenter33-450x399.jpg" alt="" width="450" height="399" /></a></p>
<p>In “Enclosure information” &gt; “Device Bays” &gt; BLADE &gt; flange “Information”, blade shows information in question, all of it is quite interesting, o a anotar, as the MAC or WWPN…</p>
<p><a class="cboxElement" href="http://www.bujarra.com/wp-content/uploads/2009/07/hpbladecenter34.jpg"><img loading="lazy" decoding="async" class="alignnone size-medium wp-image-2831 colorbox-2796" title="hpbladesystem34" src="http://www.bujarra.com/wp-content/uploads/2009/07/hpbladecenter34-450x311.jpg" alt="" width="450" height="311" /></a></p>
<p>In “Enclosure information” &gt; “Device Bays” &gt; BLADE &gt; flange “Virtual Devices”, we have different options on our blade power button, and turn it the UID.</p>
<p><a class="cboxElement" href="http://www.bujarra.com/wp-content/uploads/2009/07/hpbladecenter35.jpg"><img loading="lazy" decoding="async" class="alignnone size-medium wp-image-2832 colorbox-2796" title="hpbladesystem35" src="http://www.bujarra.com/wp-content/uploads/2009/07/hpbladecenter35-450x311.jpg" alt="" width="450" height="311" /></a></p>
<p>In “Enclosure information” &gt; “Device Bays” &gt; BLADE &gt; flange “Boot Options”, select the boot order of the blade, or next boot,</p>
<p><a class="cboxElement" href="http://www.bujarra.com/wp-content/uploads/2009/07/hpbladecenter36.jpg"><img loading="lazy" decoding="async" class="alignnone size-medium wp-image-2833 colorbox-2796" title="hpbladesystem36" src="http://www.bujarra.com/wp-content/uploads/2009/07/hpbladecenter36-450x311.jpg" alt="" width="450" height="311" /></a></p>
<p>In “Enclosure information” &gt; “Device Bays” &gt; BLADE &gt; flange “Log IML”, o Integrated Management Log, have the log’s of the blade, everything that happens will be recorded.</p>
<p><a class="cboxElement" href="http://www.bujarra.com/wp-content/uploads/2009/07/hpbladecenter37.jpg"><img loading="lazy" decoding="async" class="alignnone size-medium wp-image-2834 colorbox-2796" title="hpbladesystem37" src="http://www.bujarra.com/wp-content/uploads/2009/07/hpbladecenter37-450x277.jpg" alt="" width="450" height="277" /></a></p>
<p>In “Enclosure information” &gt; “Device Bays” &gt; BLADE &gt; “iLO” flange “Processor Information”, can do remote management of equipment, ideally to remotely control the computer, so we click on “Integrated Remote Console” for control of the team and to manage their devices or if we have it in Java JRE “Remote Console”.</p>
<p><a class="cboxElement" href="http://www.bujarra.com/wp-content/uploads/2009/07/hpbladecenter38.jpg"><img loading="lazy" decoding="async" class="alignnone size-medium wp-image-2835 colorbox-2796" title="hpbladesystem38" src="http://www.bujarra.com/wp-content/uploads/2009/07/hpbladecenter38-450x361.jpg" alt="" width="450" height="361" /></a></p>
<p>We open in a new window control on remote computer, to do everything we need, mount remote units, connect CD / DVD the remote site, restart, shutdown…</p>
<p><a class="cboxElement" href="http://www.bujarra.com/wp-content/uploads/2009/07/hpbladecenter39.jpg"><img loading="lazy" decoding="async" class="alignnone size-medium wp-image-2836 colorbox-2796" title="hpbladesystem39" src="http://www.bujarra.com/wp-content/uploads/2009/07/hpbladecenter39-450x277.jpg" alt="" width="450" height="277" /></a></p>
<p>In “Enclosure information” &gt; “Device Bays” &gt; BLADE &gt; “iLO” tab “Event Log”, filtered records have a team at iLO.</p>
<p><a class="cboxElement" href="http://www.bujarra.com/wp-content/uploads/2009/07/hpbladecenter40.jpg"><img loading="lazy" decoding="async" class="alignnone size-medium wp-image-2837 colorbox-2796" title="hpbladesystem40" src="http://www.bujarra.com/wp-content/uploads/2009/07/hpbladecenter40-450x311.jpg" alt="" width="450" height="311" /></a></p>
<p>In “Enclosure information” &gt; “Device Bays” &gt; BLADE &gt; “Port Mapping”, tab “Graphical View” we can see the internal connections of the blade, This screen is used to understand the inner connection between the blade and the switches we have in our chassis, we can see the blade adapters (Embedded or integrated and Mezzanines) each with its internal ports, are usually additional network cards or HBA’s (fiber) with one or more ports. And each port on each adapter looks at what port or ethernet fiber switch is connected.</p>
<p><a class="cboxElement" href="http://www.bujarra.com/wp-content/uploads/2009/07/hpbladecenter41.jpg"><img loading="lazy" decoding="async" class="alignnone size-medium wp-image-2838 colorbox-2796" title="hpbladesystem41" src="http://www.bujarra.com/wp-content/uploads/2009/07/hpbladecenter41-450x277.jpg" alt="" width="450" height="277" /></a></p>
<p>In “Enclosure information” &gt; “Device Bays” &gt; BLADE &gt; “Port Mapping”, tab “Table View” have the same information as in the previous tab but different view <img decoding="async" class="emoji" role="img" draggable="false" src="https://s.w.org/images/core/emoji/13.0.0/svg/1f609.svg" alt="😉" /></p>
<p><a class="cboxElement" href="http://www.bujarra.com/wp-content/uploads/2009/07/hpbladecenter42.jpg"><img loading="lazy" decoding="async" class="alignnone size-medium wp-image-2839 colorbox-2796" title="hpbladesystem42" src="http://www.bujarra.com/wp-content/uploads/2009/07/hpbladecenter42-450x270.jpg" alt="" width="450" height="270" /></a></p>
<p>In “Enclosure information” &gt; “Interconnect Bays” shows the chassis switches, back, in my case, two swtiches Ethernet and two fiber, shows the state of them, and if you have the power UID, switch type and model, su IP address management.</p>
<p><a class="cboxElement" href="http://www.bujarra.com/wp-content/uploads/2009/07/hpbladecenter43.jpg"><img loading="lazy" decoding="async" class="alignnone size-medium wp-image-2840 colorbox-2796" title="hpbladesystem43" src="http://www.bujarra.com/wp-content/uploads/2009/07/hpbladecenter43-450x311.jpg" alt="" width="450" height="311" /></a></p>
<p>In “Enclosure information” &gt; “Interconnect Bays”tab “Status” can view the status and diagnostic switch in question, if you have any electrical issues alert, Temperature…</p>
<p><a class="cboxElement" href="http://www.bujarra.com/wp-content/uploads/2009/07/hpbladecenter44.jpg"><img loading="lazy" decoding="async" class="alignnone size-medium wp-image-2841 colorbox-2796" title="hpbladesystem44" src="http://www.bujarra.com/wp-content/uploads/2009/07/hpbladecenter44-450x333.jpg" alt="" width="450" height="333" /></a></p>
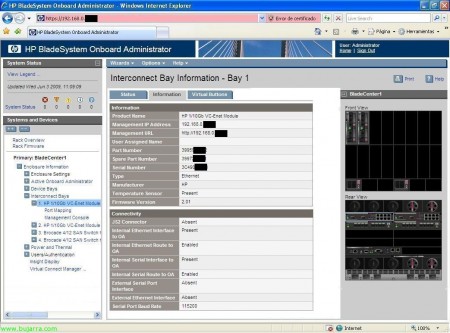
<p>In “Enclosure information” &gt; “Interconnect Bays” &gt; Bay ethernet &gt; tab “Information” see it, information about this device, certain to score in the correct documentation or to arrange a future of trouble,</p>
<p><a class="cboxElement" href="http://www.bujarra.com/wp-content/uploads/2009/07/hpbladecenter45.jpg"><img loading="lazy" decoding="async" class="alignnone size-medium wp-image-2842 colorbox-2796" title="hpbladesystem45" src="http://www.bujarra.com/wp-content/uploads/2009/07/hpbladecenter45-450x333.jpg" alt="" width="450" height="333" /></a></p>
<p>In “Enclosure information” &gt; “Interconnect Bays” &gt; Bahia ethernet , flange “Virtual Buttons” same as above, is a virtual button to turn off / reboot the device or to turn on the UID if necessary,</p>
<p><a class="cboxElement" href="http://www.bujarra.com/wp-content/uploads/2009/07/hpbladecenter46.jpg"><img loading="lazy" decoding="async" class="alignnone size-medium wp-image-2843 colorbox-2796" title="hpbladesystem46" src="http://www.bujarra.com/wp-content/uploads/2009/07/hpbladecenter46-450x333.jpg" alt="" width="450" height="333" /></a></p>
<p>In “Enclosure information” &gt; “Interconnect Bays” &gt; Bahia ethernet &gt; “Port Mapping” we can see the blades we have connected to this ethernet switch indicating which mezzanine what blade is what switch port, MAC also shows the device in question, and if a switch would display the WWNN fiber.</p>
<p><a class="cboxElement" href="http://www.bujarra.com/wp-content/uploads/2009/07/hpbladecenter47.jpg"><img loading="lazy" decoding="async" class="alignnone size-medium wp-image-2844 colorbox-2796" title="hpbladesystem47" src="http://www.bujarra.com/wp-content/uploads/2009/07/hpbladecenter47-450x326.jpg" alt="" width="450" height="326" /></a></p>
<p>In “Enclosure information” &gt; “Interconnect Bays” &gt; Bahia ethernet &gt; “Management Console”, We initiate the switch management console, and would switch level configuration, to set it up the zoninga that interest, through “HP Virtual Connect Manager”,</p>
<p><a class="cboxElement" href="http://www.bujarra.com/wp-content/uploads/2009/07/hpbladecenter48.jpg"><img loading="lazy" decoding="async" class="alignnone size-medium wp-image-2845 colorbox-2796" title="hpbladesystem48" src="http://www.bujarra.com/wp-content/uploads/2009/07/hpbladecenter48-450x311.jpg" alt="" width="450" height="311" /></a></p>
<p>In “Enclosure information” &gt; “Interconnect Bays” &gt; BAY fiber &gt; tab “Status”, can view the status and diagnostic fiber switch in question, if you have any electrical issues alert, Temperature…</p>
<p><a class="cboxElement" href="http://www.bujarra.com/wp-content/uploads/2009/07/hpbladecenter49.jpg"><img loading="lazy" decoding="async" class="alignnone size-medium wp-image-2846 colorbox-2796" title="hpbladesystem49" src="http://www.bujarra.com/wp-content/uploads/2009/07/hpbladecenter49-450x326.jpg" alt="" width="450" height="326" /></a></p>
<p>In “Enclosure information” &gt; “Interconnect Bays” &gt; BAY fiber &gt; tab “Information” see it, information about this device, certain to score in the correct documentation or to arrange a future of trouble,</p>
<p><a class="cboxElement" href="http://www.bujarra.com/wp-content/uploads/2009/07/hpbladecenter50.jpg"><img loading="lazy" decoding="async" class="alignnone size-medium wp-image-2847 colorbox-2796" title="hpbladesystem50" src="http://www.bujarra.com/wp-content/uploads/2009/07/hpbladecenter50-450x311.jpg" alt="" width="450" height="311" /></a></p>
<p>In “Enclosure information” &gt; “Interconnect Bays” &gt; BAY fiber, flange “Virtual Buttons” is the virtual button to turn off / reboot the device or to turn on the UID if necessary,</p>
<p><a class="cboxElement" href="http://www.bujarra.com/wp-content/uploads/2009/07/hpbladecenter51.jpg"><img loading="lazy" decoding="async" class="alignnone size-medium wp-image-2848 colorbox-2796" title="hpbladesystem51" src="http://www.bujarra.com/wp-content/uploads/2009/07/hpbladecenter51-450x333.jpg" alt="" width="450" height="333" /></a></p>
<p>In “Enclosure information” &gt; “Interconnect Bays” &gt; BAY fiber &gt; “Port Mapping” we can see the blades we have connected to this ethernet switch indicating which mezzanine what blade is what switch port, also shows the connected HBA WWNN, perfect to have everything well documented and annotated for configuration issues paths.</p>
<p><a class="cboxElement" href="http://www.bujarra.com/wp-content/uploads/2009/07/hpbladecenter52.jpg"><img loading="lazy" decoding="async" class="alignnone size-medium wp-image-2849 colorbox-2796" title="hpbladesystem52" src="http://www.bujarra.com/wp-content/uploads/2009/07/hpbladecenter52-450x283.jpg" alt="" width="450" height="283" /></a></p>
<p>In “Enclosure information” &gt; “Interconnect Bays” &gt; Bahia ethernet &gt; “Management Console”, We initiate the switch management console fiber, and would switch level configuration, to set it up the zoninga that interest, we have a tutorial here on how to configure a switch fiber <a title="http://www.bujarra.com/?p=2752" href="http://www.bujarra.com/en/?p=2752" target="_blank" rel="noopener noreferrer">http://www.bujarra.com/?p=2752</a>,</p>
<p><a class="cboxElement" href="http://www.bujarra.com/wp-content/uploads/2009/07/hpbladecenter53.jpg"><img loading="lazy" decoding="async" class="alignnone size-medium wp-image-2850 colorbox-2796" title="hpbladesystem53" src="http://www.bujarra.com/wp-content/uploads/2009/07/hpbladecenter53-450x311.jpg" alt="" width="450" height="311" /></a></p>
<p>In “Enclosure information” &gt; “Power and Thermal” see the status of the chassis electrical issue, and su temperature and in case of any mistakes we mark with error.</p>
<p><a class="cboxElement" href="http://www.bujarra.com/wp-content/uploads/2009/07/hpbladecenter54.jpg"><img loading="lazy" decoding="async" class="alignnone size-medium wp-image-2851 colorbox-2796" title="hpbladesystem54" src="http://www.bujarra.com/wp-content/uploads/2009/07/hpbladecenter54-450x413.jpg" alt="" width="450" height="413" /></a></p>
<p>In “Enclosure information” &gt; “Power and Thermal” &gt; “Power Management” We can manage the configuration of the redundancy on the chassis power, so as to enable “Dynamic Power” for putting cost savings F.A. you do not need a standby state not to use them unless necessary. Note, it sounds a tall tale with this issue of saving or putting virtualization topics such chassis, saving is true, just take a calculator and multiply the servers so you spend so worth the hour kilowatt (kWh) and you can amaze with the costs in one year! all this you must add the cost of air conditioning of course… if we reverse, there is nothing better than a blade virtualization environment.</p>
<p><a class="cboxElement" href="http://www.bujarra.com/wp-content/uploads/2009/07/hpbladecenter55.jpg"><img loading="lazy" decoding="async" class="alignnone size-medium wp-image-2852 colorbox-2796" title="hpbladesystem55" src="http://www.bujarra.com/wp-content/uploads/2009/07/hpbladecenter55-450x251.jpg" alt="" width="450" height="251" /></a></p>
<p>In “Enclosure information” &gt; “Power and Thermal” &gt; “Enclosure Power Allocation” spending shows us that we need the items currently in the chassis, our blades, switches, modules… and what would be our total capacity. One should always keep in mind that if we damaged a power supply, if we covered!</p>
<p><a class="cboxElement" href="http://www.bujarra.com/wp-content/uploads/2009/07/hpbladecenter56.jpg"><img loading="lazy" decoding="async" class="alignnone size-medium wp-image-2853 colorbox-2796" title="hpbladecenter56" src="http://www.bujarra.com/wp-content/uploads/2009/07/hpbladecenter56-450x275.jpg" alt="" width="450" height="275" /></a></p>
<p>In “Enclosure information” &gt; “Power and Thermal” &gt; “Power Meter”, tab “Graphical View” shows a graph of our chassis consumption,</p>
<p><a class="cboxElement" href="http://www.bujarra.com/wp-content/uploads/2009/07/hpbladecenter57.jpg"><img loading="lazy" decoding="async" class="alignnone size-medium wp-image-2854 colorbox-2796" title="hpbladesystem57" src="http://www.bujarra.com/wp-content/uploads/2009/07/hpbladecenter57-450x270.jpg" alt="" width="450" height="270" /></a></p>
<p>In “Enclosure information” &gt; “Power and Thermal” &gt; “Power Meter”, tab “Tablel View” records shows a consumption of our chassis,</p>
<p><a class="cboxElement" href="http://www.bujarra.com/wp-content/uploads/2009/07/hpbladecenter58.jpg"><img loading="lazy" decoding="async" class="alignnone size-medium wp-image-2855 colorbox-2796" title="hpbladesystem58" src="http://www.bujarra.com/wp-content/uploads/2009/07/hpbladecenter58-450x311.jpg" alt="" width="450" height="311" /></a></p>
<p>In “Enclosure information” &gt; “Power and Thermal” &gt; “Power Subsystem” shows the status of all our power supplies, and the power mode, and if we would have redundancy.</p>
<p><a class="cboxElement" href="http://www.bujarra.com/wp-content/uploads/2009/07/hpbladecenter59.jpg"><img loading="lazy" decoding="async" class="alignnone size-medium wp-image-2856 colorbox-2796" title="hpbladesystem59" src="http://www.bujarra.com/wp-content/uploads/2009/07/hpbladecenter59-450x311.jpg" alt="" width="450" height="311" /></a></p>
<p>In “Enclosure information” &gt; “Power and Thermal” &gt; “Power Subsystem” &gt; “Power Supply X” will show specific information and a power source in question as its capacity / consumption, serial, part number, spare part number…</p>
<p><a class="cboxElement" href="http://www.bujarra.com/wp-content/uploads/2009/07/hpbladecenter60.jpg"><img loading="lazy" decoding="async" class="alignnone size-medium wp-image-2857 colorbox-2796" title="hpbladesystem60" src="http://www.bujarra.com/wp-content/uploads/2009/07/hpbladecenter60-450x251.jpg" alt="" width="450" height="251" /></a></p>
<p>In “Enclosure information” &gt; “Power and Thermal” &gt; “Thermal Subsystem” tab “Fan Summary” shows a generic view of the fans or coolers that have our chassis and their use.</p>
<p><a class="cboxElement" href="http://www.bujarra.com/wp-content/uploads/2009/07/hpbladecenter61.jpg"><img loading="lazy" decoding="async" class="alignnone size-medium wp-image-2858 colorbox-2796" title="hpbladesystem61" src="http://www.bujarra.com/wp-content/uploads/2009/07/hpbladecenter61-450x308.jpg" alt="" width="450" height="308" /></a></p>
<p>In “Enclosure information” &gt; “Power and Thermal” &gt; “Thermal Subsystem” tab “Fan Zones”, shows areas of our chassis ventilation and whether they are covered or not by fans to cool the area, normal is placed behind the blades fans, because it does not make much sense to place them on the other side, sometimes anyway not us who assemble the chassis if not an HP engineer, so not all our decisions <img decoding="async" class="emoji" role="img" draggable="false" src="https://s.w.org/images/core/emoji/13.0.0/svg/1f609.svg" alt="😉" /></p>
<p><a class="cboxElement" href="http://www.bujarra.com/wp-content/uploads/2009/07/hpbladecenter62.jpg"><img loading="lazy" decoding="async" class="alignnone size-medium wp-image-2859 colorbox-2796" title="hpbladesystem62" src="http://www.bujarra.com/wp-content/uploads/2009/07/hpbladecenter62-450x311.jpg" alt="" width="450" height="311" /></a></p>
<p>In “Enclosure information” &gt; “Power and Thermal” &gt; “Thermal Subsystem” &gt; “Fan X” and shows the individual status of each fan or cooler, and their use,</p>
<p><a class="cboxElement" href="http://www.bujarra.com/wp-content/uploads/2009/07/hpbladecenter63.jpg"><img loading="lazy" decoding="async" class="alignnone size-medium wp-image-2860 colorbox-2796" title="hpbladesystem63" src="http://www.bujarra.com/wp-content/uploads/2009/07/hpbladecenter63-450x311.jpg" alt="" width="450" height="311" /></a></p>
<p>In “Enclosure information” &gt; “Users / Authentication” &gt; “Local Users” we have a local user management on the chassis, manage access to blade environment.</p>
<p><a class="cboxElement" href="http://www.bujarra.com/wp-content/uploads/2009/07/hpbladecenter64.jpg"><img loading="lazy" decoding="async" class="alignnone size-medium wp-image-2861 colorbox-2796" title="hpbladesystem64" src="http://www.bujarra.com/wp-content/uploads/2009/07/hpbladecenter64-450x311.jpg" alt="" width="450" height="311" /></a></p>
<p>In “Enclosure information” &gt; “Users / Authentication” &gt; “Local Users” &gt; “Directory Settings”, to configure access instead of local users with service users through LDAP Directory,</p>
<p><a class="cboxElement" href="http://www.bujarra.com/wp-content/uploads/2009/07/hpbladecenter65.jpg"><img loading="lazy" decoding="async" class="alignnone size-medium wp-image-2862 colorbox-2796" title="hpbladesystem65" src="http://www.bujarra.com/wp-content/uploads/2009/07/hpbladecenter65-450x311.jpg" alt="" width="450" height="311" /></a></p>
<p>In “Enclosure information” &gt; “Users / Authentication” &gt; “Local Users” &gt; “Directory Groups” to manage groups of users from LDAP,</p>
<p><a class="cboxElement" href="http://www.bujarra.com/wp-content/uploads/2009/07/hpbladecenter66.jpg"><img loading="lazy" decoding="async" class="alignnone size-medium wp-image-2863 colorbox-2796" title="hpbladesystem66" src="http://www.bujarra.com/wp-content/uploads/2009/07/hpbladecenter66-450x311.jpg" alt="" width="450" height="311" /></a></p>
<p>In “Enclosure information” &gt; “Users / Authentication” &gt; “Local Users” &gt; “SSH Administration”, manages the keys for SSH,</p>
<p><a class="cboxElement" href="http://www.bujarra.com/wp-content/uploads/2009/07/hpbladecenter67.jpg"><img loading="lazy" decoding="async" class="alignnone size-medium wp-image-2864 colorbox-2796" title="hpbladesystem67" src="http://www.bujarra.com/wp-content/uploads/2009/07/hpbladecenter67-450x311.jpg" alt="" width="450" height="311" /></a></p>
<p>In “Enclosure information” &gt; “Users / Authentication” &gt; “Local Users” &gt; “HP SIM Integration” &gt; sirve para integrar el Onboard Administrator con HP Systems Insight Manager, to pass credentials.</p>
<p><a class="cboxElement" href="http://www.bujarra.com/wp-content/uploads/2009/07/hpbladecenter68.jpg"><img loading="lazy" decoding="async" class="alignnone size-medium wp-image-2865 colorbox-2796" title="hpbladesystem68" src="http://www.bujarra.com/wp-content/uploads/2009/07/hpbladecenter68-450x270.jpg" alt="" width="450" height="270" /></a></p>
<p>In “Enclosure information” &gt; “Users / Authentication” &gt; “Local Users” &gt; “Signed in Users” shows the currently logged users on the chassis of blades or historic logins,</p>
<p><a class="cboxElement" href="http://www.bujarra.com/wp-content/uploads/2009/07/hpbladecenter69.jpg"><img loading="lazy" decoding="async" class="alignnone size-medium wp-image-2797 colorbox-2796" title="hpbladesystem69" src="http://www.bujarra.com/wp-content/uploads/2009/07/hpbladecenter69-450x311.jpg" alt="" width="450" height="311" /></a></p>
<p>In “Enclosure information” &gt; “Insight Display”, shows the small screen that has the front of the chassis, a small display that will enable us to perform certain basic configurations with a couple of buttons, and view the status of the chassis briefly.</p>
<p><a class="cboxElement" href="http://www.bujarra.com/wp-content/uploads/2009/07/hpbladecenter70.jpg"><img loading="lazy" decoding="async" class="alignnone size-medium wp-image-2869 colorbox-2796" title="hpbladesystem70" src="http://www.bujarra.com/wp-content/uploads/2009/07/hpbladecenter70-450x347.jpg" alt="" width="450" height="347" /></a></p>
<p>Well, the interesting thing is that if we set some of this is well documented, as well as for us to deliver to the customer and who come after us know what and how it is mounted, with logical drawings like this on the connections and documentation of IP’s, MAC’s, WWNN, WWPN, cabling… and perfectly in this structure would blade, more comfortable to manage and maintain! a bargain!!!</p>
</div>
<p>نوشته <a href="https://server.vcenter.ir/hp-bladesystem-installation/">نصب و راه اندازی HP BladeSystem</a> اولین بار در <a href="https://server.vcenter.ir">سرور</a>. پدیدار شد.</p>
]]></content>
		
					<link rel="replies" type="text/html" href="https://server.vcenter.ir/hp-bladesystem-installation/#comments" thr:count="0" />
			<link rel="replies" type="application/atom+xml" href="https://server.vcenter.ir/hp-bladesystem-installation/feed/atom/" thr:count="0" />
			<thr:total>0</thr:total>
			</entry>
		<entry>
		<author>
			<name>admin</name>
					</author>

		<title type="html"><![CDATA[نصب و پیکربندی HP c7000 Blade Enclosure]]></title>
		<link rel="alternate" type="text/html" href="https://server.vcenter.ir/install-and-configure-the-hp-c7000-blade-enclosure/" />

		<id>https://server.vcenter.ir/?p=1437</id>
		<updated>2023-04-01T22:39:50Z</updated>
		<published>2020-11-07T15:44:18Z</published>
		<category scheme="https://server.vcenter.ir/" term="سرور" /><category scheme="https://server.vcenter.ir/" term="پیکربندی محفظه HP c7000" /><category scheme="https://server.vcenter.ir/" term="خرید سرور بلید" /><category scheme="https://server.vcenter.ir/" term="راه اندازی بلید سرور اچ پی" /><category scheme="https://server.vcenter.ir/" term="سرور بلید" /><category scheme="https://server.vcenter.ir/" term="نرم‌افزار OneView" /><category scheme="https://server.vcenter.ir/" term="نصب و پیکربندی HP c7000 Blade Enclosure" />
		<summary type="html"><![CDATA[<p>نصب و پیکربندی HP c7000 Blade Enclosure پیکربندی HP c7000 Blade Enclosure مدیریت زیرساخت‌های تیغه‌ای شما ممکن است گاهی چالش برانگیز باشد. تصمیم گرفته‌ایم تا شما را با اجزای سرور&#8230; </p>
<p>نوشته <a href="https://server.vcenter.ir/install-and-configure-the-hp-c7000-blade-enclosure/">نصب و پیکربندی HP c7000 Blade Enclosure</a> اولین بار در <a href="https://server.vcenter.ir">سرور</a>. پدیدار شد.</p>
]]></summary>

					<content type="html" xml:base="https://server.vcenter.ir/install-and-configure-the-hp-c7000-blade-enclosure/"><![CDATA[<h2>نصب و پیکربندی HP c7000 Blade Enclosure</h2>
<figure id="attachment_1442" aria-describedby="caption-attachment-1442" style="width: 730px" class="wp-caption alignnone"><a href="https://server.vcenter.ir/wp-content/uploads/2020/11/install-and-configure-the-hp-c7000-blade-enclosure-1.jpg"><img loading="lazy" decoding="async" class="wp-image-1442 size-full" src="https://server.vcenter.ir/wp-content/uploads/2020/11/install-and-configure-the-hp-c7000-blade-enclosure-1.jpg" alt="نصب و پیکربندی HP c7000 Blade Enclosure" width="730" height="410" srcset="https://server.vcenter.ir/wp-content/uploads/2020/11/install-and-configure-the-hp-c7000-blade-enclosure-1.jpg 730w, https://server.vcenter.ir/wp-content/uploads/2020/11/install-and-configure-the-hp-c7000-blade-enclosure-1-300x168.jpg 300w" sizes="(max-width: 730px) 100vw, 730px" /></a><figcaption id="caption-attachment-1442" class="wp-caption-text">نصب و پیکربندی HP c7000 Blade Enclosure</figcaption></figure>
<h2><strong>پیکربندی HP c7000 Blade Enclosure</strong></h2>
<p>مدیریت زیرساخت‌های تیغه‌ای شما ممکن است گاهی چالش برانگیز باشد. تصمیم گرفته‌ایم تا شما را با اجزای سرور HP c7000 Enclosure و مؤلفه‌ هایی که می توانید استفاده کنید آشنا کنیم. پس از معرفی کوتاه، به سراغ پیکربندی اولیه و تنظیمات دیگر می‌رویم‌ که به نظر ما بسیار مفید واقع خواهند شد.</p>
<h2><strong>بررسی کوتاه سرور HP c7000 Enclosure</strong></h2>
<p>سرور HP Blade System c7000 Enclosure فراتر از سرورهای صرفاً Blade است. این محصول، مدیریت سرور ، ذخیره سازی، شبکه و انرژی را در یک فضای مستقل ادغام می‌کند که می‌تواند به عنوان یک محیط واحد بصورت یکپارچه مدیریت شود. محفظه این سرور تمام زیرساختهای ورودی/خروجی، سرمایشی و منبع تغذیه موردنیاز برای پشتیبانی از سرورهای ماژولار و همچنین اجزای مربوط به ذخیره‌سازی و اتصالات را متناسب با نیازهای امروز و چند سال آتی فراهم می‌کند. محفظه این سرور ۱۰U ارتفاع دارد و بالای ۱۶ عدد سرور و/ یا تیغه‌های ذخیره‌سازی را به همراه ماژول‌های اختیاری مربوط به اتصالات ذخیره‌سازی و شبکه در خود جای می‌دهد.</p>
<p><strong>پشتیبانی زیرساخت هوشمند: </strong>سرویس‌های کشف نیرو به محفظه‌های Bladesystem اجازه می‌دهد تا اطلاعات را به PDUهای هوشمند HP مخابره کنند که اتصالات برق محفظه <a href="https://shop.vcenter.ir/product-category/servers">سرور</a> به خروجی مخصوص iPDU را بصورت خودکار ردیابی می‌کند تا از افزونگی و خرابی جلوگیری کند. خدمات کشف موقعیت مکانی به c7000 اجازه می‌دهد تا مکان دقیق آن را قفسه‌های سری هوشمند HP به طور خودکار ثبت کرده و ردیابی‌های وقت‌گیر دستی را از حذف کند.</p>
<p>ماژول مدیریت این سرور (Onboard Administrator)، مدیریت محفظه، زیرسیستم و سفت افزار را پردازش می‌کند که برای پشتیبانی از محفظه‌های کلاس C سرور HP BladeSystem و تمام دستگاه‌های مدیریت شده موجود در آنها استفاده می‌گردد. این ماژول مدیریت، یک نقطه واحد را برای انجام وظایف مدیریتی روی تیغه‌های سرور یا سوئیچ‌های داخل محفظه فراهم می‌کند. در کنار نمایشگر محفظه HP، ماژول مدیریت (Onboard Administrator) هم به منظور مدیریت در محل و هم به منظور مدیریت از راه دور کلاس C سرور HP BladeSystem طراحی شده است.</p>
<h2>این ماژول و سفت‌افزارش امکانات زیر را فراهم می‌کند:</h2>
<p>تنظیمات ساده به منظور راه‌اندازی و پیکربندی سریع</p>
<p>دسترسی محلی و یا از راه دور بسیار ایمن و در دسترس به زیرساخت HP BladeSystem</p>
<p>نقش امنیتی برای مدیران سرورها، شبکه ها و ذخیره‌سازی</p>
<p>تأمین انرژی و سرمایش محفظه بصورت خودکار</p>
<p>وضعیت و سلامت دستگاه بدون عامل</p>
<p>اطلاعات و کنترل انرژی و خنک‌کنندگی</p>
<p>هر محفظه با یک ماژول یا سفت‌افزار مدیریتی کار می‌کند. سرورهای BladeSystem Platinum Enclosures می‌توانند با ماژول‌های Onboard Administrator پیکربندی شوند تا قابلیت مدیریت بی‌وقفه کل محفظه و تیغه ها فراهم شود. هنگامی که دو ماژول مدیریت Onboard Administrator وجود دارند، آن‌ها در حالت آماده‌به‌کار- فعال کار می‌کنند و به این وسیله، افزونگی کامل مدیریت یکپارچه محفظه را تضمین می‌کنند.</p>
<p><strong>مشخصات سرور HP c7000 Enclosure</strong></p>
<p><strong>ویژگی‌های فنی</strong></p>
<p><strong>ویژگی‌های سیستم خنک‌کننده</strong></p>
<ul>
<li>۱۰ فن خنک‌کننده</li>
</ul>
<p><strong>مشخصات ظاهری</strong></p>
<p>– ۸ تیغه تمام قد/ ۱۶ تیغه نیم قد</p>
<p>– پشتیبانی از پیکربندی ترکیبی</p>
<p><strong>پشتیبانی از سیستم‌های تیغه‌ای (BladeSystems)</strong></p>
<p><strong>– </strong>تیغه‌های ذخیره‌سازی، HP Proliant و Integrity در پیکربندی‌های مختلط و یا همگن</p>
<p><strong>ویژگیهای مدیریتی</strong></p>
<p>– مجوز نرم افزار oneview</p>
<p><strong>دسترسی به انرژی</strong></p>
<p>– کیت منبع تغذیه پلاتینوم تک فاز ۲۴۰۰ وات</p>
<p><strong>چه امکاناتی گنجانده شده است:</strong></p>
<p>-(۱) HP BLc7000، (۶) منبع تغذیه، (۱۰) فن خنک‌کننده، (۱) ماژول مدیریت با ماشین مجازی مبتنی بر کِرنِل، (۱۶) لایسنس کامل نرم‌افزار OneView</p>
<p><strong>مزایای متمایزکننده محصول</strong></p>
<ul>
<li>تک‌فاز، ۶ منبع تغذیه، ۱۰ فن خنک‌کننده، لایسنس کامل <a href="https://shop.vcenter.ir/product-category/brand/hpe">نرم‌افزار OneView</a></li>
</ul>
<p><strong>گارانتی</strong></p>
<p>۳/۳/۳ (قطعات-نصب-تعمیر)</p>
<p><strong>ابعاد و وزن</strong></p>
<p><strong>ابعاد(ارتفاع‌، طول، عرض)</strong></p>
<p><strong>– </strong>۷۵٫۸۹ x 60.65 x 101.29 cm (29.88 x 23.88 x 39.88 in)</p>
<p><strong>وزن</strong></p>
<p><strong>– </strong>۱۳۶٫۰۸ kg (300 lb)</p>
<p>&nbsp;</p>
<h2><strong>اتصالات HP c7000 Enclosure</strong></h2>
<p><strong>اتصال مجازی HP</strong></p>
<p>اتصال مجازی HP یک سازه ضروری برای هر نوع محیط مجازی یا فضای ابری است. این مدیریت ارتباطی نوآورانه، اتصال سرور را ساده می‌کند و اضافه کردن، جابجایی و تغییر سرورها را در عرض چند دقیقه به جای انجام همین کار در چندین ساعت یا چندین روز امکان‌پذیر می سازد. ارتباط مجازی ساده‌ترین راه برای اتصال سرورها به هر شبکه است و پراکندگی شبکه را تا بیش از ۹۵ درصد کاهش می‌دهد.</p>
<p>دو نوع اصلی ماژول های اتصال مجازی که توسط مشتریان استفاده می شود HP Virtual Connect FlexFabric و HP Virtual Connect Flex-10 هستند.</p>
<p>اتصال مجازی HP FlexFabric</p>
<p><a href="https://server.vcenter.ir/wp-content/uploads/2020/11/install-and-configure-the-hp-c7000-blade-enclosure-2.png"><img loading="lazy" decoding="async" class="aligncenter wp-image-1443 size-full" src="https://server.vcenter.ir/wp-content/uploads/2020/11/install-and-configure-the-hp-c7000-blade-enclosure-2.png" alt="نصب و پیکربندی HP c7000 Blade Enclosure" width="573" height="406" srcset="https://server.vcenter.ir/wp-content/uploads/2020/11/install-and-configure-the-hp-c7000-blade-enclosure-2.png 573w, https://server.vcenter.ir/wp-content/uploads/2020/11/install-and-configure-the-hp-c7000-blade-enclosure-2-300x213.png 300w" sizes="(max-width: 573px) 100vw, 573px" /></a></p>
<p>به طور خلاصه یک ابزار برای عبور است و با سایر محصولات سوئیچ مبتنی بر استاندارد NPIV سازگار است. هرگونه تغییر در سرور نسبت به شبکه مرتبط با آن شفاف است، به طور شفاف سرورها را از SAN جدا کرده و مدیران SAN را از <a href="https://vcenter.ir">نگهداری سرور</a> خلاص می کند.</p>
<h2><strong>مرور</strong> <strong>کوتاه</strong></h2>
<p><strong>عملکرد</strong></p>
<p><strong>– </strong>۸ پیوند کانال فیبر ۲، ۴ یا ۸ گیگابایتی که به سوئیچ های SAN خارجی متصل هستند</p>
<p>– دو کانال فیبر SFP+ فرستنده و گیرنده به همراه ماژول ارتباط مجازی کانال فیبری</p>
<p>– ۱۶ درگاه downlink کانال فیبرخودکار ۱/۲/۴/۸ گیگابایت که عملکرد حداکثر HBA را ارائه می دهد</p>
<p>– تجمیع HBA در درگاههای پیوند دهنده با استفاده از فناوری مجازی سازی N_Port ID مبتنی بر استانداردهای (NPIV)</p>
<p>– اجازه می دهد تا حداکثر ۲۵۵ دستگاه مجازی که در همان سرور فیزیکی در حال کار هستند ، به منابع ذخیره سازی جداگانه دسترسی داشته باشند.</p>
<p>– توان عملیاتی با تأخیر بسیار پایین عملکرد شبیه به سوئیچ را ایجاد می کند.</p>
<p>– مدیریت ذخیره سازی دیگر محدود به یک HBA فیزیکی واحد در <a href="https://shop.vcenter.ir/product-category/servers/">تیغه سرور</a> نیست.</p>
<p><strong>مدیریت</strong></p>
<p>– دیگر مدیریت ذخیره‌سازی فقط بر یک کارت HBA فیزیکی بر روی یک سرور blade تحمیل نمی‌شود.</p>
<p>– با ماژول اترنتِ ارتباط مجازی مدیریت می‌شود.</p>
<p>– دامنه‌های سوئیچ SAN را اضافه نمی کند یا به مدیریت سنتی SAN نیاز ندارد</p>
<p>– برای مدیر SAN به عنوان یک وسیله پس‌ترو ظاهر می‌شود.</p>
<p><strong>پروفایل های سرور مجازی</strong></p>
<p>– منبع ذخیره شده تأمین شده مستقیماً با یک ماشین مجازی خاص مرتبط است – حتی اگر به سرور مجازی درون BladeSystem مجدداً تخصیص داده شود.</p>
<p>– امکان پیش تنظیم کردن اتصالات ورودی/خروجی سرور</p>
<p>– امکان جابجایی ، اضافه یا تغییر سرورها در پرواز</p>
<p>– پس از تعریف، مدیران SAN مجبور نیستند درگیر تغییرات سرور باشند.</p>
<h4></h4>
<h2>ارتباط مجازی HP Flex-10/10D</h2>
<h4><a href="https://server.vcenter.ir/wp-content/uploads/2020/11/install-and-configure-the-hp-c7000-blade-enclosure-3.png"><img loading="lazy" decoding="async" class="alignnone wp-image-1444 size-full" src="https://server.vcenter.ir/wp-content/uploads/2020/11/install-and-configure-the-hp-c7000-blade-enclosure-3.png" alt="نصب و پیکربندی HP c7000 Blade Enclosure" width="573" height="413" srcset="https://server.vcenter.ir/wp-content/uploads/2020/11/install-and-configure-the-hp-c7000-blade-enclosure-3.png 573w, https://server.vcenter.ir/wp-content/uploads/2020/11/install-and-configure-the-hp-c7000-blade-enclosure-3-300x216.png 300w" sizes="(max-width: 573px) 100vw, 573px" /></a></h4>
<h4>عملکرد</h4>
<h4><strong>–</strong> <strong>پیوند ۱۶*۱۰ گیگابایتی به سرورهای NIC</strong></h4>
<p><strong>– </strong>هر پیوند ۱۰ گیگابایتی حداکثر ۴ FlexNIC یا ۳ FlexNIC و ۱ iSCSI FlexHBA را پشتیبانی می کند.</p>
<p>– هر iSCSI FlexHBA را می توان برای انتقال شتابiSCSI تنظیم کرد.</p>
<p>– هر FlexNIC و iSCSI FlexHBA توسط سرور به عنوان یک دستگاه فیزیکی PCI-e با سرعت قابل تنظیم از ۱۰۰مگابیت به ۱۰گیگابیت با افزایش ۱۰۰ مگابیتی در هنگام اتصال به رابط همگراکننده شبکهHP NC553i دو پورتی FlexFabric 10 گیگابیتی یا هر Flex-10 NIC 1 گیگابایت به ۱۰ گیگابایت با افزایش ۱۰۰ مگابایتی هنگام اتصال به یک رابط همگراکننده شبکه NC551m دو پورتی FlexFAbric 10 گیگابیتی یا رابط همگراکننده شبکه NC551m دوپورتی FlexFabric 10 گیگابیتی شامل همگراکننده NC554FLB دو پورتی FlexFabric</p>
<p>– ارتباطات ضربدری ۴*۱۰ گیگابایتی برای افزونگی و انباشت</p>
<p>– پیوندهای ۱۰ *۱۰ گیگابایتیSR ، LR یا LRM فیبری و SFP+ مسی</p>
<p>– حداکثر ۴ FlexNIC را به ازای هر اتصال سرور ۱۰ گیگابایتی پشتیبانی می کند.</p>
<p>– هر FlexNIC توسط سرور به عنوان یک دستگاه عملکرد فیزیکی PCI-e با سرعت قابل تنظیم از ۱۰۰ مگابایت به ۱۰ گیگابایت شناخته می شود.</p>
<p>– نرخ خط، پل فول دوبلکس ۶۰۰ گیگابیتی</p>
<p>– تاخیر ۱ میکرو ثانیه</p>
<p>– MTU حداکثر ۹۲۱۶ بایت – فریم‌های جامبو</p>
<p>– پشتیبانی از آدرس های ۱۲۸ کیلوبایتی MACو گروه های۱ کیلوبایتی IGMP</p>
<p>– برچسب گذاری VLAN، پس ترو ، پشتیبانی از تجمیع لینک‌ها در تمام پیوندها</p>
<p>– در حالت تونل VLAN، حداکثر ۴،۰۹۶ شبکه برای هر uplink و downlink سرور، پشتیبانی می‌شود. در حالت VLAN نگاشت شده، حداکثر ۱۰۰۰ شبکه در شبکه‌های uplink برای اشتراک‌گذاری مجموعه uplinkها،دامنه‌ یا ماژول پشتیبانی می شوند و روی لینک های سرور حداکثر ۱۶۲ شبکه برای هر پورت فیزیکی ۱۰ گیگابایتی پشتیبانی می شوند .(vcورژن ۳۰ یا بالاتر)</p>
<p>– چندین ماژول ارتباط مجازی Flex-10/10Dرا با سایر VC Flex-10 / 10D ، VC FlexFabric یا VC Flex-10 را با ۴ محفظه BladeSstem تجمیع کنید تا اجازه دهد هر پورت اترنت به هر uplink اترنت متصل شود.</p>
<p><strong>مدیریت</strong></p>
<p><strong>– </strong>مدیریت اتصال مجازی برای هر ماژولی را شامل میشود</p>
<p>– HTTPS و یک رابط امن و قابل اسکریپت نویسیCLI آماده به کار، خارج از جعبه است. راه اندازی و مدیریت آسان از طریق رابط مدیر پردازنده</p>
<p>– SNMP ورژن ۱و۲و۳ سهولت استفاده و نگهداری را فراهم میسازد.</p>
<p>– Port Mirroring در هر پیوند ، پشتیبانی از <a href="https://vcenter.ir">عیب یابی شبکه</a> را با آنالایزر شبکه فراهم میکند.</p>
<p>– IGMP Snooping ترافیک شبکه را بهینه می کند و از پهنای باند برای برنامه های چندکاره مانند برنامه های در جریان استفاده می کند</p>
<p>– امنیت مبتنی بر نقش برای مدیریت شبکه و سرور و سازگاری با LDAP ، TACACS + و RADIUS</p>
<p>– سفت‌افزار ارتباط مجازی را از راه دور روی چندین ماژول با استفاده از Virtual Connect Support Utility 1.10.1 بروزرسانی کنید.</p>
<p>– پر کردن خودکار CLI با کلید TAB</p>
<p>– پایان زمان جلسه CLI و GUI برای امنیت</p>
<p>– قابلیت تنظیم QOS براساس DOT1P و DSCP</p>
<p>– فیلتر قابل تنظیم ترافیک چندمسیره</p>
<p>– نظارت بر sFlow</p>
<p>&nbsp;</p>
<h2><strong>پروفایل‌های اتصال سرور مجازی</strong></h2>
<p><strong>– </strong>حداکثر ۴ FlexNIC را با استفاده از پهنای باند اختصاصی ۱۰ گیگابایتی برای هر اتصال را ایجاد کنید.</p>
<p>–     سرعت FlexNIC را از ۱۰۰مگابیت به ۱۰ گیگابیت در هر اتصال تنظیم کنید.</p>
<p>– تنظیمات اتصال سرور قبل از نصب سرور را برای استفاده آسان امکان پذیر می سازد. همچنین امکان جابجایی ، اضافه کردن یا تغییر اتصالات شبکه سرور در پرواز را می ‌دهد.</p>
<p>–    پس از تعریف ، لازم نیست مدیران LAN و SAN درگیر تغییرات سرور باشند.</p>
<p><strong>کانال‌های سوییچ فیبری</strong></p>
<p>سوییچ Brocade 8Gb SAN</p>
<p><a href="https://server.vcenter.ir/wp-content/uploads/2020/11/install-and-configure-the-hp-c7000-blade-enclosure-4.png"><img loading="lazy" decoding="async" class="alignnone wp-image-1445 size-full" src="https://server.vcenter.ir/wp-content/uploads/2020/11/install-and-configure-the-hp-c7000-blade-enclosure-4.png" alt="نصب و پیکربندی HP c7000 Blade Enclosure" width="500" height="148" srcset="https://server.vcenter.ir/wp-content/uploads/2020/11/install-and-configure-the-hp-c7000-blade-enclosure-4.png 500w, https://server.vcenter.ir/wp-content/uploads/2020/11/install-and-configure-the-hp-c7000-blade-enclosure-4-300x89.png 300w" sizes="(max-width: 500px) 100vw, 500px" /></a></p>
<p><strong>خدمات اساسی پیشرفته</strong></p>
<p><strong>– طبقه‌بندی اجرای سخت افزار (گنجانده شده)</strong></p>
<p><strong>– انتخاب مسیر پویا (گنجانده شده)</strong></p>
<p><strong>– ابزارهای وب ( گنجانده شده)</strong></p>
<p><strong>– مدیریت گروه پیشرفته(EGM)</strong></p>
<p><strong>– پکیج قدرتمند به علاوه بسته نرم‌افزاری خدمات ضروری( اختیاری)</strong></p>
<p><strong>– چشم انداز اساسی</strong></p>
<p><strong>– ISL Trunking</strong></p>
<p><strong>-ساعت فابریک</strong></p>
<p><strong>– نظارت بر عملکرد پیشرفته</strong></p>
<p><strong>– سیستم عامل ایمن( گنجانده شده در FOS پایه)</strong></p>
<p><strong>– مشاور شبکه SAN( اختیاری)</strong></p>
<p><strong>قابلیت مدیریت</strong></p>
<p>– ابزار وب(گنجانده شده)</p>
<p>– مدیریت گروه پیشرفته( EGM)</p>
<p>– نظارت بر عملکرد پیشرفته ( اختیاری پکیج + ارتقا)</p>
<p>– سرپرست HP Onboard ( همراه با HP BladeSystem)</p>
<p>– مدیری سیستم بینش HP( همراه با HP BladeSystem)</p>
<p>– ملزومات ذخیره‌سازی HP</p>
<p>– API</p>
<p>– SNMP</p>
<h2><strong>قابلیت همکاری</strong></h2>
<p>Brocade Access Gateway سوئیچ های تعبیه شده SAN Brocade را قادر می سازد تا با سایر قسمت‌های SAN که سیستم عامل پشتیبانی را اجرا می کنند ، به هم پیوسته شوند. در حالی که در حالت Brocade Access Gateway ، دستگاه نیز باید به یک سوئیچ یا مدیر لبه فعال NPIV وصل شود. محیط‌های پشتیبانی شده در یادداشت های انتشار Brocade Fabric OS® ذکر شده اند.</p>
<p>پیکربندی محفظه HP c7000</p>
<p>پیکربندی محفظه HP c7000 – نمایش بینش</p>
<p>اولین قدم برای پیکربندی محفظه ، پیکربندی آدرس IP با استفاده از Insight Display است.</p>
<p>۱٫به تنظیمات محفظه بروید</p>
<p><a href="https://server.vcenter.ir/wp-content/uploads/2020/11/install-and-configure-the-hp-c7000-blade-enclosure-5.png"><img loading="lazy" decoding="async" class="alignnone wp-image-1446 size-full" src="https://server.vcenter.ir/wp-content/uploads/2020/11/install-and-configure-the-hp-c7000-blade-enclosure-5.png" alt="نصب و پیکربندی HP c7000 Blade Enclosure" width="319" height="242" srcset="https://server.vcenter.ir/wp-content/uploads/2020/11/install-and-configure-the-hp-c7000-blade-enclosure-5.png 319w, https://server.vcenter.ir/wp-content/uploads/2020/11/install-and-configure-the-hp-c7000-blade-enclosure-5-300x228.png 300w" sizes="(max-width: 319px) 100vw, 319px" /></a></p>
<p>۲٫ به Active OA بروید و OK را کلیک کنید.</p>
<p><a href="https://server.vcenter.ir/wp-content/uploads/2020/11/install-and-configure-the-hp-c7000-blade-enclosure-6.png"><img loading="lazy" decoding="async" class="alignnone wp-image-1447 size-full" src="https://server.vcenter.ir/wp-content/uploads/2020/11/install-and-configure-the-hp-c7000-blade-enclosure-6.png" alt="نصب و پیکربندی HP c7000 Blade Enclosure" width="319" height="242" srcset="https://server.vcenter.ir/wp-content/uploads/2020/11/install-and-configure-the-hp-c7000-blade-enclosure-6.png 319w, https://server.vcenter.ir/wp-content/uploads/2020/11/install-and-configure-the-hp-c7000-blade-enclosure-6-300x228.png 300w" sizes="(max-width: 319px) 100vw, 319px" /></a></p>
<p>۳٫ به Active IPv4 بروید و OK را بزنید.</p>
<p><a href="https://server.vcenter.ir/wp-content/uploads/2020/11/install-and-configure-the-hp-c7000-blade-enclosure-7.png"><img loading="lazy" decoding="async" class="alignnone wp-image-1448 size-full" src="https://server.vcenter.ir/wp-content/uploads/2020/11/install-and-configure-the-hp-c7000-blade-enclosure-7.png" alt="نصب و پیکربندی HP c7000 Blade Enclosure" width="321" height="242" srcset="https://server.vcenter.ir/wp-content/uploads/2020/11/install-and-configure-the-hp-c7000-blade-enclosure-7.png 321w, https://server.vcenter.ir/wp-content/uploads/2020/11/install-and-configure-the-hp-c7000-blade-enclosure-7-300x226.png 300w" sizes="(max-width: 321px) 100vw, 321px" /></a></p>
<p>۴٫ مقدار مناسب را انتخاب کنید – پیکربندی IP استاتیک یا DHCP و OK را کلیک کنید.</p>
<p><a href="https://server.vcenter.ir/wp-content/uploads/2020/11/install-and-configure-the-hp-c7000-blade-enclosure-8.png"><img loading="lazy" decoding="async" class="alignnone wp-image-1449 size-full" src="https://server.vcenter.ir/wp-content/uploads/2020/11/install-and-configure-the-hp-c7000-blade-enclosure-8.png" alt="نصب و پیکربندی HP c7000 Blade Enclosure" width="322" height="244" srcset="https://server.vcenter.ir/wp-content/uploads/2020/11/install-and-configure-the-hp-c7000-blade-enclosure-8.png 322w, https://server.vcenter.ir/wp-content/uploads/2020/11/install-and-configure-the-hp-c7000-blade-enclosure-8-300x227.png 300w" sizes="(max-width: 322px) 100vw, 322px" /></a></p>
<p>۵٫ رابط شما را به سمت دکمه پذیرش هدایت می کند. تأیید را کلیک کنید.</p>
<p><a href="https://server.vcenter.ir/wp-content/uploads/2020/11/install-and-configure-the-hp-c7000-blade-enclosure-9.png"><img loading="lazy" decoding="async" class="alignnone wp-image-1450 size-full" src="https://server.vcenter.ir/wp-content/uploads/2020/11/install-and-configure-the-hp-c7000-blade-enclosure-9.png" alt="نصب و پیکربندی HP c7000 Blade Enclosure" width="321" height="241" srcset="https://server.vcenter.ir/wp-content/uploads/2020/11/install-and-configure-the-hp-c7000-blade-enclosure-9.png 321w, https://server.vcenter.ir/wp-content/uploads/2020/11/install-and-configure-the-hp-c7000-blade-enclosure-9-300x225.png 300w" sizes="(max-width: 321px) 100vw, 321px" /></a></p>
<p>۶٫ اکنون می توانید آدرس IP خود را وارد کنید. مدتی طول می کشد و پس از تنظیم آدرس IP به Accept بروید.</p>
<p><a href="https://server.vcenter.ir/wp-content/uploads/2020/11/install-and-configure-the-hp-c7000-blade-enclosure-10.png"><img loading="lazy" decoding="async" class="alignnone wp-image-1451 size-full" src="https://server.vcenter.ir/wp-content/uploads/2020/11/install-and-configure-the-hp-c7000-blade-enclosure-10.png" alt="نصب و پیکربندی HP c7000 Blade Enclosure" width="320" height="239" srcset="https://server.vcenter.ir/wp-content/uploads/2020/11/install-and-configure-the-hp-c7000-blade-enclosure-10.png 320w, https://server.vcenter.ir/wp-content/uploads/2020/11/install-and-configure-the-hp-c7000-blade-enclosure-10-300x224.png 300w" sizes="(max-width: 320px) 100vw, 320px" /></a></p>
<p>۷٫ همین کار را با ماژول دوم پردازنده مدیر انجام دهید و اکنون می توانیم به پیکربندی مبتنی بر وب برویم.</p>
<p><a href="https://server.vcenter.ir/wp-content/uploads/2020/11/install-and-configure-the-hp-c7000-blade-enclosure-11.png"><img loading="lazy" decoding="async" class="alignnone wp-image-1452 size-full" src="https://server.vcenter.ir/wp-content/uploads/2020/11/install-and-configure-the-hp-c7000-blade-enclosure-11.png" alt="نصب و پیکربندی HP c7000 Blade Enclosure" width="319" height="243" srcset="https://server.vcenter.ir/wp-content/uploads/2020/11/install-and-configure-the-hp-c7000-blade-enclosure-11.png 319w, https://server.vcenter.ir/wp-content/uploads/2020/11/install-and-configure-the-hp-c7000-blade-enclosure-11-300x229.png 300w" sizes="(max-width: 319px) 100vw, 319px" /></a></p>
<h2><strong>پیکربندی محفظه HP c7000 – راه اندازی برای اولین بار</strong></h2>
<p>پس از ورود با موفقیت به محفظه، شما توسط راه انداز برای اولین بار مورد استقبال قرار خواهید گرفت..ما از آنجا اکثر تنظیمات پیکربندی را انجام خواهیم داد.</p>
<p>۱٫تیک گزینه این صفحه را دوباره نشان نده را بزنید و سپس بر روی Next کلیک کنید</p>
<p><a href="https://server.vcenter.ir/wp-content/uploads/2020/11/install-and-configure-the-hp-c7000-blade-enclosure-12.png"><img loading="lazy" decoding="async" class="alignnone wp-image-1453 size-full" src="https://server.vcenter.ir/wp-content/uploads/2020/11/install-and-configure-the-hp-c7000-blade-enclosure-12.png" alt="نصب و پیکربندی HP c7000 Blade Enclosure" width="996" height="436" srcset="https://server.vcenter.ir/wp-content/uploads/2020/11/install-and-configure-the-hp-c7000-blade-enclosure-12.png 996w, https://server.vcenter.ir/wp-content/uploads/2020/11/install-and-configure-the-hp-c7000-blade-enclosure-12-300x131.png 300w, https://server.vcenter.ir/wp-content/uploads/2020/11/install-and-configure-the-hp-c7000-blade-enclosure-12-768x336.png 768w" sizes="(max-width: 996px) 100vw, 996px" /></a></p>
<p>۲٫ در صفحه بعدی می توانید FIPS (استانداردهای پردازش اطلاعات فدرال) را انتخاب کنید که به طور خلاصه مجموعه ای از ماژول‌های رمزنگاری استاندارد است. آن را با توجه به نیاز خود انتخاب کنید.</p>
<p><a href="https://server.vcenter.ir/wp-content/uploads/2020/11/install-and-configure-the-hp-c7000-blade-enclosure-14.png"><img loading="lazy" decoding="async" class="alignnone wp-image-1455 size-full" src="https://server.vcenter.ir/wp-content/uploads/2020/11/install-and-configure-the-hp-c7000-blade-enclosure-14.png" alt="نصب و پیکربندی HP c7000 Blade Enclosure" width="996" height="744" srcset="https://server.vcenter.ir/wp-content/uploads/2020/11/install-and-configure-the-hp-c7000-blade-enclosure-14.png 996w, https://server.vcenter.ir/wp-content/uploads/2020/11/install-and-configure-the-hp-c7000-blade-enclosure-14-300x224.png 300w, https://server.vcenter.ir/wp-content/uploads/2020/11/install-and-configure-the-hp-c7000-blade-enclosure-14-768x574.png 768w" sizes="(max-width: 996px) 100vw, 996px" /></a></p>
<p>۳٫محفظه خود را انتخاب کنید و روی Next کلیک کنید.</p>
<p><a href="https://server.vcenter.ir/wp-content/uploads/2020/11/install-and-configure-the-hp-c7000-blade-enclosure-15.png"><img loading="lazy" decoding="async" class="alignnone wp-image-1456 size-full" src="https://server.vcenter.ir/wp-content/uploads/2020/11/install-and-configure-the-hp-c7000-blade-enclosure-15.png" alt="نصب و پیکربندی HP c7000 Blade Enclosure" width="996" height="530" srcset="https://server.vcenter.ir/wp-content/uploads/2020/11/install-and-configure-the-hp-c7000-blade-enclosure-15.png 996w, https://server.vcenter.ir/wp-content/uploads/2020/11/install-and-configure-the-hp-c7000-blade-enclosure-15-300x160.png 300w, https://server.vcenter.ir/wp-content/uploads/2020/11/install-and-configure-the-hp-c7000-blade-enclosure-15-768x409.png 768w" sizes="(max-width: 996px) 100vw, 996px" /></a></p>
<p>۴٫ اگر قبلاً فایل پیکربندی را ذخیره کرده اید می توانید از آن برای تنظیم محفظه استفاده کنید.</p>
<p><a href="https://server.vcenter.ir/wp-content/uploads/2020/11/install-and-configure-the-hp-c7000-blade-enclosure-16.png"><img loading="lazy" decoding="async" class="alignnone wp-image-1457 size-full" src="https://server.vcenter.ir/wp-content/uploads/2020/11/install-and-configure-the-hp-c7000-blade-enclosure-16.png" alt="نصب و پیکربندی HP c7000 Blade Enclosure" width="992" height="612" srcset="https://server.vcenter.ir/wp-content/uploads/2020/11/install-and-configure-the-hp-c7000-blade-enclosure-16.png 992w, https://server.vcenter.ir/wp-content/uploads/2020/11/install-and-configure-the-hp-c7000-blade-enclosure-16-300x185.png 300w, https://server.vcenter.ir/wp-content/uploads/2020/11/install-and-configure-the-hp-c7000-blade-enclosure-16-768x474.png 768w" sizes="(max-width: 992px) 100vw, 992px" /></a></p>
<p>۵٫نام قفسه، نام محفظه و زمان و تاریخ را وارد کنید. پیشنهاد می کنم از سرور NTP استفاده کنید تا همیشه تنظیمات زمان و تاریخ به روز باشد.</p>
<p><a href="https://server.vcenter.ir/wp-content/uploads/2020/11/install-and-configure-the-hp-c7000-blade-enclosure-17.png"><img loading="lazy" decoding="async" class="alignnone wp-image-1458 size-full" src="https://server.vcenter.ir/wp-content/uploads/2020/11/install-and-configure-the-hp-c7000-blade-enclosure-17.png" alt="نصب و پیکربندی HP c7000 Blade Enclosure" width="1062" height="806" srcset="https://server.vcenter.ir/wp-content/uploads/2020/11/install-and-configure-the-hp-c7000-blade-enclosure-17.png 1062w, https://server.vcenter.ir/wp-content/uploads/2020/11/install-and-configure-the-hp-c7000-blade-enclosure-17-300x228.png 300w, https://server.vcenter.ir/wp-content/uploads/2020/11/install-and-configure-the-hp-c7000-blade-enclosure-17-1024x777.png 1024w, https://server.vcenter.ir/wp-content/uploads/2020/11/install-and-configure-the-hp-c7000-blade-enclosure-17-768x583.png 768w" sizes="(max-width: 1062px) 100vw, 1062px" /></a></p>
<p>۶٫ می توانید قبل از استفاده از نمایش بینش محفظه ، رمز ورود را برای مدیر تغییر داده و محافظت از PIN را فعال کنید. روی Next کلیک کنید.</p>
<p><a href="https://server.vcenter.ir/wp-content/uploads/2020/11/install-and-configure-the-hp-c7000-blade-enclosure-18.png"><img loading="lazy" decoding="async" class="alignnone wp-image-1459 size-full" src="https://server.vcenter.ir/wp-content/uploads/2020/11/install-and-configure-the-hp-c7000-blade-enclosure-18.png" alt="نصب و پیکربندی HP c7000 Blade Enclosure" width="1063" height="621" srcset="https://server.vcenter.ir/wp-content/uploads/2020/11/install-and-configure-the-hp-c7000-blade-enclosure-18.png 1063w, https://server.vcenter.ir/wp-content/uploads/2020/11/install-and-configure-the-hp-c7000-blade-enclosure-18-300x175.png 300w, https://server.vcenter.ir/wp-content/uploads/2020/11/install-and-configure-the-hp-c7000-blade-enclosure-18-1024x598.png 1024w, https://server.vcenter.ir/wp-content/uploads/2020/11/install-and-configure-the-hp-c7000-blade-enclosure-18-768x449.png 768w" sizes="(max-width: 1063px) 100vw, 1063px" /></a></p>
<p>۷٫ در بخش بعدی می توانیم حساب کاربری محلی دیگری ایجاد کنیم. بگذارید فقط یک مورد ایجاد کنیم تا به شما نشان دهیم چگونه این کار را می کنیم. روی گزینه New کلیک کنید.</p>
<p><a href="https://server.vcenter.ir/wp-content/uploads/2020/11/install-and-configure-the-hp-c7000-blade-enclosure-19.png"><img loading="lazy" decoding="async" class="alignnone wp-image-1460 size-full" src="https://server.vcenter.ir/wp-content/uploads/2020/11/install-and-configure-the-hp-c7000-blade-enclosure-19.png" alt="نصب و پیکربندی HP c7000 Blade Enclosure" width="1063" height="484" srcset="https://server.vcenter.ir/wp-content/uploads/2020/11/install-and-configure-the-hp-c7000-blade-enclosure-19.png 1063w, https://server.vcenter.ir/wp-content/uploads/2020/11/install-and-configure-the-hp-c7000-blade-enclosure-19-300x137.png 300w, https://server.vcenter.ir/wp-content/uploads/2020/11/install-and-configure-the-hp-c7000-blade-enclosure-19-1024x466.png 1024w, https://server.vcenter.ir/wp-content/uploads/2020/11/install-and-configure-the-hp-c7000-blade-enclosure-19-768x350.png 768w" sizes="(max-width: 1063px) 100vw, 1063px" /></a></p>
<p>۸٫ نام کاربری ، رمز عبور و سطح امتیاز را ارائه دهید. در قسمت سمت راست صفحه انتخاب کنید که کاربر باید به چه جایی دسترسی داشته باشد. در انتها روی Add user کلیک کنید.</p>
<p><a href="https://server.vcenter.ir/wp-content/uploads/2020/11/install-and-configure-the-hp-c7000-blade-enclosure-20.png"><img loading="lazy" decoding="async" class="alignnone wp-image-1461 size-full" src="https://server.vcenter.ir/wp-content/uploads/2020/11/install-and-configure-the-hp-c7000-blade-enclosure-20.png" alt="نصب و پیکربندی HP c7000 Blade Enclosure" width="1064" height="691" srcset="https://server.vcenter.ir/wp-content/uploads/2020/11/install-and-configure-the-hp-c7000-blade-enclosure-20.png 1064w, https://server.vcenter.ir/wp-content/uploads/2020/11/install-and-configure-the-hp-c7000-blade-enclosure-20-300x195.png 300w, https://server.vcenter.ir/wp-content/uploads/2020/11/install-and-configure-the-hp-c7000-blade-enclosure-20-1024x665.png 1024w, https://server.vcenter.ir/wp-content/uploads/2020/11/install-and-configure-the-hp-c7000-blade-enclosure-20-768x499.png 768w" sizes="(max-width: 1064px) 100vw, 1064px" /></a></p>
<p>۹٫در صفحه بعدی EBIPA را پیکربندی خواهیم کرد- محصور کردن با آدرس IP . EBIPA دامنه DHCP داخلی برای Blades iLO و دستگاه های موجود در محفظه (HP virtual connect یا HP access Gataway)است. روی Next کلیک کنید.</p>
<p><a href="https://server.vcenter.ir/wp-content/uploads/2020/11/install-and-configure-the-hp-c7000-blade-enclosure-21.png"><img loading="lazy" decoding="async" class="alignnone wp-image-1462 size-full" src="https://server.vcenter.ir/wp-content/uploads/2020/11/install-and-configure-the-hp-c7000-blade-enclosure-21.png" alt="نصب و پیکربندی HP c7000 Blade Enclosure" width="1065" height="444" srcset="https://server.vcenter.ir/wp-content/uploads/2020/11/install-and-configure-the-hp-c7000-blade-enclosure-21.png 1065w, https://server.vcenter.ir/wp-content/uploads/2020/11/install-and-configure-the-hp-c7000-blade-enclosure-21-300x125.png 300w, https://server.vcenter.ir/wp-content/uploads/2020/11/install-and-configure-the-hp-c7000-blade-enclosure-21-1024x427.png 1024w, https://server.vcenter.ir/wp-content/uploads/2020/11/install-and-configure-the-hp-c7000-blade-enclosure-21-768x320.png 768w" sizes="(max-width: 1065px) 100vw, 1065px" /></a></p>
<p>۱۰٫ما باید ابتدا آدرس EBIPA، Subnet Mask، Gateway، Domain و DNS Servers را پر کنیم. قدم بعدی کلیک بر روی autofill است که طیف وسیعی را پر می‌کند.</p>
<p><a href="https://server.vcenter.ir/wp-content/uploads/2020/11/install-and-configure-the-hp-c7000-blade-enclosure-22.png"><img loading="lazy" decoding="async" class="alignnone wp-image-1463 size-full" src="https://server.vcenter.ir/wp-content/uploads/2020/11/install-and-configure-the-hp-c7000-blade-enclosure-22.png" alt="نصب و پیکربندی HP c7000 Blade Enclosure" width="1001" height="939" srcset="https://server.vcenter.ir/wp-content/uploads/2020/11/install-and-configure-the-hp-c7000-blade-enclosure-22.png 1001w, https://server.vcenter.ir/wp-content/uploads/2020/11/install-and-configure-the-hp-c7000-blade-enclosure-22-300x281.png 300w, https://server.vcenter.ir/wp-content/uploads/2020/11/install-and-configure-the-hp-c7000-blade-enclosure-22-768x720.png 768w" sizes="(max-width: 1001px) 100vw, 1001px" /></a></p>
<p>۱۱٫ ما همین کار را برای Interconnect Bays انجام می دهیم و روی Next کلیک می کنیم.</p>
<p><a href="https://server.vcenter.ir/wp-content/uploads/2020/11/install-and-configure-the-hp-c7000-blade-enclosure-23.png"><img loading="lazy" decoding="async" class="alignnone wp-image-1464 size-full" src="https://server.vcenter.ir/wp-content/uploads/2020/11/install-and-configure-the-hp-c7000-blade-enclosure-23.png" alt="نصب و پیکربندی HP c7000 Blade Enclosure" width="868" height="595" srcset="https://server.vcenter.ir/wp-content/uploads/2020/11/install-and-configure-the-hp-c7000-blade-enclosure-23.png 868w, https://server.vcenter.ir/wp-content/uploads/2020/11/install-and-configure-the-hp-c7000-blade-enclosure-23-300x206.png 300w, https://server.vcenter.ir/wp-content/uploads/2020/11/install-and-configure-the-hp-c7000-blade-enclosure-23-768x526.png 768w" sizes="(max-width: 868px) 100vw, 868px" /></a></p>
<p>۱۲٫ می توانید IPv6 را به همان روش پیکربندی کنید. من این را رد کردم و به مرحله بعدی حرکت کردم.</p>
<p>۱۳٫ مرحله بعدی پیکربندی گروه های دایرکتوری است.</p>
<p><a href="https://server.vcenter.ir/wp-content/uploads/2020/11/install-and-configure-the-hp-c7000-blade-enclosure-24.png"><img loading="lazy" decoding="async" class="alignnone wp-image-1465 size-full" src="https://server.vcenter.ir/wp-content/uploads/2020/11/install-and-configure-the-hp-c7000-blade-enclosure-24.png" alt="نصب و پیکربندی HP c7000 Blade Enclosure" width="1067" height="471" srcset="https://server.vcenter.ir/wp-content/uploads/2020/11/install-and-configure-the-hp-c7000-blade-enclosure-24.png 1067w, https://server.vcenter.ir/wp-content/uploads/2020/11/install-and-configure-the-hp-c7000-blade-enclosure-24-300x132.png 300w, https://server.vcenter.ir/wp-content/uploads/2020/11/install-and-configure-the-hp-c7000-blade-enclosure-24-1024x452.png 1024w, https://server.vcenter.ir/wp-content/uploads/2020/11/install-and-configure-the-hp-c7000-blade-enclosure-24-768x339.png 768w" sizes="(max-width: 1067px) 100vw, 1067px" /></a></p>
<p>۱۴٫ روی New کلیک کرده و نام گروه را اضافه کنید ، سطح امتیاز را تنظیم کنید و مجوزهای لازم را به گروه بدهید. پس از آن بر روی گزینه add group setting کلیک کنید.</p>
<p><a href="https://server.vcenter.ir/wp-content/uploads/2020/11/install-and-configure-the-hp-c7000-blade-enclosure-25.png"><img loading="lazy" decoding="async" class="alignnone wp-image-1466 size-full" src="https://server.vcenter.ir/wp-content/uploads/2020/11/install-and-configure-the-hp-c7000-blade-enclosure-25.png" alt="نصب و پیکربندی HP c7000 Blade Enclosure" width="847" height="602" srcset="https://server.vcenter.ir/wp-content/uploads/2020/11/install-and-configure-the-hp-c7000-blade-enclosure-25.png 847w, https://server.vcenter.ir/wp-content/uploads/2020/11/install-and-configure-the-hp-c7000-blade-enclosure-25-300x213.png 300w, https://server.vcenter.ir/wp-content/uploads/2020/11/install-and-configure-the-hp-c7000-blade-enclosure-25-768x546.png 768w" sizes="(max-width: 847px) 100vw, 847px" /></a></p>
<p>۱۵٫ روی Next کلیک کنید و سپس ما تنظیمات Directory را انجام خواهیم داد.</p>
<p>۱۶٫ Enable LDAP Authentication را انتخاب کنید و از NT Acoount Name Mapping (username/domain) استفاده کنید.</p>
<p>تنظیمات زیر را انجام دهید:</p>
<p>۱٫ Directory Server Address</p>
<p>۲٫Directory Server SSL Port</p>
<p>۳٫ Search Context</p>
<p><a href="https://server.vcenter.ir/wp-content/uploads/2020/11/install-and-configure-the-hp-c7000-blade-enclosure-26.png"><img loading="lazy" decoding="async" class="alignnone wp-image-1467 size-full" src="https://server.vcenter.ir/wp-content/uploads/2020/11/install-and-configure-the-hp-c7000-blade-enclosure-26.png" alt="نصب و پیکربندی HP c7000 Blade Enclosure" width="1055" height="746" srcset="https://server.vcenter.ir/wp-content/uploads/2020/11/install-and-configure-the-hp-c7000-blade-enclosure-26.png 1055w, https://server.vcenter.ir/wp-content/uploads/2020/11/install-and-configure-the-hp-c7000-blade-enclosure-26-300x212.png 300w, https://server.vcenter.ir/wp-content/uploads/2020/11/install-and-configure-the-hp-c7000-blade-enclosure-26-1024x724.png 1024w, https://server.vcenter.ir/wp-content/uploads/2020/11/install-and-configure-the-hp-c7000-blade-enclosure-26-768x543.png 768w" sizes="(max-width: 1055px) 100vw, 1055px" /></a></p>
<p>۱۷٫ روی Next کلیک کنید و به Network Setting بروید.</p>
<p><a href="https://server.vcenter.ir/wp-content/uploads/2020/11/install-and-configure-the-hp-c7000-blade-enclosure-27.png"><img loading="lazy" decoding="async" class="alignnone wp-image-1468 size-full" src="https://server.vcenter.ir/wp-content/uploads/2020/11/install-and-configure-the-hp-c7000-blade-enclosure-27.png" alt="نصب و پیکربندی HP c7000 Blade Enclosure" width="1068" height="449" srcset="https://server.vcenter.ir/wp-content/uploads/2020/11/install-and-configure-the-hp-c7000-blade-enclosure-27.png 1068w, https://server.vcenter.ir/wp-content/uploads/2020/11/install-and-configure-the-hp-c7000-blade-enclosure-27-300x126.png 300w, https://server.vcenter.ir/wp-content/uploads/2020/11/install-and-configure-the-hp-c7000-blade-enclosure-27-1024x431.png 1024w, https://server.vcenter.ir/wp-content/uploads/2020/11/install-and-configure-the-hp-c7000-blade-enclosure-27-768x323.png 768w" sizes="(max-width: 1068px) 100vw, 1068px" /></a></p>
<p>۱۸٫ تنظیمات مربوط به هر دو ماژول مدیر پردازنده را فراهم کنید.</p>
<p>۱٫DNS Host Name</p>
<p>۲٫ IP Address</p>
<p>۳٫Subnet Mask</p>
<p>۴٫Gateway</p>
<p>۵٫DNS Server 1</p>
<p>۶٫DNS Server 2</p>
<p><a href="https://server.vcenter.ir/wp-content/uploads/2020/11/install-and-configure-the-hp-c7000-blade-enclosure-28.png"><img loading="lazy" decoding="async" class="alignnone wp-image-1469 size-full" src="https://server.vcenter.ir/wp-content/uploads/2020/11/install-and-configure-the-hp-c7000-blade-enclosure-28.png" alt="نصب و پیکربندی HP c7000 Blade Enclosure" width="1069" height="638" srcset="https://server.vcenter.ir/wp-content/uploads/2020/11/install-and-configure-the-hp-c7000-blade-enclosure-28.png 1069w, https://server.vcenter.ir/wp-content/uploads/2020/11/install-and-configure-the-hp-c7000-blade-enclosure-28-300x179.png 300w, https://server.vcenter.ir/wp-content/uploads/2020/11/install-and-configure-the-hp-c7000-blade-enclosure-28-1024x611.png 1024w, https://server.vcenter.ir/wp-content/uploads/2020/11/install-and-configure-the-hp-c7000-blade-enclosure-28-768x458.png 768w" sizes="(max-width: 1069px) 100vw, 1069px" /></a></p>
<p>۱۹٫ روس Nextکلیک کنید(از تنظیمات IP6 رد می‌شویم) و به صفحه تنظیمات می‌رویم</p>
<p>۲۰٫ تقریباً در پایان می توانید تنظیمات SNMP را پیکربندی کنید که من آن را رد کردم.</p>
<p><a href="https://server.vcenter.ir/wp-content/uploads/2020/11/install-and-configure-the-hp-c7000-blade-enclosure-29.png"><img loading="lazy" decoding="async" class="alignnone wp-image-1470 size-full" src="https://server.vcenter.ir/wp-content/uploads/2020/11/install-and-configure-the-hp-c7000-blade-enclosure-29.png" alt="نصب و پیکربندی HP c7000 Blade Enclosure" width="1066" height="557" srcset="https://server.vcenter.ir/wp-content/uploads/2020/11/install-and-configure-the-hp-c7000-blade-enclosure-29.png 1066w, https://server.vcenter.ir/wp-content/uploads/2020/11/install-and-configure-the-hp-c7000-blade-enclosure-29-300x157.png 300w, https://server.vcenter.ir/wp-content/uploads/2020/11/install-and-configure-the-hp-c7000-blade-enclosure-29-1024x535.png 1024w, https://server.vcenter.ir/wp-content/uploads/2020/11/install-and-configure-the-hp-c7000-blade-enclosure-29-768x401.png 768w" sizes="(max-width: 1066px) 100vw, 1066px" /></a></p>
<p>۲۱٫ مرحله آخرتنظیمات مدیریت انرژی است.</p>
<p>۱٫ power mode: AC redundant ، Power Supply Redundant یا Not Redundant را انتخاب کنید.</p>
<p>۱٫ AC redundant: در این تنظیمات ازNمنبع برای تأمین انرژی استفاده می شود و N برای تأمین افزایشی استفاده می شود.</p>
<p>۲٫ Power Supply Redundant: حداکثر ۶ منبع تغذیه را می توان با یک منبع تغذیه که همیشه محفوظ است برای تأمین افزایشی نصب کرد.</p>
<p>۳٫Non Redundant: نه کار اضافی: هیچگونه مقرراتی در مورد قدرت افزایشی اجرا نشده و هشدارهایی درباره قدرت اضافی داده نمی شود.</p>
<p><a href="https://server.vcenter.ir/wp-content/uploads/2020/11/install-and-configure-the-hp-c7000-blade-enclosure-30.png"><img loading="lazy" decoding="async" class="alignnone wp-image-1471 size-full" src="https://server.vcenter.ir/wp-content/uploads/2020/11/install-and-configure-the-hp-c7000-blade-enclosure-30.png" alt="نصب و پیکربندی HP c7000 Blade Enclosure" width="1080" height="283" srcset="https://server.vcenter.ir/wp-content/uploads/2020/11/install-and-configure-the-hp-c7000-blade-enclosure-30.png 1080w, https://server.vcenter.ir/wp-content/uploads/2020/11/install-and-configure-the-hp-c7000-blade-enclosure-30-300x79.png 300w, https://server.vcenter.ir/wp-content/uploads/2020/11/install-and-configure-the-hp-c7000-blade-enclosure-30-1024x268.png 1024w, https://server.vcenter.ir/wp-content/uploads/2020/11/install-and-configure-the-hp-c7000-blade-enclosure-30-768x201.png 768w" sizes="(max-width: 1080px) 100vw, 1080px" /></a></p>
<p>۲٫انرژی پویا: این حالت به طور پیش فرض خاموش است زیرا منبع تغذیه با راندمان بالا در اکثر شرایط باعث صرفه جویی در مصرف انرژی می شود. در صورت فعال شدن ، دینامیک پاور سعی می کند با اجرای منبع تغذیه مورد نیاز با سرعت بالاتر و استفاده از منابع غیرضروری در حالت آماده به کار ، انرژی را ذخیره کند.</p>
<p><a href="https://server.vcenter.ir/wp-content/uploads/2020/11/install-and-configure-the-hp-c7000-blade-enclosure-31.png"><img loading="lazy" decoding="async" class="alignnone wp-image-1472 size-full" src="https://server.vcenter.ir/wp-content/uploads/2020/11/install-and-configure-the-hp-c7000-blade-enclosure-31.png" alt="نصب و پیکربندی HP c7000 Blade Enclosure" width="1080" height="93" srcset="https://server.vcenter.ir/wp-content/uploads/2020/11/install-and-configure-the-hp-c7000-blade-enclosure-31.png 1080w, https://server.vcenter.ir/wp-content/uploads/2020/11/install-and-configure-the-hp-c7000-blade-enclosure-31-300x26.png 300w, https://server.vcenter.ir/wp-content/uploads/2020/11/install-and-configure-the-hp-c7000-blade-enclosure-31-1024x88.png 1024w, https://server.vcenter.ir/wp-content/uploads/2020/11/install-and-configure-the-hp-c7000-blade-enclosure-31-768x66.png 768w" sizes="(max-width: 1080px) 100vw, 1080px" /></a></p>
<p>۳٫حد مجاز توان: توان مجاز AC را در این حد محدود کنید.</p>
<p><a href="https://server.vcenter.ir/wp-content/uploads/2020/11/install-and-configure-the-hp-c7000-blade-enclosure-32.png"><img loading="lazy" decoding="async" class="alignnone wp-image-1473 size-full" src="https://server.vcenter.ir/wp-content/uploads/2020/11/install-and-configure-the-hp-c7000-blade-enclosure-32.png" alt="نصب و پیکربندی HP c7000 Blade Enclosure" width="1080" height="447" srcset="https://server.vcenter.ir/wp-content/uploads/2020/11/install-and-configure-the-hp-c7000-blade-enclosure-32.png 1080w, https://server.vcenter.ir/wp-content/uploads/2020/11/install-and-configure-the-hp-c7000-blade-enclosure-32-300x124.png 300w, https://server.vcenter.ir/wp-content/uploads/2020/11/install-and-configure-the-hp-c7000-blade-enclosure-32-1024x424.png 1024w, https://server.vcenter.ir/wp-content/uploads/2020/11/install-and-configure-the-hp-c7000-blade-enclosure-32-768x318.png 768w" sizes="(max-width: 1080px) 100vw, 1080px" /></a></p>
<p>۲۲٫ روی Next کلیک کنید و راه‌اندازی برای اولین بار را تمام کنید.</p>
<p><a href="https://server.vcenter.ir/wp-content/uploads/2020/11/install-and-configure-the-hp-c7000-blade-enclosure-33.png"><img loading="lazy" decoding="async" class="alignnone wp-image-1474 size-full" src="https://server.vcenter.ir/wp-content/uploads/2020/11/install-and-configure-the-hp-c7000-blade-enclosure-33.png" alt="نصب و پیکربندی HP c7000 Blade Enclosure" width="1068" height="454" srcset="https://server.vcenter.ir/wp-content/uploads/2020/11/install-and-configure-the-hp-c7000-blade-enclosure-33.png 1068w, https://server.vcenter.ir/wp-content/uploads/2020/11/install-and-configure-the-hp-c7000-blade-enclosure-33-300x128.png 300w, https://server.vcenter.ir/wp-content/uploads/2020/11/install-and-configure-the-hp-c7000-blade-enclosure-33-1024x435.png 1024w, https://server.vcenter.ir/wp-content/uploads/2020/11/install-and-configure-the-hp-c7000-blade-enclosure-33-768x326.png 768w" sizes="(max-width: 1068px) 100vw, 1068px" /></a></p>
<h2><strong>پیکربندی محفظه HP c7000 – تنظیمات اضافی</strong></h2>
<h2><strong>پیکربندی محفظه HP c7000 تنظیمات اضافی- Directory Setting</strong></h2>
<p>برای استفاده از تأیید هویت Active Directory ، باید گواهی کنترلر دامنه را وارد محفظه کنیم.</p>
<p><a href="https://server.vcenter.ir/wp-content/uploads/2020/11/install-and-configure-the-hp-c7000-blade-enclosure-34.png"><img loading="lazy" decoding="async" class="alignnone wp-image-1475 size-full" src="https://server.vcenter.ir/wp-content/uploads/2020/11/install-and-configure-the-hp-c7000-blade-enclosure-34.png" alt="نصب و پیکربندی HP c7000 Blade Enclosure" width="235" height="178" /></a></p>
<p>۲٫</p>
<p><a href="https://server.vcenter.ir/wp-content/uploads/2020/11/install-and-configure-the-hp-c7000-blade-enclosure-35.png"><img loading="lazy" decoding="async" class="alignnone wp-image-1476 size-full" src="https://server.vcenter.ir/wp-content/uploads/2020/11/install-and-configure-the-hp-c7000-blade-enclosure-35.png" alt="نصب و پیکربندی HP c7000 Blade Enclosure" width="577" height="525" srcset="https://server.vcenter.ir/wp-content/uploads/2020/11/install-and-configure-the-hp-c7000-blade-enclosure-35.png 577w, https://server.vcenter.ir/wp-content/uploads/2020/11/install-and-configure-the-hp-c7000-blade-enclosure-35-300x273.png 300w" sizes="(max-width: 577px) 100vw, 577px" /></a></p>
<p>۳٫ مرحله آخر تست تنظیمات است. به برگه تنظیمات آزمایش بروید. به منظور انجام این کار ، نام کاربری و رمزعبور را بدهید و روی تنظیمات تست کلیک کنید.</p>
<p><a href="https://server.vcenter.ir/wp-content/uploads/2020/11/install-and-configure-the-hp-c7000-blade-enclosure-36.png"><img loading="lazy" decoding="async" class="alignnone wp-image-1477 size-full" src="https://server.vcenter.ir/wp-content/uploads/2020/11/install-and-configure-the-hp-c7000-blade-enclosure-36.png" alt="نصب و پیکربندی HP c7000 Blade Enclosure" width="579" height="162" srcset="https://server.vcenter.ir/wp-content/uploads/2020/11/install-and-configure-the-hp-c7000-blade-enclosure-36.png 579w, https://server.vcenter.ir/wp-content/uploads/2020/11/install-and-configure-the-hp-c7000-blade-enclosure-36-300x84.png 300w" sizes="(max-width: 579px) 100vw, 579px" /></a></p>
<p>۴٫ بعد از کلیک روی تنظیمات تست ، باید برای نتیجه آزمایش مدتی صبر کنید.</p>
<p><a href="https://server.vcenter.ir/wp-content/uploads/2020/11/install-and-configure-the-hp-c7000-blade-enclosure-37.png"><img loading="lazy" decoding="async" class="alignnone wp-image-1478 size-full" src="https://server.vcenter.ir/wp-content/uploads/2020/11/install-and-configure-the-hp-c7000-blade-enclosure-37.png" alt="نصب و پیکربندی HP c7000 Blade Enclosure" width="603" height="164" srcset="https://server.vcenter.ir/wp-content/uploads/2020/11/install-and-configure-the-hp-c7000-blade-enclosure-37.png 603w, https://server.vcenter.ir/wp-content/uploads/2020/11/install-and-configure-the-hp-c7000-blade-enclosure-37-300x82.png 300w" sizes="(max-width: 603px) 100vw, 603px" /></a></p>
<p>۵٫ اگر همه چیز درست تنظیم شده است باید موفقیت را ببینید. در مورد من ، من از همه موارد عبور نکرده‌ام زیرا نمی توانم کنترل کننده دامنه را پینگ کنم ، اما تأیید صحت کار می‌کند.</p>
<p><a href="https://server.vcenter.ir/wp-content/uploads/2020/11/install-and-configure-the-hp-c7000-blade-enclosure-38.png"><img loading="lazy" decoding="async" class="alignnone wp-image-1479 size-full" src="https://server.vcenter.ir/wp-content/uploads/2020/11/install-and-configure-the-hp-c7000-blade-enclosure-38.png" alt="نصب و پیکربندی HP c7000 Blade Enclosure" width="587" height="365" srcset="https://server.vcenter.ir/wp-content/uploads/2020/11/install-and-configure-the-hp-c7000-blade-enclosure-38.png 587w, https://server.vcenter.ir/wp-content/uploads/2020/11/install-and-configure-the-hp-c7000-blade-enclosure-38-300x187.png 300w" sizes="(max-width: 587px) 100vw, 587px" /></a></p>
<p><strong>پیکربندی محفظه HP c7000 تنظیمات اضافی- Enclosure IP Mode</strong></p>
<p>شبیه به ماژول اتصال مجازی ، مدیر پردازنده از “حالت IP مجازی” پشتیبانی می کند. به عبارت ساده این بدان معنی است که با دسترسی به OA ، همیشه در محفظه به OA فعال هدایت می شوید. برای فعال کردن آن ، به گزینه Enclosure Settings بروید گزینه Enclosure TCP / IP Settings را کلیک کنید و در تب، تنظیمات IPv4 مشاهده خواهید کرد. حالت Enclosure IP Mode را انتخاب کنید و روی apply کلیک کنید.</p>
<p><a href="https://server.vcenter.ir/wp-content/uploads/2020/11/install-and-configure-the-hp-c7000-blade-enclosure-39.png"><img loading="lazy" decoding="async" class="alignnone wp-image-1480 size-full" src="https://server.vcenter.ir/wp-content/uploads/2020/11/install-and-configure-the-hp-c7000-blade-enclosure-39.png" alt="نصب و پیکربندی HP c7000 Blade Enclosure" width="1080" height="567" srcset="https://server.vcenter.ir/wp-content/uploads/2020/11/install-and-configure-the-hp-c7000-blade-enclosure-39.png 1080w, https://server.vcenter.ir/wp-content/uploads/2020/11/install-and-configure-the-hp-c7000-blade-enclosure-39-300x158.png 300w, https://server.vcenter.ir/wp-content/uploads/2020/11/install-and-configure-the-hp-c7000-blade-enclosure-39-1024x538.png 1024w, https://server.vcenter.ir/wp-content/uploads/2020/11/install-and-configure-the-hp-c7000-blade-enclosure-39-768x403.png 768w" sizes="(max-width: 1080px) 100vw, 1080px" /></a></p>
<h2><strong>تنظیمات اضافی پیکربندی محفظه HP c7000 – Onboard Administrator Active/Standby Transition</strong></h2>
<p>یکی دیگر از ویژگیهای بسیار مفید در مدیر پردازنده امکان جابجایی بین Active و Standby OA است. به منظور جابجایی، باید بر روی Transition Active to standby در Enclosure Settings کلیک کنید.</p>
<p><a href="https://server.vcenter.ir/wp-content/uploads/2020/11/install-and-configure-the-hp-c7000-blade-enclosure-40.png"><img loading="lazy" decoding="async" class="alignnone wp-image-1481 size-full" src="https://server.vcenter.ir/wp-content/uploads/2020/11/install-and-configure-the-hp-c7000-blade-enclosure-40.png" alt="نصب و پیکربندی HP c7000 Blade Enclosure" width="883" height="534" srcset="https://server.vcenter.ir/wp-content/uploads/2020/11/install-and-configure-the-hp-c7000-blade-enclosure-40.png 883w, https://server.vcenter.ir/wp-content/uploads/2020/11/install-and-configure-the-hp-c7000-blade-enclosure-40-300x181.png 300w, https://server.vcenter.ir/wp-content/uploads/2020/11/install-and-configure-the-hp-c7000-blade-enclosure-40-768x464.png 768w" sizes="(max-width: 883px) 100vw, 883px" /></a></p>
<h2></h2>
<h2><strong>تنظیمات اضافی پیکربندی محفظه HP c7000- Link Loss Failover</strong></h2>
<h4><strong>Link Loss Failover امکان نظارت بر وضعیت لینک شبکه در ماژول فعال را می‌دهد. اگر این عملکرد را فعال کنیم در صورت عدم موفقیت ، شبکه به صورت خودکار از حالت فعالOA به حالت آماده باش OA می‌رود .برای فعال کردن آن ، به قسمت Enclosure Settingsبروید و روی Link Loss Failover کلیک کنید و Enable Link Loss Failover را فعال کنید ، درخواست را Apply کنید.</strong></h4>
<h4><a href="https://server.vcenter.ir/wp-content/uploads/2020/11/install-and-configure-the-hp-c7000-blade-enclosure-41.png"><img loading="lazy" decoding="async" class="alignnone wp-image-1482 size-full" src="https://server.vcenter.ir/wp-content/uploads/2020/11/install-and-configure-the-hp-c7000-blade-enclosure-41.png" alt="نصب و پیکربندی HP c7000 Blade Enclosure" width="599" height="249" srcset="https://server.vcenter.ir/wp-content/uploads/2020/11/install-and-configure-the-hp-c7000-blade-enclosure-41.png 599w, https://server.vcenter.ir/wp-content/uploads/2020/11/install-and-configure-the-hp-c7000-blade-enclosure-41-300x125.png 300w" sizes="(max-width: 599px) 100vw, 599px" /></a></h4>
<h4></h4>
<h5>امیدواریم از این پست بهره کافی رو برده باشید. جهت مشاوره و خرید سرور اچ پی با کارشناسان ما با شماره ۸۸۸۸۴۲۶۸ تماس بگیرید.</h5>
<h2></h2>
<p>نوشته <a href="https://server.vcenter.ir/install-and-configure-the-hp-c7000-blade-enclosure/">نصب و پیکربندی HP c7000 Blade Enclosure</a> اولین بار در <a href="https://server.vcenter.ir">سرور</a>. پدیدار شد.</p>
]]></content>
		
					<link rel="replies" type="text/html" href="https://server.vcenter.ir/install-and-configure-the-hp-c7000-blade-enclosure/#comments" thr:count="0" />
			<link rel="replies" type="application/atom+xml" href="https://server.vcenter.ir/install-and-configure-the-hp-c7000-blade-enclosure/feed/atom/" thr:count="0" />
			<thr:total>0</thr:total>
			</entry>
		<entry>
		<author>
			<name>admin</name>
					</author>

		<title type="html"><![CDATA[حافظه پایدار HPE چیست؟]]></title>
		<link rel="alternate" type="text/html" href="https://server.vcenter.ir/what-is-hpe-stable-memory/" />

		<id>https://server.vcenter.ir/?p=1415</id>
		<updated>2020-11-07T15:41:20Z</updated>
		<published>2020-11-07T14:58:30Z</published>
		<category scheme="https://server.vcenter.ir/" term="رم" /><category scheme="https://server.vcenter.ir/" term="NVDIMM" /><category scheme="https://server.vcenter.ir/" term="آموزش سرور" /><category scheme="https://server.vcenter.ir/" term="اچ پی" /><category scheme="https://server.vcenter.ir/" term="تراشه های DRAM" /><category scheme="https://server.vcenter.ir/" term="تراشه های فلش NAND" /><category scheme="https://server.vcenter.ir/" term="حافظه NVDIMM" /><category scheme="https://server.vcenter.ir/" term="حافظه اچ پی" /><category scheme="https://server.vcenter.ir/" term="حافظه پایدار HPE چیست؟" /><category scheme="https://server.vcenter.ir/" term="خرید سرور" /><category scheme="https://server.vcenter.ir/" term="سرور" /><category scheme="https://server.vcenter.ir/" term="سرور اچ پی" /><category scheme="https://server.vcenter.ir/" term="قیمت ماژول DRAM" /><category scheme="https://server.vcenter.ir/" term="مفاهیم سرور" /><category scheme="https://server.vcenter.ir/" term="وایکینگ تکنولوژی" />
		<summary type="html"><![CDATA[<p>حافظه پایدار HPE چیست؟ چندین دهه است که در رایانه ها، حافظه و فضای ذخیره سازی به صورت واحدهایی مجزا در نظر گرفته میشوند، اما این واحدها در حال تغییر&#8230; </p>
<p>نوشته <a href="https://server.vcenter.ir/what-is-hpe-stable-memory/">حافظه پایدار HPE چیست؟</a> اولین بار در <a href="https://server.vcenter.ir">سرور</a>. پدیدار شد.</p>
]]></summary>

					<content type="html" xml:base="https://server.vcenter.ir/what-is-hpe-stable-memory/"><![CDATA[<h1>حافظه پایدار HPE چیست؟</h1>
<figure id="attachment_1424" aria-describedby="caption-attachment-1424" style="width: 730px" class="wp-caption alignnone"><a href="https://server.vcenter.ir/wp-content/uploads/2020/11/HPE_SDRAM_DIMM_Memory_Smart_Kit.jpg"><img loading="lazy" decoding="async" class="wp-image-1424 size-full" src="https://server.vcenter.ir/wp-content/uploads/2020/11/HPE_SDRAM_DIMM_Memory_Smart_Kit.jpg" alt="حافظه پایدار HPE چیست؟" width="730" height="410" srcset="https://server.vcenter.ir/wp-content/uploads/2020/11/HPE_SDRAM_DIMM_Memory_Smart_Kit.jpg 730w, https://server.vcenter.ir/wp-content/uploads/2020/11/HPE_SDRAM_DIMM_Memory_Smart_Kit-300x168.jpg 300w" sizes="(max-width: 730px) 100vw, 730px" /></a><figcaption id="caption-attachment-1424" class="wp-caption-text">حافظه پایدار HPE چیست؟</figcaption></figure>
<div class="content-body">
<div class="entry content-body__detail clearfix">
<p>چندین دهه است که در رایانه ها، حافظه و فضای ذخیره سازی به صورت واحدهایی مجزا در نظر گرفته میشوند، اما این واحدها در حال تغییر هستند. شرکت هیولت پاکارد گامی نوین در جهت ادغام این دو حافظه با یکدیگر برداشته است و این هفته خبری مبنی بر ایجاد حافظه ای جدید، تحت عنوان “حافظه ماندگار” منتشر شد. یک ماژول حافظه پایدار متشکل است از ۸ گیگابایت DRAM (حافظه تصادفی پویا) و ۸ گیگابایت فلش ، که هر دو در یک ماژول واحد، در یک اسلات <a href="https://shop.vcenter.ir/product-cateogry/servers">سرور</a> استاندارد DIMM (ماژول حافظه خطی دوگانه)، قرار داده شده اند.</p>
<p>DRAM با سرعت بالایی کار میکند اما قیمت آن به نسبت گران است و اگر سرور خاموش شود، به طور غیرمنتظره هرگونه اطلاعات موجود در DRAM از بین میرود. فلش، سرعت عمل پایین تری دارد اما غیر فرار است؛ بدین معنا که با خاموش شدنِ منبع انرژی، اطلاعات ذخیره شده در آن کماکان باقی مانده و حذف نمیشوند.</p>
<p>شرکت HPE ادعا میکند که در ماژولهای حافظه پایدار این شرکت، که تحت عنوان NVDIMM شناخته شده اند، سرعت DRAM و پایداریی فلش با یکدیگر ترکیب شده است.</p>
<figure id="attachment_1426" aria-describedby="caption-attachment-1426" style="width: 596px" class="wp-caption aligncenter"><a href="https://server.vcenter.ir/wp-content/uploads/2020/11/HPE-stable-memory.png"><img loading="lazy" decoding="async" class="wp-image-1426 size-full" src="https://server.vcenter.ir/wp-content/uploads/2020/11/HPE-stable-memory.png" alt="حافظه پایدار HPE چیست؟" width="596" height="252" srcset="https://server.vcenter.ir/wp-content/uploads/2020/11/HPE-stable-memory.png 596w, https://server.vcenter.ir/wp-content/uploads/2020/11/HPE-stable-memory-300x127.png 300w" sizes="(max-width: 596px) 100vw, 596px" /></a><figcaption id="caption-attachment-1426" class="wp-caption-text">حافظه پایدار HPE چیست؟</figcaption></figure>
<p><strong>حافظه NVDIMM از جلو به تراشه های DRAM و تعدادی تسهیم کننده، و از پشت به تراشه های فلش NAND متصل است.</strong></p>
<p>این حافظه ها به عنوان جایگزینی برای فضای ذخیره سازی خارجی در نظر گرفته نشده اند؛ SSD ها (هارددیسکها و نوار چرخان)، هنوز هم برای ذخیرهسازی حجم عظیمی از داده ها بهترین هستند. اما بخشی از فضای ذخیره سازی را ارائه داده است که در گذرگاه پر سرعت حافظه مستقر میباشد و میتواند در صورت خراب شدن سرور، داده ها را حفظ نماید.</p>
<p>طبق طراحی HPE، برنامه های کاربردی در NVDIMM میتوانند خیلی سریعتر اجرا شوند؛ زیرا لازم نیست که داده ها میان پردازنده و درایوهای ذخیره سازی در حرکت باشند.</p>
<p>HPE اولین شرکتی نیست که وارد این بازی شده است. سازندگانی همچون شرکت میکرون تکنولوژی و شرکت وایکینگ تکنولوژی نیز به ساخت NVDIMM پرداخته اند و سایر سازندگان سرور نیز در حال آزمایش بر روی اشکال مختلف حافظه پایدار هستند.</p>
<p>اما پاتریک مورهد، تحلیلگر ارشد شرکتِ مور اینسایت و استراتژی، عنوان میکند که حداقل در حال حاضر، HPE در میان رقبای سازنده سرور، یک برتری نسبی دارد.</p>
<p>HPE اعلام میکند که NVDIMM براساس پروتکل پرسرعتِ NVMe (حافظه غیر ولتاژ سریع)، میتواند پهنای باندی تا حداکثر شش برابرِ پهنای باند SSD ها و حداکثر ۲۴ برابرِ <a href="https://vcenter.ir/iops-concept/">IOPS</a> (عملیات ورودی-خروجی در هر ثانیه) را ارائه دهد.</p>
<p>این شرکت قصد دارد در این ماه فروش NVDIMM را با دو مدل از سرور ProLiant Gen9 ، یعنی DL380 و DL360 آغاز کند. برای این منظور، این شرکت به سازندگان نرم افزارهای هدایتگر نیز نیاز دارد. سیستم عاملها باید از NVDIMM آگاهی داشته باشند تا بتوانند از مزایای آن بهره مند شوند؛ برنامه های استاندارد ضمن اینکه باعث افزایش عملکرد میشوند، بزرگترین مزیت آنها این است که برای کاربردهایی تنظیم شده اند که از حافظه های پایدار استفاده میکنند.</p>
<p>HPE یک درایور برای ویندوز سرور ۲۰۱۲ نسخه R2 نوشته است که از طریق سرورهای جدید در دسترس خواهد بود. مقامان عالی رتبه HPE اعلام کرده اند که مایکروسافت با ویندوز سرور ۲۰۱۶، که انتظار میرود اواخر امسال منتشر شود، از NVDIMM پشتیبانی خواهد کرد (که بطور پیشفرض برای همه کاربران در دسترس است و نیازی به پرداخت هزینه اضافه نمی باشد). این شرکت همچنین با فروشندگان <a href="https://linux.vcenter.ir">لینوکس</a> و سایر سازندگان نرم افزار نیز همکاری میکند.</p>
<p>این فناوری ارزان نیست. NVDIMM های ۸ گیگابایتی HPE به قیمت ۸۹۹ دلار قیمتگذاری شده اند؛ این در حالیست که قیمت ماژول DRAM استاندارد ۸ گیگابایتی، ۲۴۹ دلار است.</p>
<p>NVDIMM ها دارای یک ریزکنترلگر هستند و به یک باتری لیتیوم ۹۶ واتی که بصورت یکپارچه در سرور قرار دارد، متصل میشوند. اگر سرور خراب شود، باتری این قابلیت را دارد که تا زمانیکه داده‌های موجود در DRAM بطور کامل بر روی حافظه فلش پشتیبان گیری میشوند، نیروی برق لازم را تامین کند. باتری میتواند حداکثر از ۱۲۸ گیگابایت حافظه پایدار در یک سرور پشتیبانی کند.</p>
<p>HPE معتقد است که NVDIMM میتواند از برنامه هایی مانند برنامه های پایگاه داده (که در آنها انجام پردازش در داخل حافظه یک روند سریع در حال رشد میباشد) نیز استفاده کند. آزمایشها حاکی از افزایش ۱۰ برابریِ برنامه های کاربردی مربوط به پایگاه داده و همچنین برنامه های تحلیلی میباشند که برای اجرا بر روی NVDIMM ها تنظیم شده اند.</p>
<p>به عنوان مثال، در مواردیکه از این برنامه ها استفاده نشود، کاربران هنوز هم شاهد افزایش ۲ برابری ورود به سیستم <a href="https://database.vcenter.ir">پایگاه داده SQL Server</a> هستند.</p>
<p>این برنامه قصد دارد در آینده NVDIMM هایی را ارائه دهد که بیش از عملکرد، بر ظرفیت بزرگتر تاکید دارند. مقامان عالی رتبه HPE اعلام کرده اند که اینتل ممکن است فناوری پر سرعت Xpoint سه بعدی را در قالب حافظه پایدار ارائه دهد.</p>
<p>این شرکت، NVDIMM ها را به عنوان پلهای در مسیر معماری های محاسباتی آینده در نظر میگیرد. سیستمهای هم افزایی ارائه شده توسط این شرکت، که دارای نوع جدیدی از “زیرساختهای سازگار” میباشند، همگی هنگام ارسال داده به حافظه پایدار فعال خواهند شد.</p>
<p>این شرکت هنوز تاریخ انتشار تجاریِ سیستمهای هم افزایی را اعلام نکرده است؛ اما طبق آنچه که مقامان عالی رتبه HPE در این هفته بیان کرده اند، این شرکت قصد دارد تا طبق برنامه، واحدهای بتا را در ماه مه برای برخی از مشتریان ارسال کند.</p>
<p>علاوه بر این، هدف <a href="https://shop.vcenter.ir/product-category/brand/hpe">HPE</a> این است که حافظه را از میان بردارد و با استفاده از فناوری جدیدی به نام memristors فرایند ذخیره سازی را در یک تک لایه انجام دهد. اما تاریخ انتشار این سیستم، که ماشین نامیده میشود، هنوز تعیین نشده است.</p>
<ol>
<li id="post-11935-footnote-1">Hewlett Packard</li>
<li id="post-11935-footnote-2">persistent memory</li>
<li id="post-11935-footnote-3">Flash</li>
<li id="post-11935-footnote-4">Micron Technology</li>
<li id="post-11935-footnote-5">Viking Technology</li>
<li id="post-11935-footnote-6">Patrick Moorhead</li>
<li id="post-11935-footnote-7">Moor Insights and Strategy</li>
<li id="post-11935-footnote-8">microcontroller</li>
<li id="post-11935-footnote-9">Synergy systems</li>
<li id="post-11935-footnote-10">single tier</li>
</ol>
</div>
<p>&nbsp;</p>
<p>&nbsp;</p>
</div>
<p>نوشته <a href="https://server.vcenter.ir/what-is-hpe-stable-memory/">حافظه پایدار HPE چیست؟</a> اولین بار در <a href="https://server.vcenter.ir">سرور</a>. پدیدار شد.</p>
]]></content>
		
					<link rel="replies" type="text/html" href="https://server.vcenter.ir/what-is-hpe-stable-memory/#comments" thr:count="0" />
			<link rel="replies" type="application/atom+xml" href="https://server.vcenter.ir/what-is-hpe-stable-memory/feed/atom/" thr:count="0" />
			<thr:total>0</thr:total>
			</entry>
		<entry>
		<author>
			<name>admin</name>
					</author>

		<title type="html"><![CDATA[سرور اچ پی HPE ProLiant ML30 Gen10]]></title>
		<link rel="alternate" type="text/html" href="https://server.vcenter.ir/hpe-proliant-ml30-gen10-server/" />

		<id>http://server.vcenter.ir/?p=1386</id>
		<updated>2020-09-06T12:21:47Z</updated>
		<published>2020-09-06T11:31:49Z</published>
		<category scheme="https://server.vcenter.ir/" term="سرور" /><category scheme="https://server.vcenter.ir/" term="خرید سرور اچ پی" /><category scheme="https://server.vcenter.ir/" term="سرور ML30" /><category scheme="https://server.vcenter.ir/" term="سرور اچ پی" /><category scheme="https://server.vcenter.ir/" term="سرور اچ پی HPE ProLiant ML30 Gen10" /><category scheme="https://server.vcenter.ir/" term="فروش سرور اچ پی" /><category scheme="https://server.vcenter.ir/" term="قیمت سرور اچ پی" /><category scheme="https://server.vcenter.ir/" term="معرفی سرور HPE Proliant ML30 Gen 10" />
		<summary type="html"><![CDATA[<p>سرور اچ پی HPE ProLiant ML30 Gen10 معرفی سرور HPE Proliant ML30 Gen 10 سرور اچ پی HPE ProLiant ML30 Gen10 ، سرور قدرتمندی است که با ظاهر ایستاده و&#8230; </p>
<p>نوشته <a href="https://server.vcenter.ir/hpe-proliant-ml30-gen10-server/">سرور اچ پی HPE ProLiant ML30 Gen10</a> اولین بار در <a href="https://server.vcenter.ir">سرور</a>. پدیدار شد.</p>
]]></summary>

					<content type="html" xml:base="https://server.vcenter.ir/hpe-proliant-ml30-gen10-server/"><![CDATA[<article class="l-section for_blogpost preview_basic post-11411 post type-post status-publish format-standard has-post-thumbnail hentry category-soft category-kn tag-hpe tag-hpe-ml30 tag-110 tag--hpe-ml30 tag-94">
<div class="l-section-h i-cf">
<div class="w-blog">
<div class="w-blog-post-preview"></div>
<div class="w-blog-post-body">
<h2 class="w-blog-post-title entry-title">سرور اچ پی HPE ProLiant ML30 Gen10</h2>
<figure id="attachment_1388" aria-describedby="caption-attachment-1388" style="width: 800px" class="wp-caption alignnone"><a href="http://server.vcenter.ir/wp-content/uploads/2020/09/c04872338.png"><img loading="lazy" decoding="async" class="wp-image-1388 size-full" src="http://server.vcenter.ir/wp-content/uploads/2020/09/c04872338.png" alt="سرور اچ پی HPE ProLiant ML30 Gen10" width="800" height="600" srcset="https://server.vcenter.ir/wp-content/uploads/2020/09/c04872338.png 800w, https://server.vcenter.ir/wp-content/uploads/2020/09/c04872338-300x225.png 300w, https://server.vcenter.ir/wp-content/uploads/2020/09/c04872338-768x576.png 768w" sizes="(max-width: 800px) 100vw, 800px" /></a><figcaption id="caption-attachment-1388" class="wp-caption-text">سرور اچ پی HPE ProLiant ML30 Gen10</figcaption></figure>
</div>
</div>
</div>
</article>
<section class="l-section">
<div class="l-section-h i-cf">
<h3>معرفی سرور HPE Proliant ML30 Gen 10</h3>
<p>سرور اچ پی HPE ProLiant ML30 Gen10 ، سرور قدرتمندی است که با ظاهر ایستاده و Tower خود، همچنان به عنوان سروری ارزان‌قیمت، قابل تهیه و خرید است و برای دفاتر کوچک، دفاتر راه دور و شعبات که به طور کلی در رده کسب‌و کارهای کوچک قرار می‌گیرند، سرور HPE Proliant ML30 Gen 10 یک سرور مناسب و ایده‌آل است.</p>
<p>سرور HPE ML30 GEN 10 از نسل 10 اچ پی ، قابلیت اجرای راهکارهای هیبرید کلود و on-premise را دارد و در کارایی و سرعت، امنیت، قابلیت اطمینان و ارتقاپذیری را در حد رده انترپرایزها ولی با قیمت پایین‌تر به شما ارایه می‌دهد. با ایجاد تغییری کوچک در این سرور، از مزایای بسیاری استفاده خواهید کرد.</p>
<p>سرور ML30 G10 همانند دیگر سرورهای نسل 10 اچ پی ، دارای ویژگی امنیتی HPE iLO Silicon Root of Trust است که آن را به یکی از امن‌ترین سرورهای دنیا بدل می‌کند.</p>
<p>منابع تغذیه با ویژگی افزونگی یا همان Radundancy، در کنار Hot-Plug HDD های 4 LFF و 8 SFF می‌توانند انعطاف و دسترس پذیری مورد نیاز شما را در سرور HPE ML30 GEN 10 برایتان فراهم کنند. ارتقاپذیری بسیار بالا در سرور HPE ML30 G10 ، با وجود کنترلرهای SAS، کارت شبکه‌ها و کارت گرافیک‌ها برای شما فراهم است و نیازهای شما را هنگام رشد کسب‌وکارتان پشتیبانی می‌کند.</p>
<p>از آنجایی که سرور HPE ML30 GEN 10 دارای ویژگی‌های انترپرایزی است، رشد کسب‌وکارتان را با TCO کمتری همراهی می‌کنید. از مزایایی که <a href="https://shop.vcenter.ir/product-category/servers">سرور ML30 G10</a> دارد، متعجب خواهید شد!</p>
<h3>ویژگی‌های جدید سرور HPE ML30 GEN 10</h3>
<ol>
<li>پشتیبانی از پردازنده‌های Intel Xeon E که 4 و 6 عدد هسته فراهم می‌کنند و حداکثر 80 وات، مصرف دارند.</li>
<li>پشتیبانی از پردازنده‌های Core i3 سری 8 و Pentium G</li>
<li>پشتیبانی از حافظه‌های 2666 MT/s HPE DDR4 Standard Memory UDIMM که ظرفیت 8، 16 و 64 گیگابایت را فراهم می‌کنند.</li>
<li>4 اسلات افزونه برای انعطاف بیشتر: دو کانکتور x8 و دو کانکتور  x16</li>
<li>پشتیبانی از Onboard M.2 NVMe SSD</li>
<li>پورت اختصاصی HPE iLO و پورت سریال اختیاری (serial port option kit)</li>
<li>⁣ظرفیت ذخیره سازی بالاتر</li>
<li>پشتیبانی از Onboard M.2 NVMe SSD</li>
<li>پشتیبانی از درایوهای SFF SAS SSD</li>
<li>⁣⁣پشتیبانی از 6 درایو NHP LFF SATA</li>
<li>سازگای با حجم‌های کاری متفاوت در SMBها</li>
<li>پشتیبانی از ClearOS</li>
</ol>
<p>حداکثر ظرفیت ممکن در سرور HPE ML30 GEN 10 ، توسط SFF های 7.68 ترابایتی فراهم می‌شود که در کل برابر با 61.44 ترابایت است.</p>
<h3>پردازنده سرور HPE ML30 GEN 10</h3>
<p>چیپ ستی که در سرور ML30 G10 استفاده شده، Intel C246 است. در سرور HPE ML30 GEN 10 ، همانند نسل 9 آن، از سهپردازنده اینتل زئون، پنتیوم و Core i3 می‌توان استفاده کرد که البته در سری‌های جدیدی که این سرور پشتیبانی می‌کند تعداد هسته‌ها، فرکانس و <a href="https://vcenter.ir/cache-memory/">حافظه Cache</a> تفاوت‌هایی دارند. اگر کنجکاوید که بدانید چه چیپ ستی در سرور ML30 G9 استفاده شده بود، باید بگویم که چیپ ست Intel C236 بوده است.</p>
<p>سرور HPE ML30 GEN 10 ، در صورت استفاده از اینتل زئون های سری E که فرکانسی بین 3.3 تا 3.8 گیگاهرتز دارند و حافظه Cache آن‌ها 8 یا 12 مگابایت است، می‌توانند 4 یا 6 هسته برای شما فراهم کنند. این سری پردازنده‌ها از حافظه‌های نسل 10 اچ پی که سرعت 2666 MT/s دارند، پشتیبانی می‌کنند. با چنین شرایطی، اپلیکیشن‌های SMB ها با کارایی بسیار بالا قابل اجرا هستند.</p>
<p>در صورت استفاده از پردازنده های Core i3-8300 که فرکانس 3.7 گیگاهرتز و 8 مگابایت حافظه Cache دارند، تعداد 4 هسته خواهید داشت و تنها می‌توانید از DDR4هایی با سرعت 2400 MT/s استفاده کنید.</p>
<p>در نهایت هم اگر از پردازنده های Pentium G5400 که فرکانس 3.7 گیگاهرتز و 4 مگابایت حافظه Cache دارند، استفاده کنید، تعداد 2 هسته خواهید داشت و تنها می‌توانید از DDR4هایی با سرعت 2400 MT/s استفاده کنید.</p>
<p>در تصویر زیر می‌توانید تمامی مدل‌های پردازنده که سرور ML30 G10 پشتیبانی می‌کند را به همراه ویژگی‌های آنها ببینید.</p>
<p><a href="http://server.vcenter.ir/wp-content/uploads/2020/09/HPE-ML30-Gen10.jpg"><img loading="lazy" decoding="async" class="alignnone wp-image-1396 size-full" src="http://server.vcenter.ir/wp-content/uploads/2020/09/HPE-ML30-Gen10.jpg" alt="" width="730" height="199" srcset="https://server.vcenter.ir/wp-content/uploads/2020/09/HPE-ML30-Gen10.jpg 730w, https://server.vcenter.ir/wp-content/uploads/2020/09/HPE-ML30-Gen10-300x82.jpg 300w" sizes="(max-width: 730px) 100vw, 730px" /></a></p>
<h3>حافظه سرور HPE ML30 GEN 10</h3>
<p>سرور ML30 G10 از 4 عدد استاندارد-مموری های HPE DDR4 UDIMM با سرعت 2666 MT/s پشتیبانی می‌کند که ظرفیت 8، 16 و 64 گیگابایت را فراهم می‌کنند. این 4 عدد DIMM در دو کانال قرار دارند و در هر کانال دو DIMM قرار می‌گیرد. ظرفیت هر <a href="http://server.vcenter.ir/comparison-of-dimm-rdimm-and-lrdimm-memory-modules/">DIMM</a> می‌تواند 2 یا 4 یا 16 گیگابایت باشد.</p>
<p>نکته: حداکثر سرعت حافظه بستگی به مدل پردازنده دارد.</p>
<p>استفاده از ویژگی امنیتی و <a href="https://vcenter.ir/ecc-feature/">قابلیت ECC</a> در حافظه از بروز Data Loss و Downtime های پیش‌بینی نشده سیستمی جلوگیری می‌کند.</p>
<figure id="attachment_1397" aria-describedby="caption-attachment-1397" style="width: 670px" class="wp-caption alignnone"><a href="http://server.vcenter.ir/wp-content/uploads/2020/09/HPE-ML30-Gen10_1.jpg"><img loading="lazy" decoding="async" class="wp-image-1397 size-full" src="http://server.vcenter.ir/wp-content/uploads/2020/09/HPE-ML30-Gen10_1.jpg" alt="سرور اچ پی HPE ProLiant ML30 Gen10" width="670" height="341" srcset="https://server.vcenter.ir/wp-content/uploads/2020/09/HPE-ML30-Gen10_1.jpg 670w, https://server.vcenter.ir/wp-content/uploads/2020/09/HPE-ML30-Gen10_1-300x153.jpg 300w" sizes="(max-width: 670px) 100vw, 670px" /></a><figcaption id="caption-attachment-1397" class="wp-caption-text">سرور اچ پی HPE ProLiant ML30 Gen10</figcaption></figure>
<h3>ذخیره سازی سرور HPE ML30 GEN 10</h3>
<p>ظرفیت ذخیره سازی در سرور HPE ML30 G10 برابر با 1.44 ترابایت است و این ویژگی این سرور را به سروری ایده‌آل برای راهکار ذخیره سازی در کسب‌وکارتان تبدیل می‌کند تا بتوانید رشد روزافزون داده‌ها را کنترل کنید. با پشتیبانی از اسلات آنبورد M.2 NVMe SSD می‌تواند سرعت بسیار خارق‌العاده‌ای را برای “بوت درایو – Boot Drive” برایتان فراهم کند. این M.2، ظرفیت 480 گیگابایتی دارد.</p>
<p>سرور HPE ProLiant ML30 Gen9 با داشتن تکنولوژی HPE Smart Drives امکان افزودن درایوهای بیشتری را بر اساس نیاز شما در ذخیره‌سازی فراهم می‌کند و شما می‌توانید  Drive Cageهایی با 4 عدد LFF و 8 عدد SFF استفاده کنید. در نتیجه انعطاف‌پذیری برای افزایش ظرفیت استوریج لوکال شما فراهم می‌شود. این سرور اچ پی به ازای هر اسلات، حداکثر 7.68 ترابایت را پشتیبانی می‌کند یعنی اگر از تمامی ظرفیت SFF آن استفاده کنید خواهید توانست از 61.44 ترابایت استوریج داخلی استفاده کنید.</p>
<p>سرور HPE Proliant ML30 Gen 10 نیازهای متنوع شما در زمینه ذخیره سازی را فراهم می‌کند و در واقع انعطاف پذیری لازم را دارد و از فرمت‌های متنوعی از هارد درایوها پشتیبانی می‌کند و امکان پیاده‌سازی انواع مختلفی از RAID را فراهم می‌کند. با این شرایط بر اساس رشد و کسب‌وکارتان می‌توانید <a href="https://shop.vcenter.ir/product-category/storage">استوریج</a> مناسب را انتخاب کنید.</p>
<p>انتخاب‌های شما در این زمینه به صورت زیر است:</p>
<p><a href="http://server.vcenter.ir/wp-content/uploads/2020/09/HPE-ML30-Gen10_2.jpg"><img loading="lazy" decoding="async" class="alignnone wp-image-1398 size-full" src="http://server.vcenter.ir/wp-content/uploads/2020/09/HPE-ML30-Gen10_2.jpg" alt="" width="703" height="282" srcset="https://server.vcenter.ir/wp-content/uploads/2020/09/HPE-ML30-Gen10_2.jpg 703w, https://server.vcenter.ir/wp-content/uploads/2020/09/HPE-ML30-Gen10_2-300x120.jpg 300w" sizes="(max-width: 703px) 100vw, 703px" /></a></p>
<p>4 درایو LFF به صورت هات پلاگ و غیر هات پلاگ (NHP)</p>
<p>LFF های هات پلاگ (SAS و SATA) و غیر هات پلاگ (SATA) هر دو در این سرور نسل 10 اچ پی قابل استفاده است. تفاوت آنها در ظرفیتی است که ارایه می‌دهند، اولی 12 ترابایتی است و دومی 4 ترابایتی. و از آنجایی که سرور ML30 g10 از 4 هارد LFF پشتیبانی می‌کند، در نتیجه به ترتیب ظرفیت 48 و 16 ترابایت فراهم خواهد شد. در این مورد تفاوتی بین نسل 9 و نسل 10 وجود ندارد.</p>
<p>یکی از تفاوت‌های نسل 9 و نسل 10 در HPE ML30 G10 این است که هنگام استفاده از LFF غیر هات پلاگ، در کنار 4 درایو 4 ترابایتی، می‌توانیم از یک Additional Optional LFF Drive Enablement Kit استفاده کنیم تا دو غیر هات پلاگ دیگر هم داشته باشیم و ظرفیت به 24 ترابایت برسد. پس در صورت استفاده از LFF های NHP می‌توان 6 درایو 4 ترابایتی داشته باشیم.</p>
<p>و اما در صورت استفاده از Hot Plug LFF SATA SSD که 1.92 ترابایت ظرفیت دارند، 7.68 ترابایت ظرفیت خواهیم داشت.</p>
<p>در صورت استفاده از اینتل زئون های سری E که فرکانسی بین 3.3 تا 3.8 گیگاهرتز دارند و حافظه Cach آن‌ها 8 یا 12 مگابایت است، می‌توانند 4 یا 6 هسته برای شما فراهم کنند.</p>
<ol start="2">
<li>8 درایو SFF به صورت هات پلاگ</li>
</ol>
<p>از آنجایی که حداکثر ظرفیت هارد درایوهای SFF SATA برابر با 2 ترابایت است، در صورت استفاده از آنها، 16 ترابایت استوریج داخلی خواهید داشت. در صورت استفاده از SFF SAS ها که ظرفیت 2.4 ترابایت را دارا هستند، ظرفیت 19.2 ترابایت فراهم می‌شود که با نسل 9 تفاوتی نکرده است. در صورت استفاده از SFF SATA SSD ها که ظرفیت 7.68 ترابایت دارند، به ظرفیت 61.44 ترابایت می‌رسیم که در نسل 9 از چنین درایوهایی با ظرفیت 3.84 ترابیت پشتیبانی می‌شود و ظرفیت30.72 ترابایت فراهم می‌شود (ظرفیت نصف می‌شود).</p>
<p>در ML30 G9 از SFF SAS SSD ها پشتیبانی نمی‌شود و یکی از تفاوت‌های ML30 G9 و ML30 G10 همین است. اگر از چنین درایوهایی که ظرفیت 400 گیگابایت دارند استفاده کنید، ظرفیت 3.2 ترابایت خواهید داشت.</p>
<p>می‌بینیم که حداکثر ظرفیت ممکن در این <a href="https://shop.vcenter.ir/product-category/servers">سرور اچ پی</a>، توسط SFF های 7.68 ترابایتی فراهم می‌شود که در کل برابر با 61.44 ترابایت است.</p>
<ol start="3">
<li>Onboard M.2 NVMe SSD</li>
</ol>
<p>تفاوت مهمی که ML30 G9 و ML30 G10 دارند این است که در نسل 10 از M.2 های آنبورد پشتیبانی می‌شود. این درایوها 480 گیگابایتی هستند و سرعت خارق‌العاده‌ای دارند و برای Boot Drive مناسبند. لازم به توجه است که تمام مدل‌های ML30 G10 از آن پشتیبانی می‌کنند.</p>
<h2>کنترلر سرور HPE ML30</h2>
<p>کنترلری که به صورت تعبیه شده در سرور HPE Proliant ML30 Gen 10 قرار دارد، همانند تمامی دیگر سرورهای نسل 10 اچ پی، کنترلر نسل 10 و کنترلر پیش‌فرض SATA HPE Smart Array S100i است. این کنترلر در واقع فرم دوباره طراحی شده HPE Smart Array است و انعطاف لازم برای این که بتوانید مناسب‌ترین کنترلر 12 گیگابیتی (در ثانیه) را متناسب با محیط کاری خود انتخاب کنید، فراهم می‌کند.</p>
<h3><strong>نکاتی درباره کنترلر S100i</strong></h3>
<p>کنترلر S100i به غیر از 4 پورت SATA در Drive Cage از 2 پورت اضافی هم پشتیبانی می‌کند.</p>
<p>کنترلر S100i تنها در حالت UEFI کار می‌کند و برای پشتیبانی از حالت Legacy، کنترلر دیگری لازم است.</p>
<p>کنترلر S100i تنها از ویندوز پشتبانی می‌کند. اچ پی به کاربران <a href="http://linux.vcenter.ir">لینوکس</a> راهکار استفاده از نرم افزار متن باز In-Distro را برای ایجاد two-disk RAID 1 boot volume می‌دهد. برای اطلاعات بیشتر به لینک زیر مراجعه کنید:</p>
<p>https://downloads.linux.hpe.com/SDR/project/lsrrb</p>
<h3>انواع کنترلر در ML30 G10</h3>
<p dir="ltr">Essential RAID Controller:</p>
<ol dir="ltr">
<li>HPE Smart Array E208i-p SR Gen10 Controller</li>
<li>HPE Smart Array E208e-p SR Gen10 Controller</li>
</ol>
<p dir="ltr">Performance RAID Controller:</p>
<ol dir="ltr">
<li>HPE Smart Array P408i-p SR Gen10 Controller</li>
<li>HPE Smart Array P408e-p SR Gen10 Controller</li>
</ol>
<p>نکته: کنترلرهای Performance RAID که یکی از سه نوع کنترلرهای نسل 10 اچ پی است، به HPE Smart Storage Battery نیاز دارند که باید به صورت جداگانه خریداری شود.</p>
<p>اسلات‌های افزونه و USB ها</p>
<p>ML30 G9 و سرور HPE ML30 G10 ، هر دو از 4 اسلات PCIe پشتیبانی می‎کنند که در نسل 10 برای انعطاف بیشتر، دو کانکتور با کانکتور واید  x8 و دو کانکتور با کانکتور واید  x16 قابل استفاده است. در هر دو نسل این سرور، از 6 عدد USB 3.0 پشتیبانی می‌شود اما تعداد USB 2.0 ها از 4 به 1 رسیده است.</p>
<h2>نرم افزار مدیریتی HPE iLO 5 در سرور ML30 G10</h2>
<p>وجود پورت اختصاصی HPE iLO امکان اختصاص پهنای باند بیشتر برای کارهای شبکه را فراهم می‌کندتا به کارایی بالاتر در شبکه برسیم.</p>
<p>سرور HPE Proliant ML30 Gen 10 دارای مجموعه کاملی از HPE iLO 5 است که در سرورهای نسل 10 وجود دارد و ویژگی‌های مدیریتی آن شامل موارد زیر است:</p>
<ul>
<li dir="ltr">HPE Agentless Management</li>
<li dir="ltr">HPE Active Health System</li>
<li dir="ltr">HPE Intelligent Provisioning</li>
</ul>
<p><a href="http://server.vcenter.ir/wp-content/uploads/2020/09/5-610x458-1.png"><img loading="lazy" decoding="async" class="alignnone wp-image-1394 size-full" src="http://server.vcenter.ir/wp-content/uploads/2020/09/5-610x458-1.png" alt="سرور اچ پی HPE ProLiant ML30 Gen10" width="610" height="458" srcset="https://server.vcenter.ir/wp-content/uploads/2020/09/5-610x458-1.png 610w, https://server.vcenter.ir/wp-content/uploads/2020/09/5-610x458-1-300x225.png 300w" sizes="(max-width: 610px) 100vw, 610px" /></a></p>
<h3>کارت گرافیک سرور HPE Proliant ML30 Gen 10</h3>
<p>امکان استفاده از کارت گرافیک‌های سه بعدی و حرفه‌ای در سرور ML30 G10 وجود دارد در نتیجه حجم‌های کاری گرافیکی مانند مدل‌های CAD در اندازه متوسط (نرم افزار طراحی برای مهندسان و طراحان و … که مدل‌های دو بعدی و سه بعدی قابل طراحی است)، تولید محتوای دیجیتالی و تصویربرداری پزشکی، قابل کنترل و مدیریت هستند.</p>
<h3>منبع تغذیه HPE Proliant ML30 Gen 10</h3>
<p>این سرور نسل 10 اچ پی از منبع تغذیه هات پلاگ HPE 500W Flex Slot Platinum استفاده می‌کند که قابلیت اطمینان را افزایش می‌دهد. همچنین در پلت‌فرم‌های مختلف سرور، می‌توان این قطعات را به اشتراک گذارید.</p>
<h2>ویژگی‌های امنیتی سرور ML30 G10</h2>
<p>سرور HPE Proliant ML30 Gen 10 یکی دیگر از سرورهای اچ پی است که فریمور اصلی مستقیما بر روی سیلیکون قرار گرفته تا حفاظت و امنیتی که در سرورهای نسل 10 اچ پی تعبیه شده است، با وجود تکنولوژی Silicon Root of Trust فراهم شود.</p>
<p>قبل از بوت شدن سیستم عامل، میلیون‌ها کدخط فریمور اجرا می‌شود. با وجود Runtime Firmware Validation که در HPE iLO Advanced Premium Security Edition فراهم می‌شود، می‌توان هر 24 ساعت، اعتبار فریمور اصلی سرور را بررسی کرد.</p>
<p>اگر کد نامعتبری تشخیص داده شود، Secure Recovery امکان برگشتن فریمور <a href="https://shop.vcenter.ir">سرور</a>، به آخرین نسخه مناسب و سالم و یا حالت کارخانه  را فراهم می‌کند.</p>
<p>ویژگی‌های امنیتی دیگری هم غیر از iLO، در دسترس است مثلا ماژول امنیتی TPM که از دسترسی‌های غیرمجاز به سرور HPE Proliant ML30 Gen 10 جلوگیری می‌کند.</p>
<h2>مشخصات فنی سرور HPE Proliant ML30 Gen 10</h2>
<p dir="ltr">Processor: Intel</p>
<p dir="ltr">Processor family:</p>
<ul dir="ltr">
<li>Intel® Xeon® E Processor</li>
<li>Intel® Core™ i3 Processor</li>
<li>Intel® Pentium® Processor</li>
</ul>
<p dir="ltr">Processor core available: 2 to 6 core</p>
<p dir="ltr">Processor cache: 4 to 12 MB L3</p>
<p dir="ltr">Processor number: 1</p>
<p dir="ltr">Processor speed: 3.8 GHz, maximum depending on processor</p>
<p dir="ltr">Maximum memory: 64 GB with 16 GB DDR4</p>
<p dir="ltr">Memory slots: 4</p>
<p dir="ltr">Memory type: HPE DDR4 Standard Memory</p>
<p dir="ltr">Memory protection features: Unbufferred ECC</p>
<p dir="ltr">Drive supported</p>
<ul dir="ltr">
<li>4 NHP LFF SATA HDD with optional 2 LFF SATA HDD</li>
<li>4 LFF SAS/SATA HDD/SSD</li>
<li>8 SFF SAS/SATA HDD/SSD</li>
<li>1 M.2 NVMe SSD</li>
</ul>
<p dir="ltr">Infrastructure management</p>
<ul dir="ltr">
<li>HPE iLO Standard with intelligent provisioning (embedded)</li>
<li>HPE Systems Insight Manager (requires download)</li>
<li>HPE OneView Standard (requires download, available in early 2019)</li>
<li>HPE iLO Advanced (Optional)</li>
<li>HPE iLO Advanced Premium Security Edition (Optional)</li>
<li>HPE OneView Advanced (requires download, available in early 2019) (Optional)</li>
</ul>
<p dir="ltr">Expansion slots: 4</p>
<p dir="ltr">Network controller: HPE 1 Gb 332i Ethernet adapter, two ports per controller</p>
<p dir="ltr">Storage controller: 1 HPE Smart Array S100i</p>
<p dir="ltr">Form factor: 4U Tower</p>
<p dir="ltr">Product dimensions (H x W x D): 36.83 x 17.50 x 47.50 cm</p>
<p dir="ltr">Weight: 10.1 kg minimum; 17.6 kg maximum</p>
<p>برای مشاوره و خرید انواع سرورهای اچ پی، می‌توانید با شماره 88884268 تماس حاصل فرمایید.</p>
</div>
</section>
<p>نوشته <a href="https://server.vcenter.ir/hpe-proliant-ml30-gen10-server/">سرور اچ پی HPE ProLiant ML30 Gen10</a> اولین بار در <a href="https://server.vcenter.ir">سرور</a>. پدیدار شد.</p>
]]></content>
		
					<link rel="replies" type="text/html" href="https://server.vcenter.ir/hpe-proliant-ml30-gen10-server/#comments" thr:count="0" />
			<link rel="replies" type="application/atom+xml" href="https://server.vcenter.ir/hpe-proliant-ml30-gen10-server/feed/atom/" thr:count="0" />
			<thr:total>0</thr:total>
			</entry>
		<entry>
		<author>
			<name>admin</name>
					</author>

		<title type="html"><![CDATA[مفهوم RAM]]></title>
		<link rel="alternate" type="text/html" href="https://server.vcenter.ir/the-concept-of-ram/" />

		<id>https://server.vcenter.ir/?p=1094</id>
		<updated>2019-12-05T11:00:42Z</updated>
		<published>2019-12-05T09:47:25Z</published>
		<category scheme="https://server.vcenter.ir/" term="رم" /><category scheme="https://server.vcenter.ir/" term="سرور" /><category scheme="https://server.vcenter.ir/" term="RAM" /><category scheme="https://server.vcenter.ir/" term="حافظه رم" /><category scheme="https://server.vcenter.ir/" term="خرید رم" /><category scheme="https://server.vcenter.ir/" term="مفهوم RAM" /><category scheme="https://server.vcenter.ir/" term="مفهوم حافظه رم" /><category scheme="https://server.vcenter.ir/" term="مفهوم رم" />
		<summary type="html"><![CDATA[<p>مفهوم RAM RAM مخفف Random Access Memory به معنی حافظه دسترسی تصادفی است می باشد. رم یک جزء سخت افزاری رایج می باشد که در دستگاه های الکترونیکی از جمله&#8230; </p>
<p>نوشته <a href="https://server.vcenter.ir/the-concept-of-ram/">مفهوم RAM</a> اولین بار در <a href="https://server.vcenter.ir">سرور</a>. پدیدار شد.</p>
]]></summary>

					<content type="html" xml:base="https://server.vcenter.ir/the-concept-of-ram/"><![CDATA[<h1>مفهوم RAM</h1>
<figure id="attachment_1105" aria-describedby="caption-attachment-1105" style="width: 1280px" class="wp-caption alignnone"><a href="https://server.vcenter.ir/wp-content/uploads/2019/12/850937316.jpg"><img loading="lazy" decoding="async" class="wp-image-1105 size-full" src="https://server.vcenter.ir/wp-content/uploads/2019/12/850937316.jpg" alt="مفهوم RAM" width="1280" height="848" srcset="https://server.vcenter.ir/wp-content/uploads/2019/12/850937316.jpg 1280w, https://server.vcenter.ir/wp-content/uploads/2019/12/850937316-300x199.jpg 300w, https://server.vcenter.ir/wp-content/uploads/2019/12/850937316-1024x678.jpg 1024w, https://server.vcenter.ir/wp-content/uploads/2019/12/850937316-768x509.jpg 768w, https://server.vcenter.ir/wp-content/uploads/2019/12/850937316-1144x758.jpg 1144w" sizes="(max-width: 1280px) 100vw, 1280px" /></a><figcaption id="caption-attachment-1105" class="wp-caption-text">مفهوم RAM</figcaption></figure>
<div class="adDefRect">
<p>RAM مخفف Random Access Memory به معنی حافظه دسترسی تصادفی است می باشد. رم یک جزء سخت افزاری رایج می باشد که در دستگاه های الکترونیکی از جمله رایانه های رومیزی ، لپ تاپ ، تبلت و تلفن های هوشمند وجود دارد. در رایانه ها حافظه رم ممکن است به عنوان ماژول های حافظه ، مانند DIMM یا SO-DIMMs sodimm نصب شود. در تبلت ها و تلفن های هوشمند حافظه رم معمولا برر روی دستگاه ادغام شده است و نمی توان آن را از سیستم حذف کرد.</p>
<p>مقدار حافظه رم در یک دستگاه تعیین می کند که سیستم عامل و برنامه های کاربردی باز چه مقدار حافظه می توانند استفاده کنند. هنگامی که یک دستگاه دارای حافظه <a href="http://www.kadkala.com">رم</a> کافی باشد چندین برنامه کاربردی می توانند همزمان و بدون هیچ گونه کندی اجرا شوند. هنگامی که یک دستگاه صد در صد از حافظه رم موجود خود را استفاده کند ممکن است باعث کند شدن قابل توجه دستگاه شود. بنابراین ، اضافه کردن رم یا خرید دستگاه با رم بیشتر یکی از بهترین راهها برای بهبود عملکرد دستگاه می باشد.</p>
<p>رایانه ای با 16 گیگابایت رم دارای 16 گیگ حافظه می باشد. مقدار حافظه رم کاملا متفاوت از مقدار حافظه هارد می باشد و فضای دیسک HDD یا SSD صرفا برای ذخیره سازی فایل ها و داده ها مورد استفاده قرار می گیرد.<br />
حافظه رم حافظه فرار می باشد زیرا فقط هنگام روشن بودن دستگاه ، داده ها را ذخیره می کند و هنگامی که دستگاه خاموش است ، داده های ذخیره شده در حافظه رم پاک می شوند. با راه اندازی مجدد دستگاه ، سیستم عامل و برنامه ها داده های تازه را در حافظه رم سیستم بارگذاری می کنند. به همین دلیل است که راه اندازی مجدد رایانه اغلب مشکلات را برطرف می کند.</p>
</div>
<p>&nbsp;</p>
<p>نوشته <a href="https://server.vcenter.ir/the-concept-of-ram/">مفهوم RAM</a> اولین بار در <a href="https://server.vcenter.ir">سرور</a>. پدیدار شد.</p>
]]></content>
		
					<link rel="replies" type="text/html" href="https://server.vcenter.ir/the-concept-of-ram/#comments" thr:count="0" />
			<link rel="replies" type="application/atom+xml" href="https://server.vcenter.ir/the-concept-of-ram/feed/atom/" thr:count="0" />
			<thr:total>0</thr:total>
			</entry>
		<entry>
		<author>
			<name>admin</name>
					</author>

		<title type="html"><![CDATA[آشنایی با انواع سرور]]></title>
		<link rel="alternate" type="text/html" href="https://server.vcenter.ir/introduction-to-server-types/" />

		<id>https://server.vcenter.ir/?p=698</id>
		<updated>2019-09-19T11:37:26Z</updated>
		<published>2019-09-11T15:29:39Z</published>
		<category scheme="https://server.vcenter.ir/" term="سرور" /><category scheme="https://server.vcenter.ir/" term="آشنایی با انواع سرور" /><category scheme="https://server.vcenter.ir/" term="آموزش سرور" /><category scheme="https://server.vcenter.ir/" term="آموزش مفاهیم سرور" /><category scheme="https://server.vcenter.ir/" term="انواع سرور" /><category scheme="https://server.vcenter.ir/" term="رول Desktop workstation" /><category scheme="https://server.vcenter.ir/" term="رول سرور" /><category scheme="https://server.vcenter.ir/" term="رول‌های سروری" /><category scheme="https://server.vcenter.ir/" term="سرور نرم افزاری" /><category scheme="https://server.vcenter.ir/" term="فایل سرور" /><category scheme="https://server.vcenter.ir/" term="مفاهیم سرور" />
		<summary type="html"><![CDATA[<p>آشنایی با انواع سرور شبکه و یا زیرساخت شبکه، مجموعه‌ای از مولفه‌های سخت‌افزاری و نرم‌افزاری مورد نیاز برای اتصال دستگاه‌ها در یک سازمان و اتصال سازمان با دیگر سازمان‌ها و&#8230; </p>
<p>نوشته <a href="https://server.vcenter.ir/introduction-to-server-types/">آشنایی با انواع سرور</a> اولین بار در <a href="https://server.vcenter.ir">سرور</a>. پدیدار شد.</p>
]]></summary>

					<content type="html" xml:base="https://server.vcenter.ir/introduction-to-server-types/"><![CDATA[<h2 class="entry-title fusion-post-title" data-fontsize="24" data-lineheight="34">آشنایی با انواع سرور</h2>
<p><a href="https://server.vcenter.ir/wp-content/uploads/2019/09/78794533.jpg"><img loading="lazy" decoding="async" class="alignnone" src="https://server.vcenter.ir/wp-content/uploads/2019/09/78794533.jpg" alt="آشنایی با انواع سرور" width="753" height="447" /></a></p>
<div class="post-content">
<p>شبکه و یا زیرساخت شبکه، مجموعه‌ای از مولفه‌های سخت‌افزاری و نرم‌افزاری مورد نیاز برای اتصال دستگاه‌ها در یک سازمان و اتصال سازمان با دیگر سازمان‌ها و اینترنت است. سخت‌افزارهای فیزیکی و مولفه‌های منطقی زیرساخت شبکه باید بتوانند برخی ویژگی‌های لازم برای شبکه از جمله قابلیت اتصال، قابلیت‌های مسیریابی و سوئیچینگ، امنیت شبکه و کنترل دسترسی را تامین کنند. <a href="http://network.vcenter.ir">شبکه</a> و یا زیرساخت شبکه باید قبل از اینکه سرورهایی برای پشتیبانی از اپلیکیشن‌هایی که کاربران نیاز دارند، در محیط شبکه پیاده‌سازی شوند، ایجاد شود.</p>
<p>بنابراین هنگام طراحی شبکه و انتخاب کامپیوترها برای شبکه، عملکردی که هر کامپیوتر قرار است انجام دهد، باید مشخص باشد. دانستن این عملکردها موجب می‌شود طراح شبکه بتواند به خوبی، مولفه‌های سخت‌افزاری و نرم‌افزاری مورد نیاز کامپیوترها را تعیین کند.</p>
<p>خود ویندوز سرور 2003 هنگام نصب، امکانات و ابزارهایی را روی کامپیوتر فراهم می‌کند. امکانات و عملکردهای اضافی باید روی سرور پیاده‌سازی شوند تا سرویس‌ها و قابلیت‌های مورد نیاز سازمان و کاربران آن تامین شود. در واقع، تا زمانی که این امکانات و قابلیت‌های اضافی نتوانند سرویس‌های ویژه را تامین کنند، کامپیوتر نمی‌تواند نیازهای کاربران را تامین کند.</p>
<div id="gallery-2" class="gallery galleryid-33852 gallery-columns-1 gallery-size-full"></div>
<p><strong>کامپیوترهای مورد نیاز در شبکه می‌توانند با توجه به Role های زیر دسته‌بندی شوند:</strong></p>
<h4 data-fontsize="17" data-lineheight="29">رول‌های سروری</h4>
<p>سرورها را می‌توان برای اجرای رول‌های متعددی پیکربندی کرد. برنامه‌های کاربردی که <a href="http://proliant.ir">سرور</a> اجرا می‌کند، رول آن سرور را مشخص می‌کند. معمولا سرورها برای اجرای رول خاص‌شان، نیاز به نصب سرویس‌ها و امکانات اضافی دارند. در مقایسه با workstation ها، سرورها دارای فضای دیسک حافظه بیشتر، و پردازنده‌های سریع‌تری هستند. نقش و رول سرور، مشخص‌کننده‌ی سخت‌افزارهای موردنیاز سرور است. در ادامه برخی از نقش‌های رایج سروری را مشاهده می‌کنید.</p>
<ul>
<li dir="ltr" style="text-align: left;">Domain controller</li>
<li dir="ltr" style="text-align: left;">Database server</li>
<li dir="ltr" style="text-align: left;">Backup server</li>
<li dir="ltr" style="text-align: left;">File server</li>
<li dir="ltr" style="text-align: left;">Print server</li>
<li dir="ltr" style="text-align: left;">Infrastructure server</li>
<li dir="ltr" style="text-align: left;">Web server</li>
<li dir="ltr" style="text-align: left;">E-mail server</li>
</ul>
<h4 data-fontsize="17" data-lineheight="29">رول Desktop workstation</h4>
<p>desktop workstation ها متمایز از سرورها هستند، desktop workstation ها کامپیوترهای همه منظوره‌ای هستند که قادر به انجام برخی عملکردها هستند.</p>
<h4 data-fontsize="17" data-lineheight="29">رول Workstation قابل حمل</h4>
<p>workstation های قابل حمل در واقع راهکاری هستند که امکانات کامپیوترهای رومیزی را برای کارمند خارج از سازمان (آف سایت) فراهم می‌کنند.</p>
<p>ویندوز سرور 2003 مفهوم رول‌های سروری را معرفی کرد. نقش‌های سرور اصولا وظایف ادمینی مرتبط را گروه‌بندی کرده و قابلیت یا عملکرد خاصی را برای طراحی شبکه فراهم می‌کند. در ویندوز سرور 2003، اگر سرور برای نقش سروری خاص پیکربندی شده باشد، سرویس‌ها، امکانات و ابزارهای اضافه‌تری روی آن سرور نصب می‌شوند. به این ترتیب، سرور سرویس‌های مورد نیاز کاربران را فراهم می‌کند.</p>
<p>ویندوز سرور 2003، ابزار جدیدی با عنوان Manage Your Server Utility، برای تعریف و مدیریت نقش‌های سروری فراهم می‌کند. ویزارد مورد استفاده برای اجرای رول‌های سروری در کامپیوترها، Configure Your Server Wizard است که شامل Manage Your Server Utility بوده و از طریق همین Utility مدیریت می‌شود.</p>
<p><strong>با وجود ویندوز سرور 2003، می‌توان یازده نقش سروری مختلف را با Configure Your Server Wizard پیکربندی کرد:</strong></p>
<ul>
<li dir="ltr" style="text-align: left;">File server</li>
<li dir="ltr" style="text-align: left;">Print server</li>
<li dir="ltr" style="text-align: left;">Application server</li>
<li dir="ltr" style="text-align: left;">Mail server</li>
<li dir="ltr" style="text-align: left;">Terminal server</li>
<li dir="ltr" style="text-align: left;">Remote access server/VPN server</li>
<li dir="ltr" style="text-align: left;">Domain controllers</li>
<li dir="ltr" style="text-align: left;">DNS server</li>
<li dir="ltr" style="text-align: left;">WINS server</li>
<li dir="ltr" style="text-align: left;"><a href="https://en.vcenter.ir/network/dhcp-definition/">DHCP</a> server</li>
<li dir="ltr" style="text-align: left;">Streaming media server</li>
</ul>
</div>
<div class="fusion-meta-info"></div>
<p>نوشته <a href="https://server.vcenter.ir/introduction-to-server-types/">آشنایی با انواع سرور</a> اولین بار در <a href="https://server.vcenter.ir">سرور</a>. پدیدار شد.</p>
]]></content>
		
					<link rel="replies" type="text/html" href="https://server.vcenter.ir/introduction-to-server-types/#comments" thr:count="0" />
			<link rel="replies" type="application/atom+xml" href="https://server.vcenter.ir/introduction-to-server-types/feed/atom/" thr:count="0" />
			<thr:total>0</thr:total>
			</entry>
		<entry>
		<author>
			<name>admin</name>
					</author>

		<title type="html"><![CDATA[معرفی انواع سرور اچ پی]]></title>
		<link rel="alternate" type="text/html" href="https://server.vcenter.ir/introducing-hp-server-types/" />

		<id>https://server.vcenter.ir/?p=694</id>
		<updated>2019-09-19T23:51:17Z</updated>
		<published>2019-09-11T15:28:13Z</published>
		<category scheme="https://server.vcenter.ir/" term="سرور" /><category scheme="https://server.vcenter.ir/" term="انواع سرور اچ پی" /><category scheme="https://server.vcenter.ir/" term="خرید سرور" /><category scheme="https://server.vcenter.ir/" term="خرید سرور اچ پی" /><category scheme="https://server.vcenter.ir/" term="سرور hp" /><category scheme="https://server.vcenter.ir/" term="سرور اچ پی" /><category scheme="https://server.vcenter.ir/" term="سرور ایستاده" /><category scheme="https://server.vcenter.ir/" term="سرور رکمونت" /><category scheme="https://server.vcenter.ir/" term="سرورهای BL" /><category scheme="https://server.vcenter.ir/" term="سرورهای DL" /><category scheme="https://server.vcenter.ir/" term="سرورهای ML" /><category scheme="https://server.vcenter.ir/" term="فروش سرور اچ پی" /><category scheme="https://server.vcenter.ir/" term="مزیت های سرورهای BL اچ پی" /><category scheme="https://server.vcenter.ir/" term="معرفی انواع سرور" /><category scheme="https://server.vcenter.ir/" term="معرفی انواع سرور اچ پی" />
		<summary type="html"><![CDATA[<p>معرفی انواع سرور اچ پی در خرید سرور اچ پی یکی از دانستی های مهم، آشنایی با انواع سرورهای شرکت اچ پی است تا بتوانید خریدی هوشمندانه و متناسب با&#8230; </p>
<p>نوشته <a href="https://server.vcenter.ir/introducing-hp-server-types/">معرفی انواع سرور اچ پی</a> اولین بار در <a href="https://server.vcenter.ir">سرور</a>. پدیدار شد.</p>
]]></summary>

					<content type="html" xml:base="https://server.vcenter.ir/introducing-hp-server-types/"><![CDATA[<h2>معرفی انواع سرور اچ پی</h2>
<p>در خرید سرور اچ پی یکی از دانستی های مهم، آشنایی با انواع سرورهای شرکت اچ پی است تا بتوانید خریدی هوشمندانه و متناسب با نیازتان داشته باشید. کمپانی اچ پی (HP) یک شرکت آمریکایی است که محصولات اصلی آن شامل چاپگر، موبایل، تبلت، لپ تاپ و <a href="https://server.vcenter.ir/introducing-hp-server-types/"><strong>انواع سرور</strong></a> می شود. در این مقاله قصد داریم به چند نکته مهم در مقایسه سرورهای اچ پی بپردازیم.</p>
<p>اچ پی با تولید و عرضه انواع نسل های سرور به عنوان یکی از از بزرگترین پرچمداران دنیای تولید سرور و تجهیزات ذخیره سازی شناخته شده است و به جرات می توان گفت که انواع سرور اچ پی در ایران فروش بالایی داشته و از سایر برندها محبوبیت بیشتری دارد. به طور کلی سرورهای HP ایده آل برای مدیریت و ذخیره سازی اطلاعات هستند که قابلیت های مختلفی را برای محیط های کاری و سازمانی شما مهیا می سازند.</p>
<p>انواع سرور اچ پی<br />
<a href="http://shop.vcenter.ir">خرید سرور اچ پی</a> را باید براساس نوع تاور و نوع رک مونت بودن سرور انتخابی انجام دهید که یکی از مهمترین نکات در خرید سرور HP تلقی می شود. سرورهای شرکت اچ پی در رده Proliant در سه گروه کلی Rackmount وTower وBlade قرار می گیرند. در این مقاله از سایت کیهان سرور به معرفی این گروه ها پرداخته ایم.</p>
<h4>۱- سرورهای RACKMOUNT) DL)</h4>
<p><a href="https://server.vcenter.ir/wp-content/uploads/2019/09/14645789.jpg"><img loading="lazy" decoding="async" class="alignnone" src="https://server.vcenter.ir/wp-content/uploads/2019/09/14645789.jpg" alt="معرفی انواع سرور اچ پی" width="600" height="253" /></a></p>
<div class="post-content">
<p>این گروه از سرورهای اچ پی به صورت خوابیده در سایز متوسط طراحی شده اند که از انعطاف، مدیریت پذیری و ارتقا پذیری بالایی برخوردار می باشند و مخصوص رک بسیار پرقدرت هستند. خرید سرور اچ پی گروه DL برای استفاده در محیط هایی که تعداد زیادی سرور وجود دارد و برای پردازش‌های گوناگون و کسب و کارهای متوسط تا بزرگ مناسب است.<br />
سرورهای DL شرکت اچ پی در انواع سری های DL700 ، DL500 ، DL300 ، DL100 و DL900 تولید می شوند که در این بین، <a href="http://proliant.ir">سرور اچ پی</a> سری DL380 در ایران بسیار پر فروش و محبوب است که از جدیدترین مدل های این سری می توان به مدل HP DL380 Gen9 E5-2620v3 اشاره داشت.</p>
<h4>۲- سرورهای TOWER) ML)</h4>
<p><a href="https://server.vcenter.ir/wp-content/uploads/2019/09/28790461.jpg"><img loading="lazy" decoding="async" class="alignnone" src="https://server.vcenter.ir/wp-content/uploads/2019/09/28790461.jpg" alt="معرفی انواع سرور اچ پی" width="600" height="300" /></a><br />
برای خریدی مناسب از لحاظ کارایی چیزی کمتر از سرورهای DL اچ پی ندارند و سرورهای ایستاده و قدرتمندی هستند. از مزایای مهم سرورهای ML، عدم وابستگی آنها به رک و ارتقا پذیری آنها است، از این رو <a href="http://proliant.ir">خرید سرور اچ پی</a> گروه ML برای کسب و کارهای کوچک، متوسط و حتی بزرگ و هم چنین شرکت های معمولی انتخابی مناسب است. این سرورها می توانند زیر ساخت کاملی را برای شرکت ها فراهم کنند.</p>
<h4>۳- سرورهای BLADE) BL)</h4>
<p><a href="https://server.vcenter.ir/wp-content/uploads/2019/09/35809472.jpg"><img loading="lazy" decoding="async" class="alignnone" src="https://server.vcenter.ir/wp-content/uploads/2019/09/35809472.jpg" alt="معرفی انواع سرور اچ پی" width="600" height="300" /></a></p>
<p>سرورهای BLADE اچ پی به صورت تیغه ای هستند، نوع طراحی این سرورها کاملا ماژولار و فشرده است. از مزیت های سرورهای BL اچ پی می توان به کارایی بالا و دسترسی پذیری فوق العاده ، ۸۵ درصد کابل کشی کمتر نسبت به سایر سرورها، قدرت پردازنده ی قوی، مصرف انرژی و اشغال فضای بسیار کم، معماری ماژولار و ساختار متفاوت اشاره داشت.<br />
از طرفی سرورهای BLADE HP را می توان به راحتی مدیریت کرد تمامی این ویژگی ها سبب شده است تا میزان هزینه ها در دیتا سنترها کاهش پیدا کند و کیفیت سرویس دهی بالا برود.<br />
شکل قرار گیری سرورهای BL اچ پی در رک به صورت مجموعه ای است. تعداد این مجموعه ۸ یا ۱۶ عدد بوده که برای نصب در رک در داخل محفظه های مخصوصی به نام C3000 و C7000 قرار می گیرند. خرید سرور اچ پی گروه BLADE همراه با استوریج مناسب، <strong><a href="https://en.wikipedia.org/wiki/Total_cost_of_ownership">TCO</a></strong> (هزینه کل مالکیت) کمتری دارد.<br />
این سرورها مناسب برای استفاده در کسب و کارهای کوچک و بزرگ انترپرایزها هستند که قابلیت های زیادی در اختیار شما قرار می دهند به طوری که زیر ساخت های سنتی قادر به ارائه این مزایا نمی باشند.</p>
</div>
<p>نوشته <a href="https://server.vcenter.ir/introducing-hp-server-types/">معرفی انواع سرور اچ پی</a> اولین بار در <a href="https://server.vcenter.ir">سرور</a>. پدیدار شد.</p>
]]></content>
		
					<link rel="replies" type="text/html" href="https://server.vcenter.ir/introducing-hp-server-types/#comments" thr:count="0" />
			<link rel="replies" type="application/atom+xml" href="https://server.vcenter.ir/introducing-hp-server-types/feed/atom/" thr:count="0" />
			<thr:total>0</thr:total>
			</entry>
	</feed>